In the CM4D Scheduler Manager User Interface, there are several grids which use column headers and grouping controls. Scheduler Manager has the capability to sort the information grids by several column headers on multiple levels. This functionality allows for quick and logical ordering of Scheduler Jobs or Processes in Scheduler Manager, which can then be easily located and selected for viewing or editing.
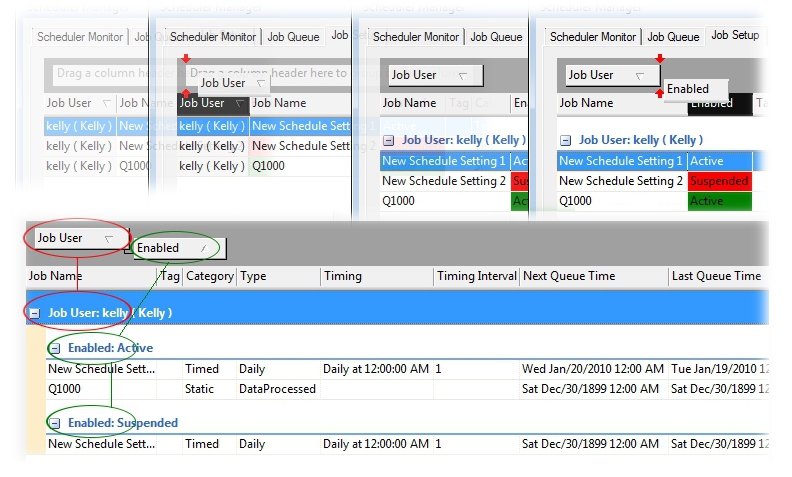
Grouping refers to the organization of column headers in the grid regions of the Scheduler Manager interface. When grouped, the grid fields will be sorted structurally, allowing you to find the information that you need quickly and efficiently.
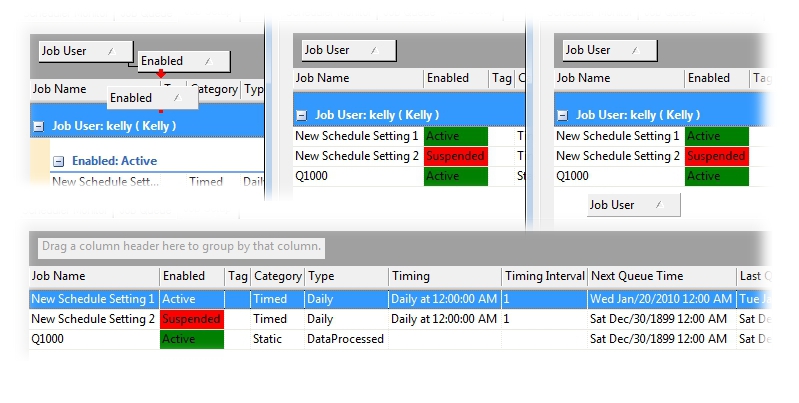
When using grouping, you can drag and drop column headers into the grey region above the column headers. Each header that is placed in the grouping region of the grids will be designated as a level of grouping, with each subordinate column group added successively in order to form dynamic, multi-level sort groups by which data can be organized. As each column header is placed in the grouping region, you will be able to see the grid being formatted according to your grouping selections.
To remove a column header from the Grouping area, click and drag the header from the grouping area back onto the Column header area. When the column header is dropped between two red arrows, it will return to a position within the standard column headers in the grid. If the column header is dragged to a position other than the column header area, a black X will appear and it will disappear from the grid.
If a column header is removed and it disappears, simply right-click on the column headers and select Field Chooser. Any available column headers that do not already appear in the grid will be shown in the Fields dialog. Click, drag, and drop a column header from the Fields dialog onto either the Column Header area or the Grouping area to restore it in the interface.
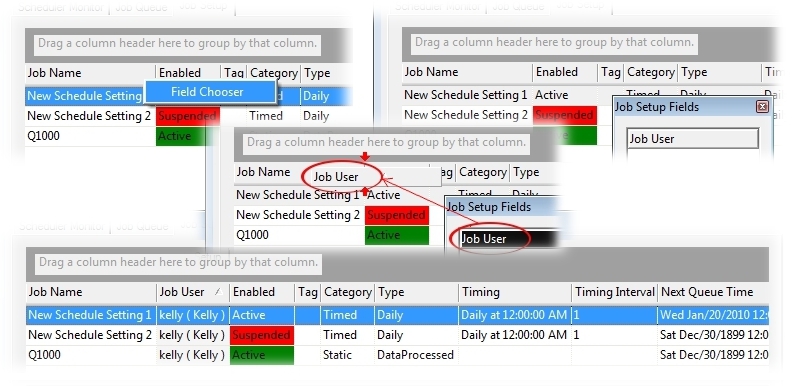
If you are using any column headers in the grouping area, these headers will appear in the Fields dialog and may be used in duplicate as both Group and Column headers. Once the headers are removed from the grouping area, the column headers will return to a single instance.