1. Locate the Characteristics node under the Header node.
2. Create a New Characteristic.
a. Open the Characteristic Properties for "Characteristic A".
i. Change the label to “Routine”.
ii. Change the color if desired.
iii. Click Associate.
(1) In the Associations dialog:
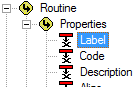
(a) Select the association Routine>Properties>Label.
(2) Click Ok.
iv. Click Ok.
b. Locate the Instructions node under "Routine".
i. Define the instructions as:
3. Duplicate the characteristic "Routine".
a. Open the Characteristic Properties for "Routine (1)".
i. Change the label to “Sample”.
ii. Change the color if desired.
iii. Click Associate.
(1) In the Associations dialog:
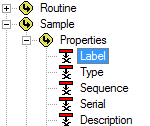
(a) Select the association Sample>Properties>Label.
(2) Click Ok.
iv. Click Ok.
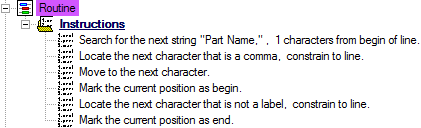
b. Locate the Instructions node under "Sample".
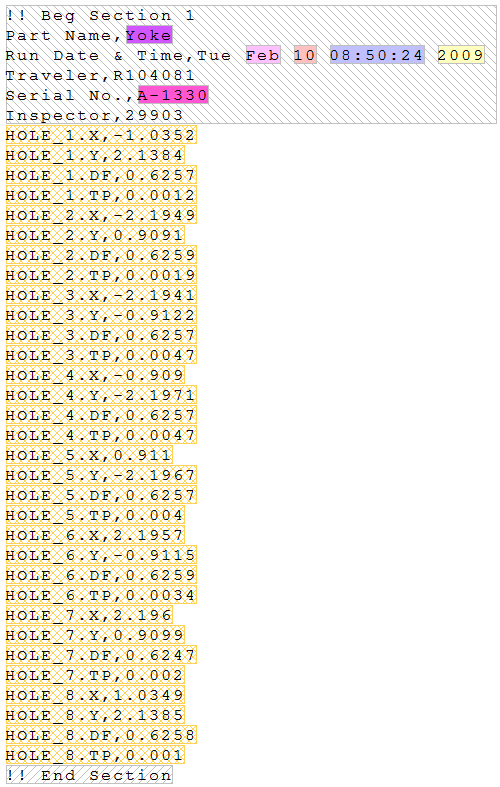
i. Change the first instruction string from "Part Name" to "Serial No.,"

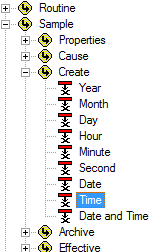
4. Create a New Characteristic.
a. Open the Characteristic Properties for "Characteristic A".
i. Change the label to “Year”.
ii. Change the color if desired.
iii. Click Associate.
(1) In the Associations dialog:
(a) Select the association Sample>Create>Year.
(2) Click Ok.
iv. Uncheck the check box "Visible to Output".
v. Set the Type Validation to "Integer (whole number)".
vi. Click Ok.
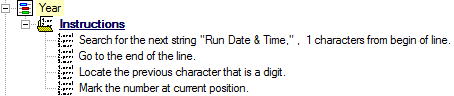
b. Locate the Instructions node under "Year".
i. Define the instructions as:
5. Duplicate the characteristic "Year".
a. Open the Characteristic Properties for "Year (1)".
i. Change the label to “Month”.
ii. Change the color if desired.
iii. Click Associate.
(1) In the Associations dialog:
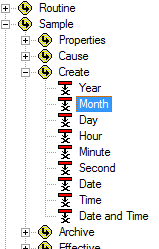
(a) Change the association to Sample>Create>Month.
(2) Click Ok.
iv. Set the Type Validation to "Text".
v. Click Ok.
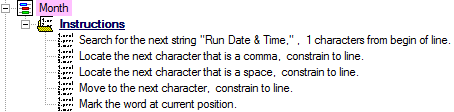
b. Locate the Instructions node under "Month".
i. Change the first instruction from "any character position"" to "1 characters from begin of line".
ii. Change the second instruction to "Locate the next character that is a comma, constrain to line".
iii. Change the third instruction to "next character", "space", and "constrain to line".
iv. Right-click the fourth instruction and select Insert New Instruction.
(1) Set the new instruction to "Move to the next character, constrain to line".
v. Change the last instruction from "number" to "word".
6. Duplicate the characteristic "Month".
a. Open the Characteristic Properties for "Month (1)".
i. Change the label to “Day”.
ii. Change the color if desired.
iii. Click Associate.
(1) In the Associations dialog:
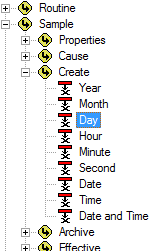
(a) Change the association to Sample>Create>Day.
(2) Click Ok.
iv. Set the Type Validation to "Integer (whole number)".
v. Click Ok.
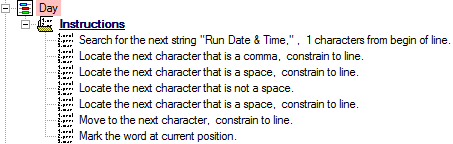
b. Locate the Instructions node under "Day".
i. Right click the third instruction and select Copy Instruction.
ii. Right-click the third instruction and select Paste Instruction twice.
iii. Change the new fourth instruction to "not a space" and "do not constrain".
7. Duplicate the characteristic "Day".
a. Open the Characteristic Properties for "Day (1)".
i. Change the label to “Time”.
ii. Change the color if desired.
iii. Click Associate.
(1) In the Associations dialog:
(a) Change the association to Sample>Create>Time.
(2) Click Ok.
iv. Set the Type Validation to "Time (time only)".
v. Click Ok.
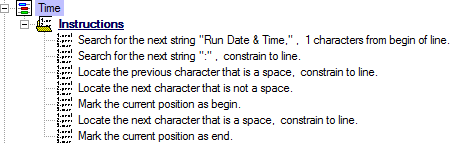
b. Locate the Instructions node under "Time".
i. Change the second instruction to "Search for the next string ":", constrain to line.
ii. Change the third instruction to "previous character".
iii. Select the second to last instruction, and drag it up one level to make it the fifth instruction.
iv. Change the new fifth instruction to "Mark the current position as begin".
v. Change the last instruction to "current position as end".
8. Create a New Characteristic.
a. Open the Characteristic Properties for "Characteristic A".
i. Change the label to “Date Time”.
ii. Change the color if desired.
iii. Click Associate.
(1) In the Associations dialog:
(a) Select the association Sample>Create>Year.
(2) Click Ok.
iv. Click Mangle.
(1) Select the "Format" radio button and enter the following string in the field: "~Month~/~Day~/~Year~ ~Time~"
(2) Click OK.
v. Set the Type Validation to "DateTime (date and time)".
vi. Click Ok.
b. Delete all Undefined instructions for the "Date Time" characteristic, if desired.
9. To view a screenshot of the expected results, click the link below: