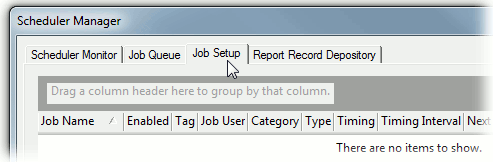
1. Open CM4D Scheduler Manager.
2. Go to the Job Setup Tab.
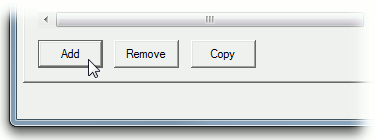
3. Click the Add button in the bottom left corner of the interface.
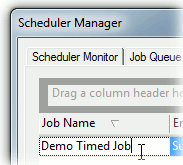
4. Select the new row and enter Demo Timed Job as the Job Name.
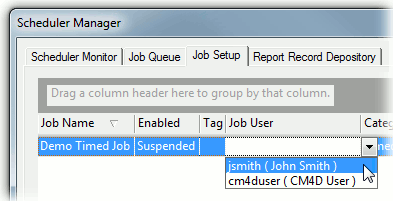
5. Select a Job User.
6. In the Category field, select Timed.

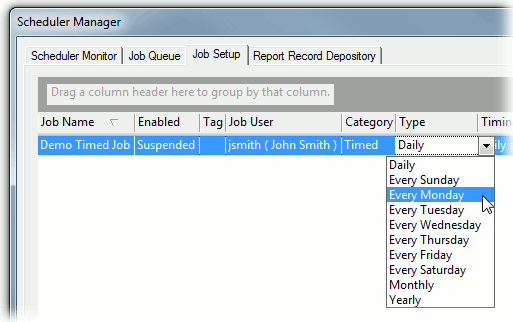
7. In the Type field, select Every Monday.
8. Double click the Timing field and set the time in the pop up dialog to 8:00:00AM.
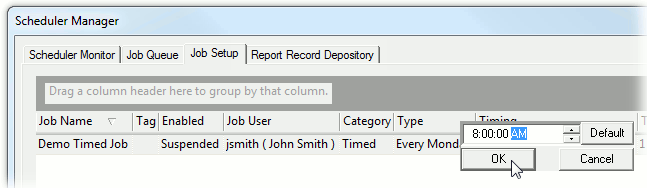
9. Since the Timing field only applies to Daily, Monthly, or Yearly Types, leave the default setting of "1" as it is.
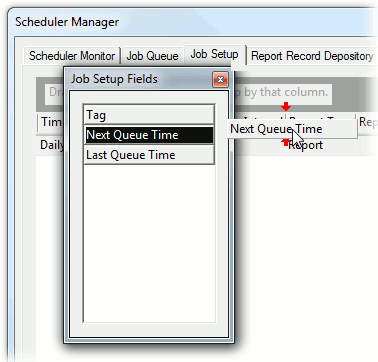
10. Scroll to the right as needed to see more columns.
 Tip
Tip
If
you are missing any columns, right click the column headers to open the
Field Chooser dialog. To learn more about how the
column headers and grouping options work, see the topic Grid
Controls.

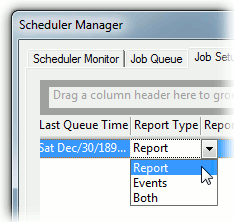
11. In the Report Type field, the default setting Report will be used.
12. If you want to use a Sample Filter, select the Filter and enter the Filter Value exactly as it appears in the database. For this example, however, no filters will be used.
13. Double click the Managed Report field to open the selection dialog. Select the check box next to the Managed Report(s) you want to use to run your report and click OK.
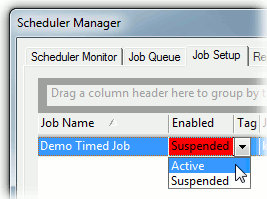
14. If you have all your settings correct and you want your job to run, return to the Job Setup tab and change the Enabled field to Active.
15. Now that you have set all of the required fields, click the Save button in the bottom right corner of the dialog.
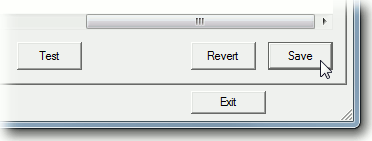
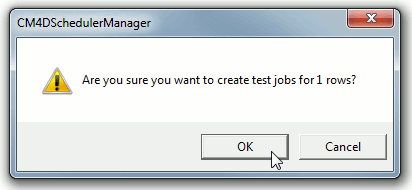
16. Once you have started the Services, you can Test your job by selecting the row from the list and clicking the Test button in the bottom center of the interface. Once you click Ok in the dialog that pops up, the job will be sent to the Job Queue and completed as it would if it were processed normally. If you want to test the PDF function, you must have eDoc Printer installed.

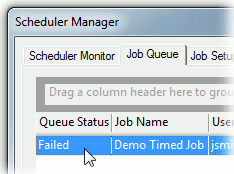
17. Select the Job Queue tab to see the status of your job.
a. If there are any missing or invalid settings, the test job will fail.
18. Now that you have learned how to create a Timed Job, continue with creating all other jobs you plan to use to create your Scheduler Reports.
See also, How to Create Static or Dynamic Jobs.