The Modify Config dialog contains the properties available for the Config.
 The Modify Config dialog contains the properties available for the Config.
Each time data is processed by a translator, all enabled Configs are checked to see if the data fits the set requirements. If a Config is disabled, it will remain in the tree, but will not be used when data is processed. Disabled Configs appear as just the Config label highlighted red with white text, and has all of its contents hidden.
Enter a new label for the Config. This should be unique within the translator if you have more than one Config in your DataSmith document.
An optional description of the Config may be entered in the Description field.
The Extensions field may be used to exclude any unwanted file types automatically when loading data files into a Config. To indicate specific file extensions you want to allow, enter just the extension into the field (no periods), separated by a comma or semicolon.
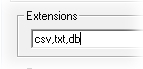
The file extensions 4datasmith, 4jr, 4jx, and [~4j_tmp~]_ are always ignored when adding files to a Config. For the settings shown in the image above, the file types that would be included would be *.csv, *.txt, and *.db files.
Preprocessing is any processing DataSmith does on a data file without putting the data in the database. Preprocessing can be done on your data files by selecting options within the Modify Config dialog.
When DataSmith does any type of preprocessing, a temporary file will be created. The string [~4j_tmp~]_ will be added as a prefix of the file name, and the extension will be changed to *.[~4j_tmp~]_(original file type extension).
|
Original file: |
|
DataSmith Temp file: |
|
q1000 Sample Two.txt |
|
[~4j_tmp~]_q1000 Sample Two.[~4j_tmp~]_txt |
DataSmith usually cleans up the temporary files, but occasionally they may be left. If this happens, and you are sure they are not being used, you can delete them safely as they are no longer needed. If the temporary files are active, you will not be able to delete them.
The External option for Preprocessing allows you to write a user-defined script to pre-process data files that otherwise cannot be read by DataSmith.
An example of such a file would be a script that converts PDF files into a file type that can be read by DataSmith.
The script must be able to accept two command line parameters. The first parameter will be the name of input file (with complete path). The second parameter will be the name of the output file (with complete path). The script will be required to open the input file, read the contents, perform the desired processing, and write to the output file. The script will need to create the output file.
 Tip
Tip
If you do not enter the full path to the external file, but only the file name, DataSmith will look for the file in the same folder that DataSmith was started from.
When IGES is selected, DataSmith will prepare the IGES data file so that it can be processed.
When CSV is selected, DataSmith will prepare the CSV data file so that it can be processed.
An internal Preprocessing method used by DataSmith to read Rich Text Format (*.rtf) files.
An internal Preprocessing method used by DataSmith to read Microsoft Excel documents (*.xls or .xlsx).
· Microsoft Excel must be installed on the system that is running DataSmith in order for the Excel preprocessor to work.
· The Excel preprocessing is upwards compatible from Excel 2000.
· The version of Excel that is installed on the workstation running DataSmith must support .xlsx files in order for DataSmith to read them.
· Make sure that the file is not already open in Excel when DataSmith is trying to read the file.
Excel documents may still be preprocessed using an External Preprocessor, but would require a separate script in order to be able to load .xls or .xlsx data files.
If there is more than one worksheet within an Excel workbook, all of the worksheets will be processed (starting with the first worksheet, not the sheet that is open when saved) as a single file in DataSmith.
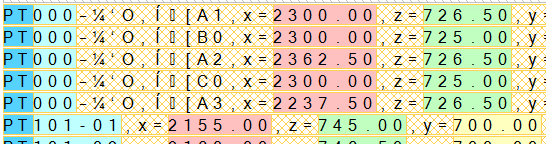
Insert Header is an internal Preprocessing method in which DataSmith will insert information about the file into the beginning of the file. After the Insert Header box is checked, the DataSmith document needs to be saved, then closed and reopened to view the header information. Below is an example of the information that is inserted at the beginning of a data file when the Insert Header check box is selected.
The drive, directory, title, file extension, filename and path are provided. Then, the creation date of the file is provided in abbreviated and complete formats. Two different time stamp formats are provided. The week number labeled 'Week1' starts on a Sunday, and 'Week2' starts on a Monday. The current date is provided in abbreviated and complete formats. To remove the header information from the beginning of the data file, clear the check box next to Insert Header, then save, close, and reopen the data file.
An internal Preprocessing method used by DataSmith to read Microsoft Excel documents (*.xls or *.xlsx). Unlike the standard Excel preprocessing option, the Excel Free option does not require Excel to be installed. Additionally, it provides settings for selecting a specific portion of the sheet and selecting how that information is read by DataSmith.
· Excel Free - Enable this check box to use the free Excel preprocessing option. All other Preprocessing options will be disabled if this option is checked. If any other preprocess options are currently enabled, you must first uncheck those boxes before you will be able to turn on the Excel Free option.
· Sheet Number - Enter the number of the Sheet that will be processed. Only one Sheet of a workbook can be processed by a single Config. If you have multiple sheets in a Workbook, you will need to use additional Configs.
· Range in Sheet - Enter the column/row label of the first cell and last cell of the data range that you want DataSmith to parse. This range of cells will be the only data that will be parsed; all other data in the sheet will be ignored. If no range is specified, the entire sheet will be loaded.
· Columnize - This determines in which format the data will be loaded from the spreadsheet. You should leave this off if you are using translators that were designed for the standard Excel option.
§ Columnize On show/hide - When this is turned on, all data is loaded by column. Any data in columns preceding the Start Column is repeated in every column section, followed by the data from all the rows in a single column, beginning with the Start Column.
§ Columnize Off show/hide - When this is turned off, the data is loaded as a tab delimited file in the same format as it appears in Excel.
· Start Column - Specify the first column of data that will follow the repeatable column information. If a Range is specified, this count is done from the starting column. Any columns preceding the Start Column will be repeated in each section.
· Insert Header show/hide - This option adds information taken from the data file properties to each Column section, including Title, Path, Date, and Time. This is similar to the standard Insert Header Preprocess option, but with a subset of added information.
Example Excel File - The image below shows an example data file in Excel, and indicates where each of the Advanced Excel Library settings corresponds in the Excel Sheet.
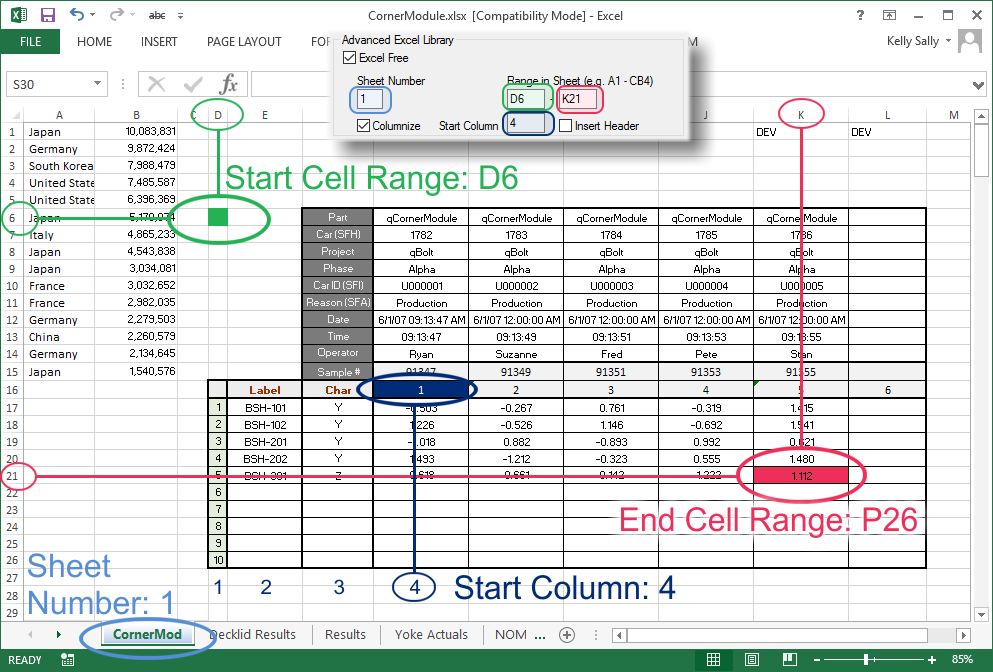
Loaded in Translator - The image below shows the data file shown in the image above, loaded into a DataSmith translator that has been set up to Columnize the data.
![]()
The Locale Setting enables DataSmith to recognize the content of the data file according to the locale in which the file was created. This setting is similar to the Windows Region setting "Language for non-Unicode programs", which allows computers to specify the Character Set that is used when Unicode is not directly supported by a file or an application.
Tip
The locales available in DataSmith use the default options for a region. It does not use the Windows system settings or any customized region options.
The Locale setting in the DataSmith Config properties acts as a region setting on the Config so that the instructions to accurately identify the types of decimal separators, characters, etc. that may be specific to the country or region where a data file was originally created. This also acts as a region setting for non-Unicode data files that contain Unicode characters.
In cases where you have data files that are in ANSI format but contain Unicode characters embedded into the file that DataSmith cannot read natively, you can try using the Region setting to see if DataSmith can load the data file using its native character mapping.
|
Locale Setting: en-US / English / English (United States) |
|
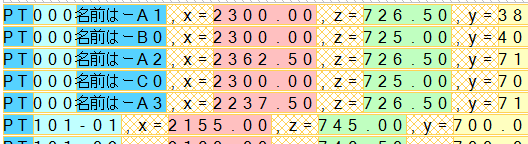
Locale Setting: ja-JP / Japanese / 日本語 (日本) |
|
|
|
|
Although we highly recommend that all data files be saved in UTF8 or UTF16 formats to ensure that the correct character sets are encoded directly into the data file, in rare cases you may receive data files that are in ANSI format and contain Unicode characters. To allow DataSmith to read this type of file using its native Character Set, each Config in your DataSmith translators may be set to the specific Region in which the data file was originally created. This setting must be used even if the computer on which the translator is run is set to the same Region as the data file, since the Config Region setting not automatically set to the same Region as the system OS.
 Notice
If an ANSI data file is been saved on a computer where the original Character set it not supported (Unicode characters appear as question marks), DataSmith cannot recover any lost characters. This setting can only be used to read ANSI files that are created on a computer that allows a specific Character set to be embedded into the non-Unicode file.
1. Right-click on the Config label and select Modify Config.
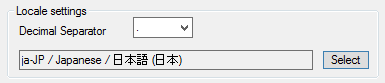
2. In the Locale Settings section, click Select.

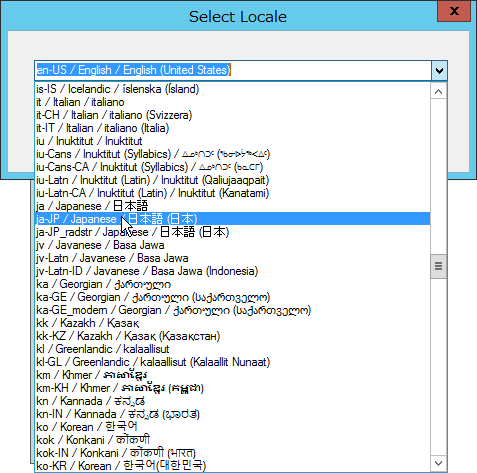
3. Select the Locale in which the data file was originally saved.
This list is generated according to your Windows configuration. If a Region is not available, it is because it is not available on your computer or is not compatible with DataSmith. The selection here does not change any region settings on your Operating System, it only allows DataSmith to provide a better translation of your data files.
4. Once the correct Region is displayed in the field, click OK to save the changes to the Config.
5. If the data file is already loaded into the translator, remove it and then re-add the file to see the Locale Setting applied.
6. DataSmith should now load the correct characters from the data file.
If the characters are still not loading correctly, you may need to try another Region setting. Please keep in mind that it is best practice to have Unicode files to ensure the correct characters are used.
This setting only allows DataSmith to use the Character set you specify on the Config properties to read the data file. DataSmith cannot determine if this is the same setting as the one originally used to create the data file, so you must make sure that the Region set in the Config is the right one to be used to read the data.
High Volume Data Processing can be used to put data in your database quicker. High Volume Data Processing is a considerably faster way to manage data in the database. It is faster because it restricts the way the data goes into the database, making it more compact.
The Archive Restore option may be enabled when data that has been archived using Data Archiver is read back into the Database. The Archive Restore option in the Config Properties will mark all of the data that is being put back into the Database with the "Restore" flag.
If a feature does not have a feature label defined, DataSmith can use the Locate Feature By option to match features by either the XYZ Nominal or Actual values.
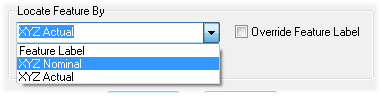
The numerical field used with the Locate Feature option defines how close a value must be to be considered a match. The numeric value is a proximity distance in the units of the data being processed. Zero is a valid entry. Locate Feature by XYZ may be used to locate Reference Features.
In order for the Locate Feature By options to work, the feature must:
· exist in the database (features cannot be added to a database using this method)
· not have a feature label defined
· have nominal or actual XYZ values assigned to the feature