In order for CM4D to generate events, you must first setup a Managed Document with the appropriate settings to do so. For more information on how to create Managed Documents, see the CM4D Help Documentation.
- Run CM4D.
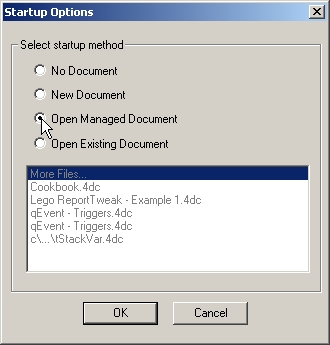
- Open the managed document you want to set up your Events for.
- For this example, a table annotation connected to the DataSet "MiniXBar S" will be used.
- In the open managed document, double-click the DataSet from the tree that you want to set up Events to trigger on.
- Open the Event tab.
- Event Properties - a direct correlation to what EventSmith is going to do.
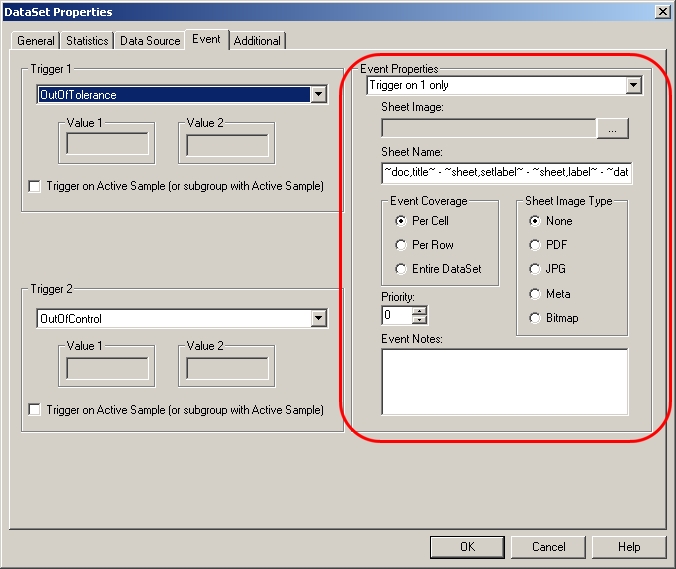
- The drop down menu at the top of the Event Properties section contains five options:

- Never Trigger - Events will never be generated, regardless of whether or not data has been triggered within the DataSet
- Trigger on 1 only - Events will only be generated if data within the selected DataSet is triggered on the set Trigger 1. For this example, this would occur if any of the data in the DataSet is "Out of Tolerance"
- Trigger on 2 only - Events will only be generated if data within the selected DataSet is triggered on the set Trigger 2. For this example, this would occur if any of the data in the DataSet is "Out of Control"
- Trigger on both - Events will only be generated if data within the selected DataSet is triggered on the set Trigger 1 AND Trigger 2. For this example, this would occur if any of the data in the DataSet is "Out of Tolerance" AND "Out of Control"
- Trigger on either - Events will only be generated if data within the selected DataSet is triggered on the set Trigger 1 OR Trigger 2; one or the other would be sufficient. For this example, this would occur if any of the data is "Out of Tolerance" OR "Out of Control".
- The drop down menu at the top of the Event Properties section contains five options:
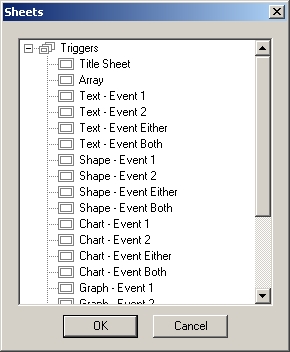
- Sheet Image - Click the browse button to open the Sheets dialog. If you select a sheet from the list, an image of the selected sheet will be included in the notification email sent by EventSmith
- The Array sheet may be used, although if the Array sheet is used as the Sheet Image, PDF's must be selected from the Sheet Image Type to get all of the sheets in the SheetSet
- Summary tables showing an overview of triggered cells is one example of commonly used Sheets for Sheet Image
- Sheet Name - The Sheet Name section contains 5 default variables to resolve a composite name for the Sheet Image

- Event Coverage - CM4D looks through the DataSet cell by cell to determine when a notification will be sent to a subscribed user's email

- Per Cell - 1 email is sent for each cell that is triggered within the DataSet
- Per Row - 1 email is sent for each row that contains a triggered cell, regardless of how many cells are triggered in that row
- Entire DataSet - 1 email is sent for each DataSet that contains a triggered cell, regardless of how many cells are triggered in that DataSet
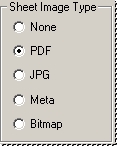
- Sheet Image Type - Determines what file type will be used when sending an image of the sheet included with the email notification. Only PDF's should be used when the Array Sheet is used as the Sheet Image.
- Priority - A user-defined number which can be used to alert users of a particular event priority defined by the EventSmith Administrators. This number will in no way affect how events are processed.

- Event Notes - Any text may be entered in the Event Notes field, including a few select CM4D variables that will resolve in the Event notification email. Keep in mind that if variables are used, the type of Event Coverage selected will effect how the variables resolve.
- Click OK to apply your settings and return to your managed document.
- Event Properties - a direct correlation to what EventSmith is going to do.
- To check to make sure your event property settings are valid, open the Document menu and select Test Run Events.
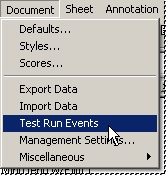
The Test Run Events function is particularly useful when you are building templates or debugging a document, so that you can see what events would be generated with the current settings. - Look at the Trace window at the bottom of the interface. You will see a line of text representing each e-mail that CM4D is going to generate for the set events once a user has subscribed to the events. At this time however, no e-mail notifications are sent.
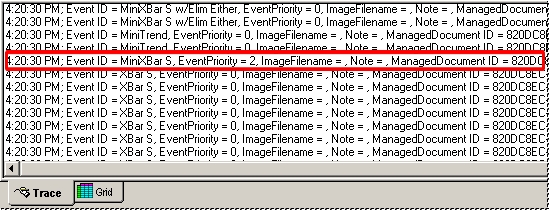
- The highlighted line in the above image indicates the event set up for the "MiniXBar S" DataSet used in this example.
- Save the Managed Document and exit CM4D.
Continue on to the next topic, Setup a Database in DataUtility.