Managed Document Selector
The Managed Document Selector is the interface used to find and open a Managed Document. This interface allows for advanced navigation of the list of Managed Documents in the Database using search filters and sorting based on Routine Properties.
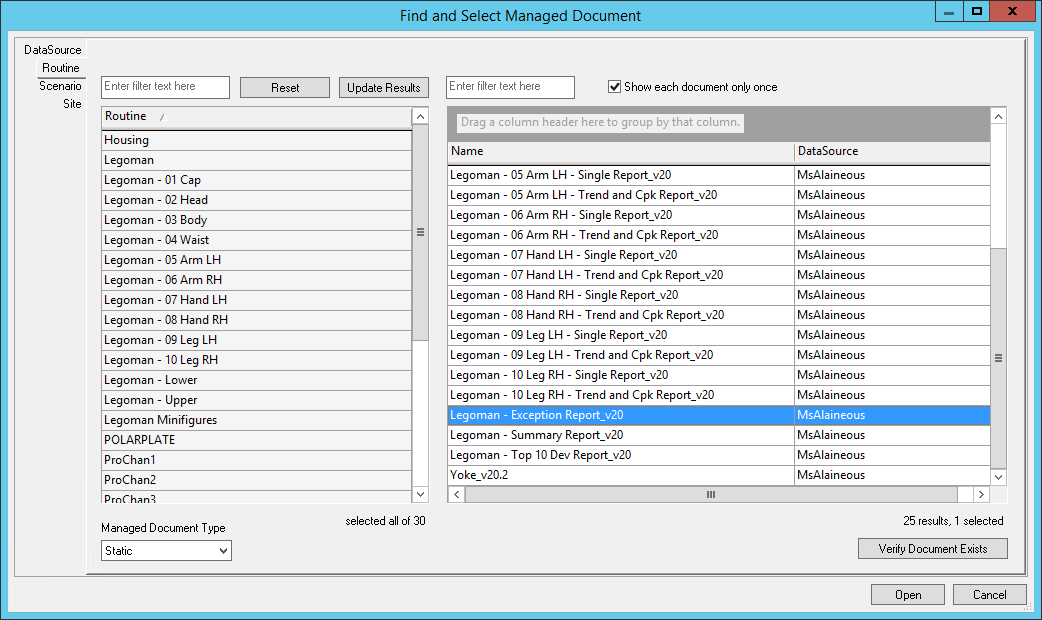
Find and Select Managed Document
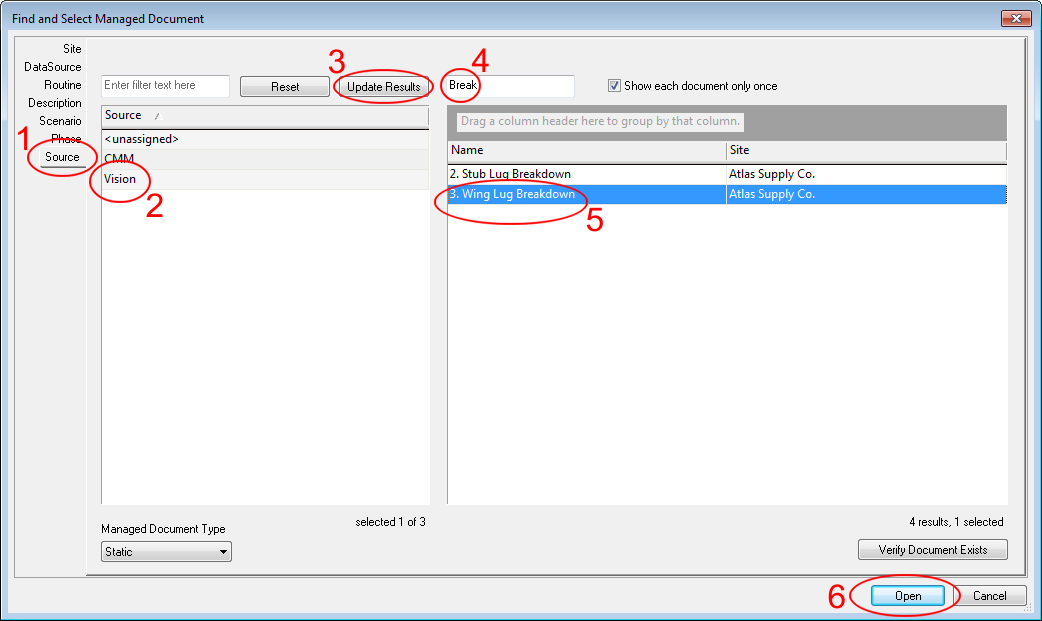
Use the tabs to drill down from the highest level (e.g., Site) down to the lowest levels (e.g., Filters) in order to find and open Managed Documents. You can search from any level available, but searching from a higher level and filtering down will stack the selected categories.
If you would like to find the same flat Managed Document list as seen before v20, simply execute a search at the Site level.
Properties tabs - The tabs on the left side of the dialog are determined by what Property settings are selected in the Configure Document Selector. This may be set for you based on your Database Privileges or your User information within your company's network.
If the settings have not been set up, the Configure Document Selector dialog will open automatically.
Enter filter text here - Enter a string to filter down to specific Routine properties (left side), or document labels (right side). These are dynamic fields that will update the results field as you type.
Reset - Reverts the dialog back to the highest level property available and clear any previously selected properties.
Update Results - Click Update Results to view the Managed Documents that fit into the currently selected properties.
Managed Document Type - Filters out managed documents by Type (Static, Dynamic, or Workcell).
Open - Select the Managed Document that you want to load and then click Open, or double-click the Managed Document label.
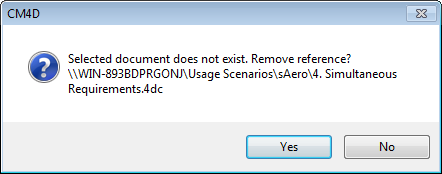
Verify Document Exists - Checks to see if the selected document is valid before CM4D attempts to load the document. Select a Managed Document from the list, then the button will appear for selection. If the managed document no longer exists, you are given the option to remove that document reference from the Site database. Show/HideShow/Hide
Results Grid
The results of the managed document search/filtering will be displayed in the results grid.
Columns - The available columns can be used to sort and group the results of a search.
Field Chooser - To access any additional or removed columns, right click in the column header area and select Field Chooser. Drag the column names into position in the column header area and close the Field Chooser dialog.
Sorting the Grid - The results grid can be sorted and/or grouped using the same control methods as seen in the DataUtility, Scheduler, and DataSmith Batch interfaces.
The window size, position, visible columns, and check box selections for this dialog are automatically saved in the CM4D Site database for each user.
How to Find a Managed Document
You can open the Managed Document Selector using one of the following methods:
click the Open Managed Document ( ) button on the toolbar
click File > Open Advanced > Open Managed Document
ctrl + M on the keyboard
Select a Routine property from the tabs on the left side of the dialog.
Select a Routine property option from the results.
Selecting multiple rows will allow you to apply more than one option.
Click Update Results.
Enter a string in the filter text field to further filter the results.
Select an available Managed Document.
Click Open.
Configure Document Selector
The configuration settings (File > Document Selection Settings) dialog is used to set up the Managed Document Selector. This dialog will open automatically if the Routine Selector has not been previously configured.
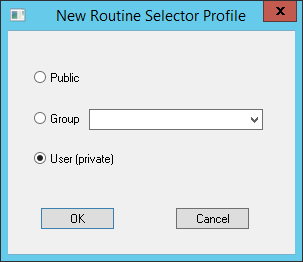
Click New Profile.
Select a Profile scope. Click OK.
Select Settings from Available columns.
Click OK to save and apply the settings.

Selected - Displays the Routine property fields that are currently selected. The order of the selected properties is important, as that is the order by which Routines will be filtered from the database. To remove a Selected setting, select the row and click the Right arrow ( ).
).
Available - Displays the Routine property fields that are available for selection. Select a row and click the Left arrow ( ) to move it to the Selected field.
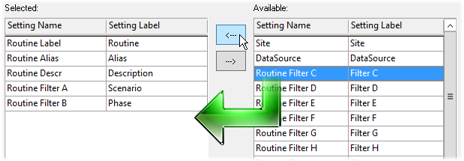
Routine Filters A-Z - If filters are assigned, the Routine Filter labels will be displayed in place of "Filter A" in the Setting Label column. If the filter label is not the same for all DataSources, however, the label will not be applied.
Selected Profile - Displays the setting configurations that have been saved. Selecting an already saved setting from the drop down and clicking OK will load that setting configuration the next time you open the Find and Select Managed Document dialog.
New Profile - To create a new setting configuration, click New Profile and then select one of the three profile options.
Public - Settings are applied to all users in the database. Any user can make changes and save the new settings.
Group - Settings are applied to all users that belong to a selected group in the Site database. Any user that is a member of that group can make changes and save new settings.
User (private) - Settings are applied for the current user only.
Delete Profile - Removes the current profile from the Selected Profile list.
Move Up - Moves the selected row up in the list of Selected Routine properties.
Move Down - Moves the selected row down in the list of Selected settings.
Can we improve this topic?