Feature Properties
The properties of a single feature may be edited using the Feature Properties dialog.
Access Feature Properties
There are two ways that you can access the Feature Properties dialog:
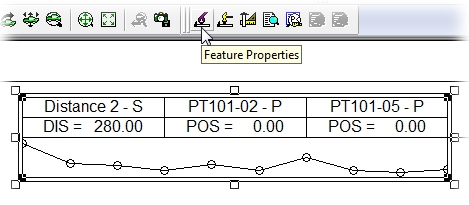
- Select an annot and then click the Feature Properties button on the toolbar.
- Select a feature in the Data tree and then either double-click on the feature label,or right-click the feature label and select Properties from the context menu.

Feature Properties Dialog
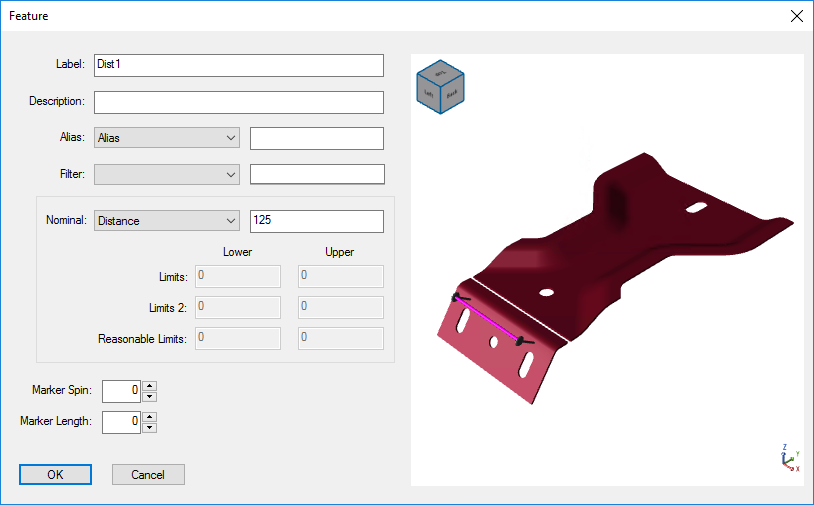
The Feature Properties dialog allows you to edit all of the properties of a single feature. The image viewer portion on the right hand side of the dialog will display the image assigned to the selected feature (if one exists).
Keep in mind that any changes to the feature in the Feature Properties dialog will be saved to the Database as soon as you click OK to exit the dialog.
Label
The Label of the feature may be viewed or edited.
Description
The Description of the feature may be viewed or edited.
Alias
Select one of the four Alias from the drop down menu to view or edit.
Filter
The Filter assignment and Filter Label of the feature may be viewed or edited. The filter value field to the right will change depending on the type of Feature selected from the first dropdown menu:
- Restricted Filters will have a dropdown menu populated with the valid restriction values.
- Unrestricted Filters will have an editable text field.
Nominal
Select one of the characteristics available in the drop down menu to view or edit the nominal value.
Limits
If Limits are set for the characteristic selected in the Nominal field, the Limits fields will become active and populated only to accommodate any existing limit information. Limits may only be edited if the Limits are already set for the selected Nominal characteristic.
Limits 2
If Limits 2 are set for the characteristic selected in the Nominal field, the Limits 2 fields will become active and populated only to accommodate any existing limit information. Limits 2 may only be edited if the Limits 2 are already set for the selected Nominal characteristic.
Reasonable Limits
If Reasonable Limits are set for the characteristic selected in the Nominal field, the Reasonable Limits fields will become active and populated only to accommodate any existing limit information. Reasonable Limits may only be edited if the Reasonable Limits are already set for the selected Nominal characteristic.
Assign Material to this Feature
To assign a material to the feature marker, select the check box next to Assign Material to this Feature and then click the browse button to open the Material selection dialog.
Select a Material Group from the drop down menu and then click one of the example spheres to assign the selected material to the feature marker.
Click Ok to save your Material selection.
Once a material is assigned to a single feature, that material becomes a property of that feature in the database. Each time the feature appears, it will use the assigned material for the feature marker.
Marker Material may also be set using DataUtility. To select a Material, you can either enter the four-digit Marker ID or click the browse button to open the Material selection dialog.
Unassign Material
If you want to revert the feature marker back to the default setting of the marker type for that feature type, deselect the Assign Material to this Feature check box and click Ok to save the change.
Marker Spin
Enter a number (in degrees) between 180 and -180 to change the rotation of the marker in relation to the feature point.
Marker Length
Enter a number to change the length of the marker (cannot be a negative number).
Marker Align
Aligns the Feature Marker to the selected Axis - X, Y, or Z. The selection 3D aligns the marker parallel to the point(s) being measured.
Marker Spin, Length, and Align may also be set using DataUtility.
Manipulating the Viewer
The following controls may be used when manipulating the model in the right-hand side of the Feature Properties dialog:
- Translate/Pan - Hold down the Shift or Ctrl key (or the hold the mouse wheel) and drag the image as desired.
- Spin - Hold down the left mouse button, drag the image in the desired direction, and then release the mouse button. Image will continue to spin on its own. To stop spin, click image again. To speed up or slow down the spin of an image, increase or decrease the speed at which you initially pull the image and release the left mouse button.
- Rotate - Hold down the left mouse button and drag the image in the desired direction.
- Zoom - Hold down Shift + Ctrl, click the left mouse button in the preview pane, and drag the image as desired. Another option for zooming may be utilized if your mouse has the wheel feature. Moving the mouse wheel forwards or backwards while positioning the cursor over the preview pane will zoom the image in or out.
Can we improve this topic?