Install CM4D Clients
This guide contains the detailed steps for installing and configuring a CM4D Client system from start to finish. This topic is intended for installing Clients that are part of a larger setup that includes at least one CM4D Server installation that would be installed before any client systems.
For the CM4D Server Installation guide, see the topic Install CM4D Server.
Prepare for Installation
Contact your ATS sales representative or ATS Support if you have questions or need assistance.
Gathering the following information is helpful before running the installer.
|
Download installers/files referenced in this guide. |
||
|
ATS CM4D Client installer. |
||
|
Download and Install Prerequisites. This is only required if you plan to run the installer on a machine without an internet connection. With an internet connection, any prerequisites not present or require updates are downloaded automatically when needed during installation. |
||
| Visual C++ Redistributable for Visual Studio 2012 Update 4 x64 - 11.0.61030 or higher | ||
| Microsoft Visual C++ 2015-2019 Redistributable (x64) - 14.25 or higher | ||
| SQL Server OLE DB Driver 18 x64 - 18.2.2.0 or higher | ||
| .NET Framework 4.7.2 | ||
|
Optional Files from CM4D Server. There are some configuration files that can be copied from the CM4D Server and put into the CM4D Client install folder after the Client installation is completed. |
||
|
ATSLicensingServer.Client.dll.config - Includes the licensing server information; do not use a copy if the CM4D Server is configured as 'localhost'. |
||
|
CM4D.4ds - This includes the Database Server and CM4D Site connection. |
||
|
Cm4d.ini - This includes runtime settings for CM4D. Your Server may use different startup options than the Clients. |
||
Install CM4D Client
Before starting the CM4D installer, the 'Print Spooler' Windows service must be running. If the service is not running, the installation will fail.
- Run the CM4D Client install executable (as Administrator).
- Click Next.
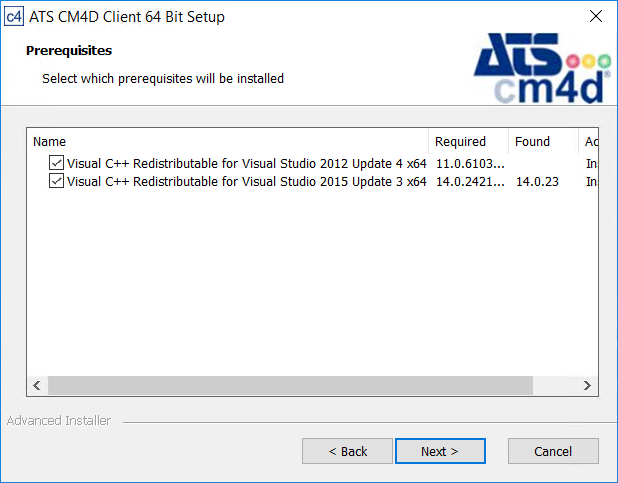
Prerequisites
The first part of the installation will check to see if the machine has the required supporting software redistributables. If your machine already has the required versions of the files installed the installer will detect it and move on to the next steps without reinstalling the existing files.
Restart the machine if prompted. On restart, the installer resumes automatically.
Click Next.
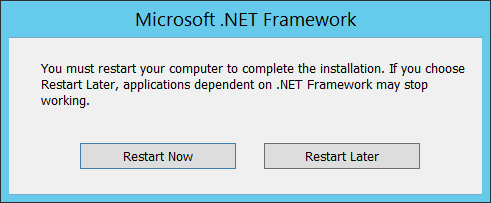
Install .NET Framework
Agree to the terms and conditions, then click Install.

Click Finish.

When prompted to reboot, select an option.
Restart Now - the machine will reboot; on restart, the CM4D installation will continue where it left off before the restart.
Restart Later - the CM4D installation will continue; make sure to reboot the system once the CM4D installation is completed.
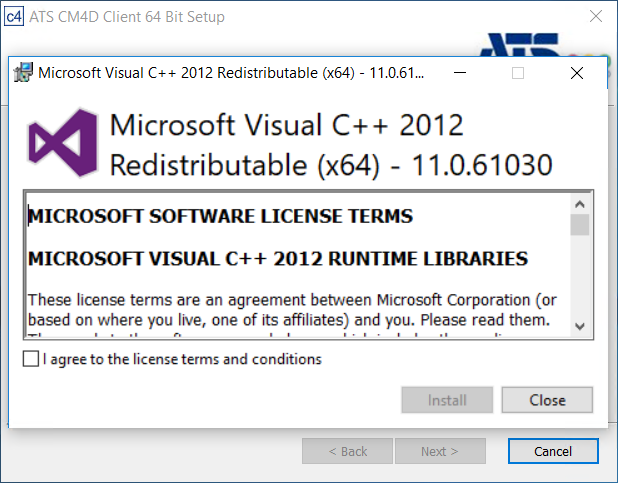
Install Microsoft Visual C++ 2012 Redistributable
Agree to the terms and conditions, then click Install.
Click Close.
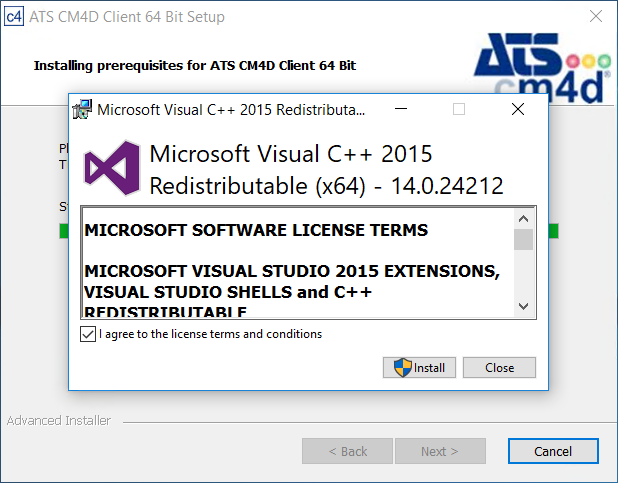
Install Microsoft Visual C++ 2015 Redistributable
Agree to the terms and conditions, then click Install.
Click Close.
CM4D Setup
Once the prerequisites are installed, continue to the CM4D portion of the installation.
Click Next.
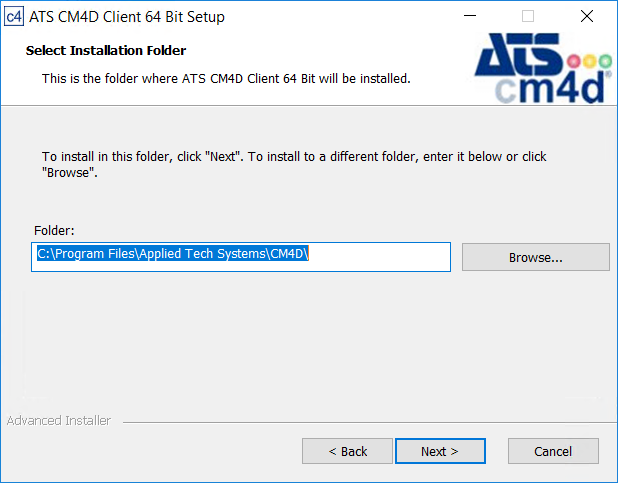
Select Installation Folder
The default installation folder is C:\Program Files\Applied Tech Systems\CM4D\.
To change the install folder, click Browse.
Select the new folder and click Select Folder.
Click Next.
Installation Type
To complete the CM4D installation, choose an Installation Type. For Client installations, Quick Install is the same as the Configure and Install method.
Select Quick Install.
Click Next.
Licensing Server
Enter the server name of the ATS Licensing Server or leave as 'localhost' if you plan to copy the license config file from the CM4D Server.
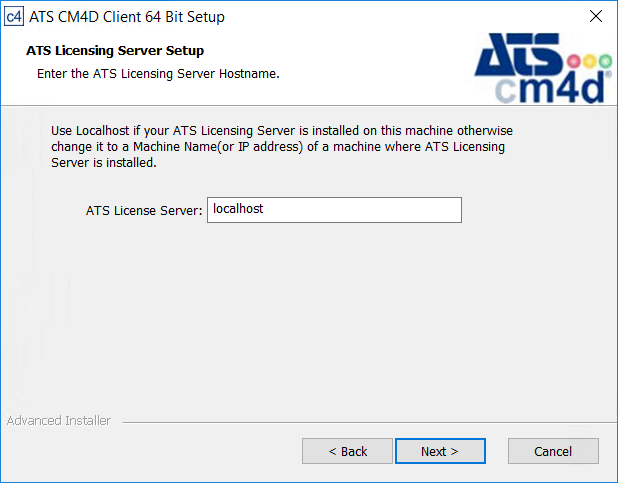
Click Next.
Click Install.
Click Finish.
Configure Client (Post-Installation)
- Complete the configuration using one of two methods:
- Copy configured files from the CM4D Server:
- ATSLicensingServer.Client.dll.config
- CM4D.4ds
- Cm4d.ini
- Manually configure on the Client (you may need different options from the Server):
- Configure Site Connection in DbConnect. Run DbConnect (as Administrator).
- Connection Type - Change the dropdown to "Site Connection".
- Windows Authentication - Select one of the two available methods of authentication for connecting to the databases:
- Windows Authentication - Set the dropdown to 'True'.
- SQL Authentication - Set the dropdown to 'False'; enter the SQL username and password.
- Server Name - Enter the name of the database server. If using a Named Instance, include this in the server name.
- Database Name - Enter the name of the CM4D Site database.
- Configure the CM4D runtime options. Edit the Cm4d.ini file:
- In the [default] section find the parameter "PDFPRINTDRIVER".
- Set the value to "ATS CM4D Printer".
- Comment out (#) the other print driver options or delete the unused lines entirely.
- Configure any other settings as needed for the Client.
- In the [default] section find the parameter "PDFPRINTDRIVER".
- Set the ATS Licensing Server (if not entered during the CM4D Client installation). Edit the ATSLicensingServer.Client.dll.config:
- <setting name="EndpointAddress" serializeAs="String">
<value>net.tcp://localhost:8001/ATSLicensingServer/</value>
- <setting name="EndpointAddress" serializeAs="String">
- Configure Site Connection in DbConnect. Run DbConnect (as Administrator).
- Copy configured files from the CM4D Server:
Can we improve this topic?