Configure the Scheduler Job Users
To add a Job User to the Site Database (even if the user does not have a Windows ID):
Open Site Manager.
Create a User.
Assign the user to a group which has the privilege Scheduler User.
Save and Exit.
To assign the User in the Scheduler configuration files:
Browse to the CM4D Installation folder.
Open the file CM4DScheduler.settings in a text editor.
Copy the line <JobUser userName="username"/> and paste it in the next line.
Enter the user name that you want to use as the Job User between the quotations.
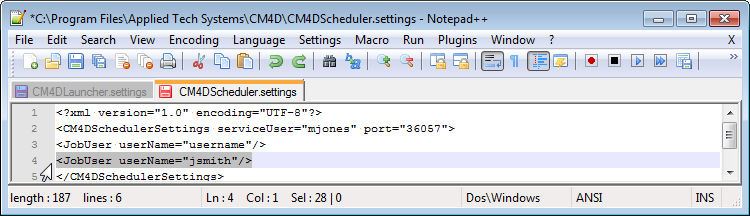
For each user, enter a new line.
Save your changes and close the CM4DScheduler.settings file.
To check the configuration is complete:
Start your CM4D Scheduler and CM4D Launcher Services.
Open Scheduler Manager.
Connect to the Service.
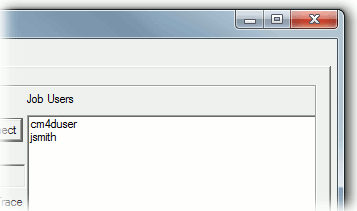
All users that have both the Scheduler Job privilege in Site Manager and a user name listed in a Job User line of the *.settings file will appear in the Job Users field of the Scheduler Monitor tab and in the Job User field in the Job Setup tab.
Can we improve this topic? Click Send Feedback in the upper right of the screen to share your comments!