To see how this item is associated to other items refer to the Item Relationship section here.
Root causes try to determine the real reason that a defect occurred. An example might be:
| Part | DVD Player |
| Concern | Inoperative |
| Repair Type | Re-seat wiring connector |
While this information is beneficial, it does not get to the true reason that the DVD player did not work. That information is critical in improving the process that led to this defect.
The inspector's job is generally to find problems, but not necessarily diagnose them or try to determine root causes. The person who best knows why a problem (defect) has occurred may be the repair person during the time of repair, or an engineer who researches the problem "after the fact."
Root causes for this particular part/concern combination (up to the time the repair was made) might include:
● Defective DVD Player (supplier-related)
● Wiring short
● Wiring connector not properly seated
Root Causes are associated to part/concern combinations via the Part/Concern/Repair dialog.
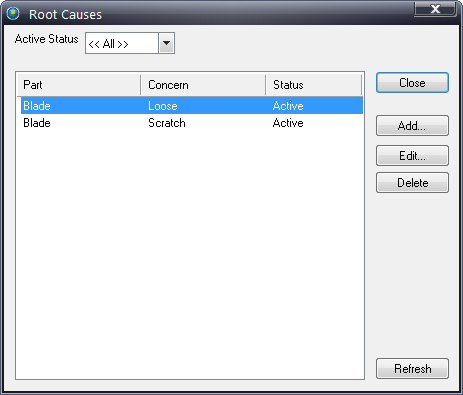
1. Click Defects > Root Cause > Root Causes.
2. Click Add.
3. Select a Part and a Concern from the drop-down lists.
4. Type the unique code (optional).
5. Click OK.
The Root Cause is added and the dialog box remains open so that you can add further Root Causes.
6. When they have all been added click Done.
The new Root Causes are shown in the list.
1. Click Defects > Root Cause Folders.
2. Click the Add button to add a new root cause folder.
3. In the Description field, type the new unique folder name.
4. In the Comments field, type any comments you would like to add about the folder. (Use of this field is optional.)
5. Click OK.
6. Repeat as necessary to add other root cause folders.
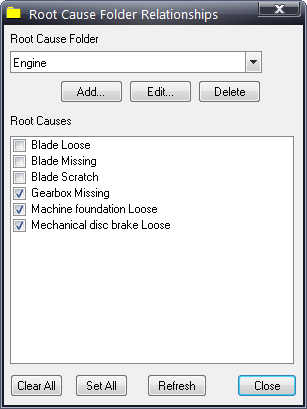
7. To add root causes to a root cause folder, select the desired folder using the Root Cause Folder field.
8. Use the Root Causes checkboxes to select the root causes to add to that folder.