
You create triggers to send notifications to recipients. The contact information for the recipient may be an e-mail address, or cell phone number.
A single recipient specified in the database can be assigned several forms of contact. It may even be sent to several different people. When a message needs to be sent to the recipient it will be sent using every contact method specified.
1. In the navigation bar, click Configure Recipients.
2. Click New…
3. Ensure Is Active is enabled.
The Is Active option can be disabled if someone needs to be removed from the delivery list temporarily. This prevents having to delete and re-add recipients in this situation.
4. In the Description field, type the recipient name. This is the name that will display in the Recipient list.
5. In the Comments field, type any comments (Optional).
The numbers in brackets after the output types represent how many outputs of that type have already been set up for this recipient. If you are creating a new recipient no numbers will be shown.
The next step depends on how you wish to communicate with the recipient. The following types of "output" are currently supported:
Because the descriptions for output types are determined by the Inspect Administrator, the output type names displayed may vary from these examples. If in doubt, please consult your Inspect Administrator to learn the actual names to use.
1. Click the AlphaVision Display link.
2. Click New…
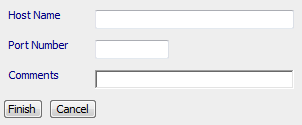
3. Enter the Host Name, Port Number and any Comments in the appropriate fields.
4. Click Finish.
5. Repeat steps 1 thru 6 for each AlphaVision Display for this recipient.
6. Click Finish at the General form.
1. Click the MQ Series output link.
2. Click New…
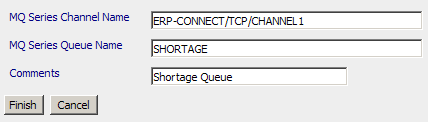
3. In the MQ Series Channel Name field, type the Channel Name for the recipient.
This should be in the form channel-name/transport-type/connection-name.
4. In the MQ Series Queue Name field, type the Queue Name for the recipient.
This name must be defined as an input queue by the MQ administrator.
5. In the Comments field, enter any comments.
6. Click Finish.
7. Repeat steps 1 thru 6 for each MQ Series channel/queue for this recipient.
8. Click Finish at the General form.
1. Click the email output link.
2. Click New…
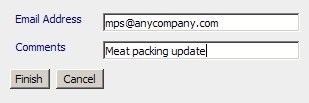
3. In the Email Address field, type the email address for the recipient.
4. In the Comments field, enter descriptions comments.
Comments are very important. Use comments that clearly indicate who is the intended recipient of the output. They are the only way to distinguish between different outputs for a recipient when you are setting up different events.
5. Click Finish.
6. Repeat the steps for each email address for this recipient.
7. Click Finish at the General form.
There are a few additional configuration steps for SMTP configuration. Because these steps involve editing the Windows Registry (which can be extremely dangerous), you may need to consult your IT department prior to editing the registry.
Improperly editing the Windows Registry may result in Windows or other applications not working properly or even prevent Windows from booting.
8. Open up the Windows Registry Editor (regedit) and navigate to
HKEY_LOCAL_MACHINE\SOFTWARE\Applied Tech Systems\EventSMTPDevice Service\Settings
9. Double-click the FromAddress key and enter the address that you want displayed in the From field when sending email from Event Services.
10. Double-click the FromName key and enter the name that you want displayed in the Name field when sending email from Event Services.
11. Some SMTP servers expect a username/password to be sent to validate the sending user. If that is the case, enter the username and password settings using the Username and Password keys.
1. Click the Socket Output link.
2. Click New…

3. In the Host Name field, enter the TCP/IP hostname –or- IP Address for the target TCP/IP host.
4. In the Port Number field, select the TCP/IP port number the host will be listening to for incoming connections.
5. In the Comments field, enter any comments.
6. Click Finish.
7. Repeat steps 1 thru 6 for each Socket Output for this recipient.
8. Click Finish at the General form.
1. Click the recipient's link in the Description column.
2. In the next window, modify the recipient information as necessary.
3. Click OK to return to the list of currently configured recipients.
1. Click the Delete button next to the recipient you want to remove.
This will remove this recipient from all events the recipient is currently associated with.