After you have completed the General form for creating trigger types, you must complete the conditions forms. Be sure to complete all of the conditions forms. Most of the condition forms are identical except for the items they list. The Parts form lists parts, the Concerns form lists concerns, etc.
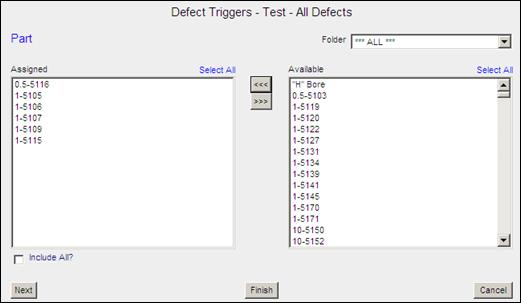
Below is an example of one of the forms:
In the Available pane, Areas and Cells will be displayed in sequence order rather than alphabetical order.
1. Select the desired items from the Available list. The Available list contains the all the items for that type (i.e. Parts contains parts) that the Inspect administrator set up in the Inspect Admin program.
2. If applicable, use the Folder selection to limit the items that appear in the Available list.
3. Select the required items in the Available list. To assign all the items in the Available list, check the Include All checkbox.
4. Click the <<< button. The selected items are added to the Assigned list.
5. After finishing the form click the Next button at the bottom left of the form to go to the next form.
You can also select the desired form in the navigation bar at the right.
The Qty Per Time, Qty Per Unit, and Good Unit Mix Triggers also contain a Group On checkbox on the condition forms (for example, Group on Product, Group on Part, etc). "Group on…" means treat any of the selected items (part, location, concern, etc.) as one item.
For example, let's say you are using the Qty Per unit trigger and you need 5 defects for the trigger to fire. In the Parts filter you have three parts selected: Fender, Door, Hood. Assume all other filters are set to "include all" with "Group On" enabled.
If "Group On" is not enabled for Parts then you must have 5 defects on the same unit on the same part (hood for example) for the trigger to fire. If "Group On" is enabled then you need a total of 5 defects on any of the three parts for the trigger to fire. For example it would fire if you had 2 on the hood, 1 on the fender and 2 on the door.
The final form to complete is the Recipient form. For each trigger you create, you must assign at least one recipient or there will be no one to send the output to.
1. Select one or more recipients or groups from the Recipients list.
2. Click the <<< button. The selected items appear in the Send To box.
3. Click the Finish button in the left-hand corner of the form to save the completed trigger.