The Repair screen is available from the main screen, by clicking the Mode toggle button to activate the repair mode. The Repair screen contains repair processes for a specific defect for a single unit.
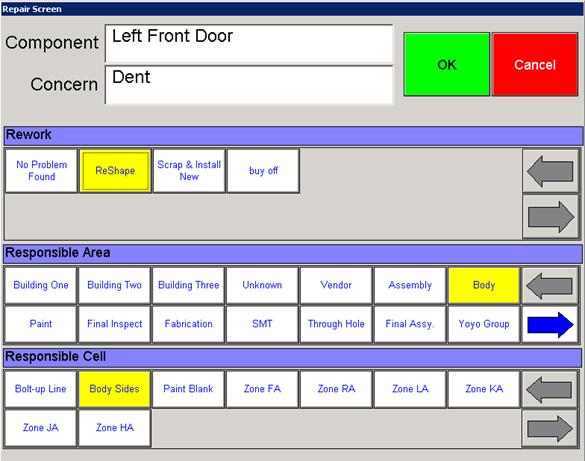
The following is an example of a Repair screen.
The Repair screen utilizes the following controls:
| Control | Used to perform this action |
| Click to close the Repair screen without saving changes. | |
| Click to save the actions made in this screen and return to the previous screen. | |
| Displays the name of the component being repaired. | |
| Displays the name of the selected concern. | |
| Displays the repair performed on this component. | |
| Displays the selected responsible area. | |
| Displays the selected responsible cell. | |
| Displays a selection of repair types that the operator can select. | |
| Displays a selection of responsible areas that the operator can select. | |
| Displays a selection of responsible cells that the operator can select. | |
| Displays list of most recent comments associated to the selected Component/Concern/Repair combination. | |
| Displays the most common repairs for the selected component. | |
| Click to enter the actual repair time. | |
| Click to enter comments about the repair. | |
| Click to insert images from disk or camera. | |
 Reference Documents Reference Documents |
Displays guideline documents for the current concern. |