The following steps show the general process of changing any of the report criteria.
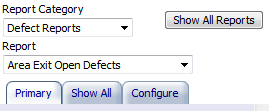
1. Select the Report Category and Report.
The available criteria for the report will be displayed below. If you wish to change the criteria displayed for this report see here.
For this example we will use the production shift that the defects originated from
2. Select the Change? button for Shift.

3. Select the desired shift from the options presented. Once the shift has been selected, the user will be returned to the criteria window.
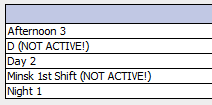
4. Once a criteria has been changed, the drop-down value (in this case, the production shift), will be highlighted in light blue.

5. When you have set all the criteria you can view the report by the clicking Submit button.
If you have selected the Save Report Criteria? option, when you click Submit button the criteria will be saved for the selected report for the logged in user. This means that when you go to a different report and come back, or even log out and log back in, the criteria you chose will still be selected.
This button resets the criteria to those that the user last saved (by clicking Submit) before leaving the report.
This button removes the user modifications and resets the criteria to the defaults stored on the database.
Several of the report criteria have the following symbol placed on them, which is known as a dependency symbol:

This symbol is placed wherever one criteria selection is dependent upon another. For example, if a report user wants to see quality issues that originated in a specific area of the plant, they can select the Responsible Area and Responsible Cell.
The dependency symbol indicates that the "Responsible Area" is the parent and the "Responsible Cell" is the child. Therefore, when a specific Responsible Area is selected, the only Responsible Cells that will display are the ones assigned to that area.