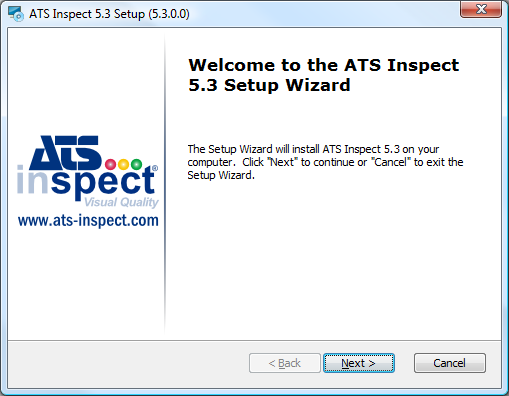
1. Insert the Inspect CD (or double-click Inspect.exe). The following screen will be displayed.
2. Click Next. Three options are displayed:
o Modify - Allows user to add or remove components..
o Repair - Fixes missing or corrupt files, shortcuts and registry entries.
o Remove - Removes Inspect from the machine.
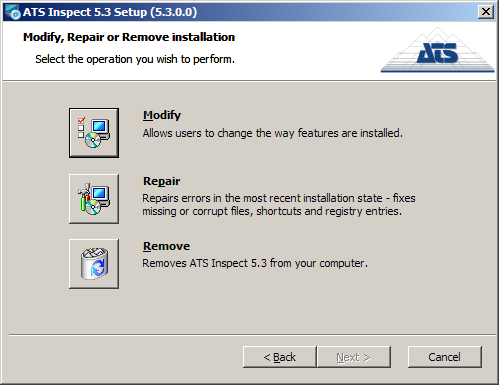
3. Click Modify.
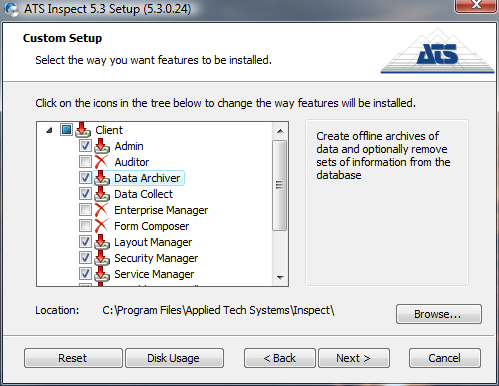
4. Select the required components.
If Security Manager is being installed on a system that does not have SQL Server present, then SharedManagementObjects.msi and SQLSysClrTypes.msi must also be installed.
● Client includes the following applications:
o Admin: configuration application, only intended for Inspect system administrators. (also installs Data Importer)
o Auditor: data collection application at audit stations.
o Cockpit: configuration application, only intended for Inspect system administrators.
o Data Archiver: database maintenance application, only intended for Inspect system administrators.
o Data Collect: data collection module for inspection and repair stations.
o Form Composer: configuration application, only intended for Inspect system administrators.
o Layout Manager: configuration application, only intended for Inspect system administrators.
o Security Manager: configuration application, only intended for Inspect system administrators (see the note above).
o Variable Data Collect: variable data collection application for inspection and repair stations.
● Server includes the following items:
o Services
§ Base Services: communication services that receive data from external systems; typically installed on the application server.
• WCF Checklist Service: handles requests to perform tasks related to checklist questions. Installs two services; WCF Checklist Service and Checklist Generation Service.
• WCF Comm Service: processes Inspect-related data received from Flat files, RS-232 and TCP/IP sockets.
• WCF Data Service: handles requests to deliver data to various Inspect clients and services. It acts as a gateway between the database and the Inspect applications in order to keep data access consistent.
• WCF Traffic Service: manage inter-station communications.
• WCF Travel Service: print configurable travel ticket for individual unit.
§ Event Services: alarm notification, usually installed on the application server.
§ OPC Service: publishes data for external systems. Usually installed on the application server.
o Classic Reporting: web site installed on the web server.
o Connectivity Kit: scripts to create or upgrade databases. Usually installed on the database server.
● Mobile: files required to use the Mobile Checklist and Mobile Repair applications.
● Documentation: recommended to be installed on all user PCs and the servers. Creates a link in the Start menu in the ATS Inspect folder.
5. Click Next.
The Classic Reporting configuration screen is displayed only if it has been selected for installation. If it wasn't, go directly to the Ready to Install screenshot.

6. Enter the required details.
o Location Website: Folder where the reporting files will be placed.
o Virtual Directory: The URL for the Classic Reporting site is http://server_name/virtual_directory. Enter the desired value here.
7. Click Next.
The Ready to Install dialog is displayed.

8. Click Install.
If a COM exception in CreateChecklistServiceClient(): Class not registered error appears during installation it is because Inspect 6.0 has previously been installed on the machine. To resolve this issue refer to Inspect/Applications (x86)/Utilities/Utilities.txt.
The final page appears.
9. Click Finish to close the installation program.
The following steps are only required if you are using Inspect Reporting and running IIS6 on a 64-bit system.
The file ReportPDF.dll (by default installed in c:\inetpub\wwwroot\Inspect\dll\) needs to be added as a Web Extension. (Extension name: Inspect Reporting)
1. In IIS Manager, expand the computer name, and then click Web Service Extensions.
2. In the details pane, click Add a new Web service extension.
3. In the Extension name text box, type the name of the new Web service extension, and then click Add.
4. In the Path to file text box, type the path or click Browse to navigate to any files that the new Web service extension requires, and then click OK.
5. Optionally, select the Set extension status to Allowed check box to automatically set the status of the new Web service extension to Allowed.
6. Click OK to add the new Web service extension.