In this Topic Hide
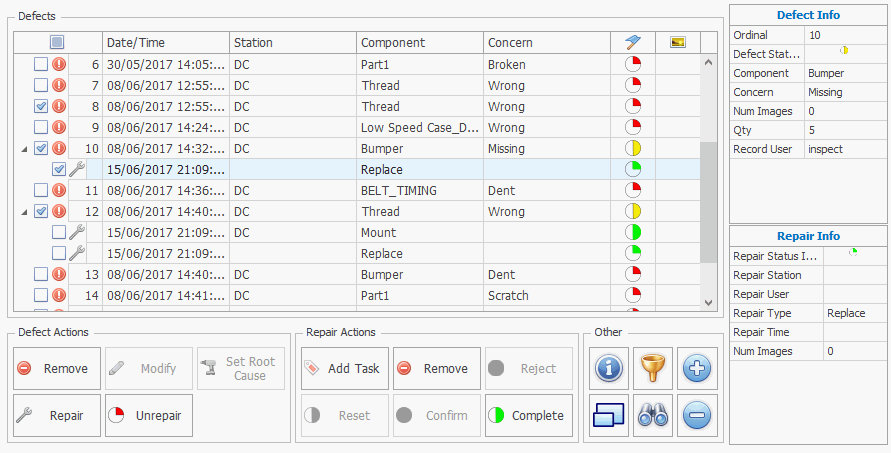
You can view and manage all defects and repairs in the Overview screen, which can be accessed by clicking the Overview button, or using the Overview control that may be incorporated in one of your other screens. The image below shows an example of the Overview control.
By enabling the check box for one or more defects or repairs you can carry out the actions listed below.
Multiple defects can be selected and repaired simultaneously (if common repairs exist).
Depending on the station property Keep resp area/cell on multiple defect repair the Responsible Areas/Cells can either be left as they originally were or they can all be changed to the same Responsible Area/Cell.
All defects and repairs can be selected at once by enabling the checkbox above the list.

● Remove: Remove the defect.
● Modify: Change the concern, detail, rank, responsible area, or responsible cell for the defect.
● Set Root Cause: Select a root cause for the defect.
● Repair: Add a repair to the defect. The defect status will change to Repaired.
● Unrepair: Remove all repairs from the defect.
● Find View: Open the view in which the selected defect was added.
● Add Task: Add a repair task that needs to be performed (completed). Multiple repair tasks can be added to a single defect.
● Remove: Remove the repair.
● Reject: Reject the repair.
● Reset: Reset the repair to Unrepaired.
● Confirm: Confirm the repair.
● Complete: Show the repair has been performed.
●  Show detailed information
for the focused defect or repair.
Show detailed information
for the focused defect or repair.
●  Show/hide the column filter.
●  Toggle full screen display.
●  Show/hide find panel. This will allow you to search for defects by property
value.
Show/hide find panel. This will allow you to search for defects by property
value.
● 
 Show/hide all repairs associated to defects.
Defects can have the following statuses:
| Not Repaired |  |
| Partially Repaired |  |
| Repaired |  |
| Confirmed |  |
Defects can have the following statuses:
| Not completed |  |
Completed |
 |
Confirmed |
|
| Rejected |  |