What is a View?
A View is what is seen by the operator using the data collection applications. To highlight a defect the operator clicks on the appropriate location on the view. This corresponds to a specific component and they can then select the type of concern that has been found together with other relevant details. There are two kinds of view:
- Raster: Can be made up of layers of images that can be added and removed during an inspection so that the required components can be accessed to assign a defect. Alternatively, you could just use a single layer.
- Vector: 3D views that can be rotated. Components can be added and removed at runtime if the correct bookmarks have been created during configuration.
Create a View
Before you create a View you must import the image(s) it will use (see here).
Select the Home tab.
Click New.
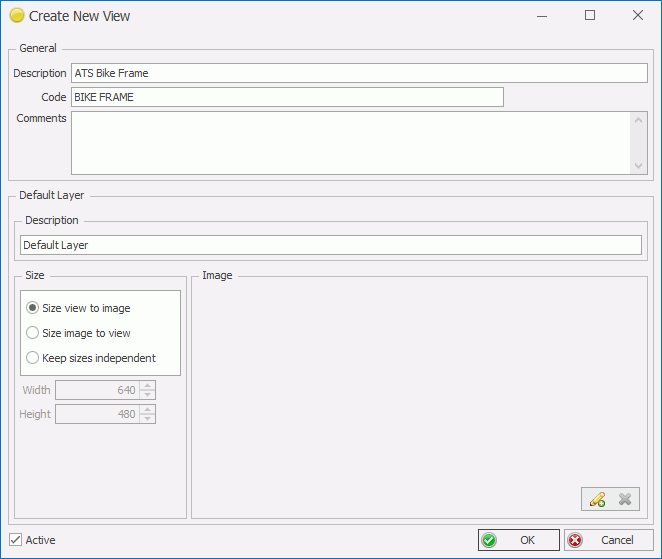
The Create New View popup opens.

Enter a Description and Code for the view.
Enter a name for the Default Layer. Layers are only used in 2D (raster) views but a name is required for the default layer whichever type you're producing.
At this point you can create the view and add the primary image afterwards. Alternatively, you can enter the image now as follows.
Select one of the Size options to determine how the view and the image in the default layer will be sized (only affects raster views):
Size view to image: The size of the view will match the image.
Size image to view: The image will resize, retaining its aspect ratio, to fit the view. The size of the view must be specified.
Keep sizes independent: The image will remain in its original size, independent of the size of the view. The size of the view must be specified.
Click the Add button(![]() ) to add an image to the default layer of the view.
) to add an image to the default layer of the view.
The Select Image popup opens.
For more information on adding images see here.
Select an image from the list.
Click OK.
The view is created.
Open a View
A view can be opened as follows.
Select the Home tab.
Click Open.
A list all the views is shown.
Filter the list as required.
Select a view from the list or select multiple views by enabling the checkboxes to the left of the views.
Click OK.
The view is opened.
Save the View
Before you start making modifications it would be a good idea to save the view.
Select the Main tab.
Click Save View.
The view is saved.
Delete a View
A view can be deleted as follows.
Select the Home tab.
Click Open.
A list all the views is shown.
Filter the list as required.
Select a view from the list or select multiple views by enabling the checkboxes to the left of the views.
Click Delete.
The selected views are deleted.
If the Delete button is disabled then the view may be associated to a View Category or a Setup or both.
For information on disassociating a view from a view category see here.
For information on removing a view from a setup see here.
Rename a View
The description and code of a view can be changed as follows.
Open a view.
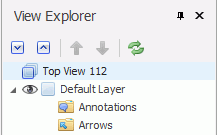
Select the name of the view in the View Explorer pane.

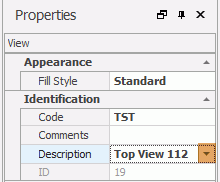
Click the down-arrow next to the description in the Properties pane.

Update the description.
Click outside the description popup to close it.
The description is updated.
Create Part/Concern Associations in Runtime
When using Data Collect an operator can assign concerns contained in pre-selected folders. This creates part/concern relationships which can then be used to create limited concern lists by the administrator in Cockpit.
Enabling a view to utilise this functionality, called View Defaults, is done in Cockpit.
Assign a View to a Setup
Once a view has been created it can be used in an Inspection Setup in Cockpit.
Assigning Quaestions, Views and Parts to Steps
Assign a View to a View Category
Once a view has been created it can be assigned to a View Category in Cockpit.