In this Topic Hide
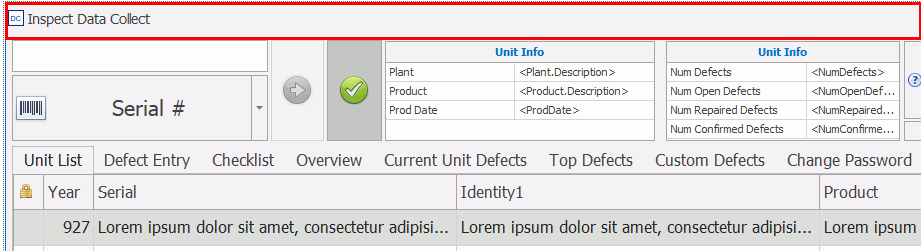
To start with we will make some modifications to the Main form. This is the form that will be presented to the operator when they run Data Collect.
1. Click Open in the Forms tab.
The Open Form dialog opens.
2. Select Main (Simplified) and click Open.
The form opens. The form is made up of multiple controls. Each control can be repositioned and resized and the look of each one can be modified.
There are some components we don't need on the form. We'll remove these controls and replace them with a control we do want.
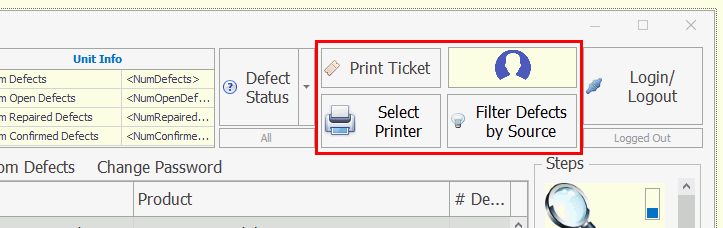
3. Remove the Print Ticket, Select Printer, Filter Defects and User Picture controls by clicking on each control and pressing the Delete key.
You can select multiple controls at the same time by holding the Shift key while selecting them.
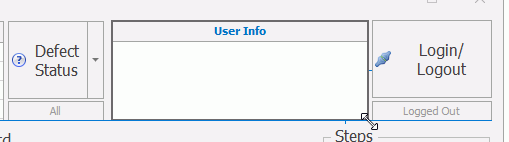
Now we'll add the User Info grid which will show details about the currently logged in user.
4. Select the Other tab in the Toolbox pane.
5. Drag and drop the User - Info Grid control onto the form so that it aligns with the top-right corner of the Defect Status control. When you add a control the location you select will be the top-left corner of the control.
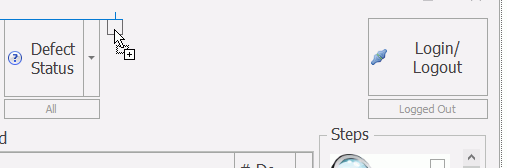
6. Click and drag the bottom-right handle of the control and align it with the Login Toggle Button.
When the size of the form changes we want the User Info control to stay in the same location relative to the right-hand side. This can be done as follows.
7. Select the User - Info Grid control and click the smart tag in the top-right corner of the control. This will open up a list of options.
8. Open the drop-down next to Anchor Style.
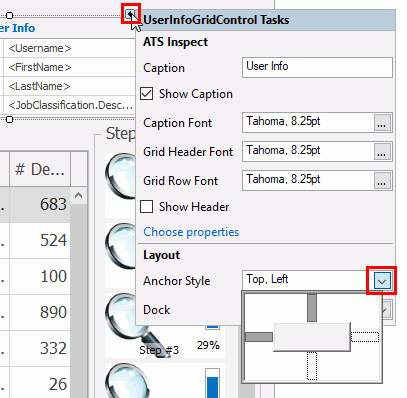
By default Top and Left are selected. This means that the control will always stay at the same distance from the top and left-hand side when the form is resized.
9. Click the left bar to de-select it and the right bar to select it.
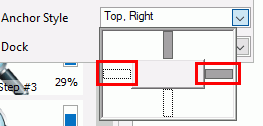
The control will now always stay at the same distance from the top and right-hand side when the form is resized.
If you wanted the control to stretch with the form then you would need to enable both the left and right (or top and bottom) bars at the same time.
10. Click outside of the smart tag to close it.
Now we can add some information to show in the control.
11. Select the User - Info Grid control and click the smart tag in the top-right corner of the control.
12. Click Choose properties.
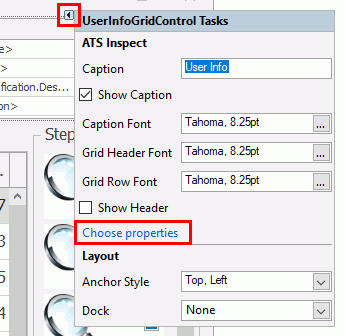
13. Enable the following four items in the Available Properties pane.
o Username
o FirstName
o LastName
o JobClassification > Description
The items will be displayed to the user in the order they are added in.
14. Click OK.
The properties are displayed in the control.
The tab control allows the operator to access all the information they need without leaving the Main screen. Each tab can contain one or more controls.
We're going to simplify the tabs in our tab control by removing the Custom Defects and Change Password tabs and we'll then rename the Defect Entry tab to Enter Defects.
15. Click inside the bar at the top of the tab control.

If you click inside the tab itself you will select the controls within the tab which is not what you want at this point.
16. Click the smart tag in the top-right corner of the control.
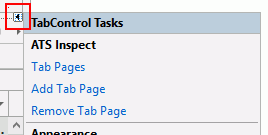
17. Select Tab Pages.
The names of all the tabs are listed in order.
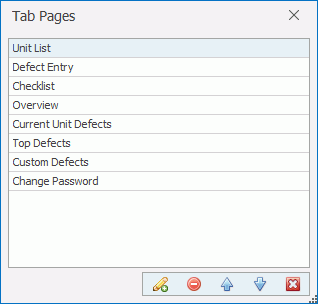
18. Select Change Password in the list of tabs.
19. Click the Delete
button ( ).
).
The Change Password tab is removed.
20. Remove the Custom Defects tab in the same way.
Now we'll rename a tab.
21. Click on Defect Entry in the list of tabs.
22. Modify it to say Enter Defects.
23. Click the cross in the bottom-right corner to close it.
The size of the form is important as it has to fit within the screen of the monitor. However, if the form is set up correctly then it can be made to fit any monitor size and the controls will dynamically move and resize with it.
24. Click at the top of the form to select it.
The Properties pane updates to show the properties for the overall form.
By default the properties are listed by category. You can view the properties
alphabetically by clicking  .
.
The properties shown are limited to those most commonly use. To view
the extended list click the Enable Expert
Mode button ( ).
).
25. Locate the Size property and expand it to show the height and width separately.
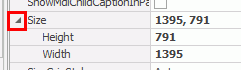
26. Change the Height to 800 and the Width to 1400.