 to your database.
In this Topic Hide
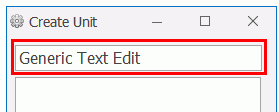
The Create Unit form allows you to add a unit to the system based on information that you enter or select. This could include details such as the serial number, color or build group.
The form can include check boxes, combo boxes, list boxes that are populated with data from the database. You can then make a selection from that list.
Alternatively, or in addition, it can contain a text box where you can enter a customized value.
In this tutorial we will select the color of the unit that is being manufactured and enter a serial number for it.
In order to insert a new unit in the database you will need to use a stored procedure. As with all customised stored procedures it must start with the prefix _custom. In this case we will use custom_create_new_unit.
1. Add this
stored procedure to your database.
2. In Form Composer click Open in the Forms tab.
The Open Form dialog opens.
3. Select Create Unit and click Open.
We'll start by modifying a control so that the serial number can be entered which will then be stored with the newly created unit in the database.
4. Click on the Generic Text Edit control.
5. Click the smart tag.
You are presented with a number of options.
6. Change the Maximum Text Length to 8.
7. Enter Serial number in the Prompt to display when control is empty.
8. Click outside the smart tag menu to close it.
9. In the properties pane
enable Expert Mode by clicking  .
.
10. In the (Name) property enter Serial_Number. This will be useful later when you need to link the form to the stored procedure.
The next control will present the operator with a list of product codes to select from.
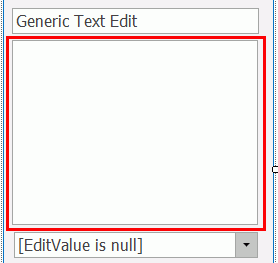
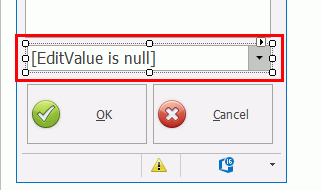
11. Click on the Generic Listbox control.
12. Click the smart tag.
You are presented with a number of options. We need to use this control to retrieve the code of the products. The code will be presented to the operator who can then select one. The selected color code will then be sent to the stored procedure so that it can be associated to the new unit.
13. Click Edit Query.
14. In the upper pane enter the following text which will retrieve the code of each entry in the products table.
select code from products
15. Click Execute Query.
The lower pane lists the code for each product. This is the list that will be presented to the operator. The list is generated from the database at runtime so it will always contain the latest information.
16. Click OK. You're returned to the smart tag menu.
Now we need to select a Value Member and a Display Member. The Value Member is what will be sent to the stored procedure. The Display Member is what will be shown to the operator.
17. Select code for the Value Member.
18. Select code for the Display Member.
19. Click outside of the smart tag menu to close it.
20. In the (Name) property in the properties pane enter Product_Code.
The other control we need will allow the operator to select the color of the unit. This is a bit more complicated as we need to get the list of colors from the database.
21. Click on the Generic Listbox control.
22. Click the smart tag.
You are presented with a number of options. We need to use this control to retrieve the ID and description of the colors. The descriptions will be presented to the operator who can then select one. The ID of the selected color will then be sent to the stored procedure so that it can be associated to the new unit.
23. Click Edit Query.
24. In the upper pane enter the following text which will retrieve the ID and description of each entry in the colors table.
select color_id, descriptions from colors
25. Click Execute Query.
The lower pane lists the ID and descriptions for each color. However, you will notice that the description is set up so that it can display the name in every language. We just want to display the English version.
26. In the upper pane enter the following text.
select color_id, dbo.get_multi_text(c.descriptions, 1033) as colors from colors as c
27. Click Execute Query.
It now just shows the description in English.
Using and modifying sql queries requires a lot of sql knowledge which we won't cover in this tutorial.
28. Click OK. You're returned to the smart tag menu.
Now we need to select a Value Member and a Display Member. The Value Member is what will be sent to the stored procedure. The Display Member is what will be shown to the operator.
29. Select color_id for the Value Member.
30. Select colors for the Display Member.
31. Enter Select unit color in the Empty Text property.
32. Click outside of the smart tag menu to close it.
33. In the (Name) property in the properties pane enter Color.
Finally, we need to remove controls that aren't required.
34. Remove the Generic Checkbox control.
35. Adjust the other controls to fill the space.
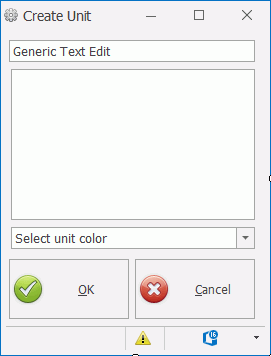
The form is now ready to use.
You now have everything you need to enable the stored procedure to create a new unit in the database. You just need to link the values from the components with the stored procedure.
36. Select the form by clicking at the top of it.
37. In the Properties
pane click the edit button ( )
next to OnAcceptStoredProcedure.
)
next to OnAcceptStoredProcedure.
38. Select the custom_create_new_unit stored procedure from the drop-down list.
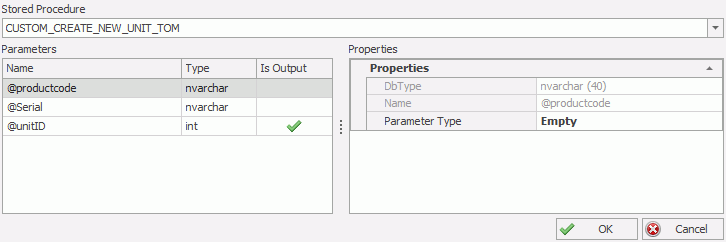
The Parameters pane lists the parameters that are required by and returned by the stored procedure. If Is Output is enabled for a parameter then that parameter will be returned to the Create Unit form. In this instance this will be the Unit ID.
39. Select the @productCode parameter. The Properties tab updates.
40. In the Properties pane select the Parameter Type drop-down list. This can be one of the following:
o Value: A static value that will always be used by the stored procedure. This requires a number type and the value that will be used.
o Component: Uses the output (Value Member) from one of the controls in the form. This is selected from the Component drop-down list which gives the names of the available controls.
o Variable: Contains global variables from the database. This includes any variable relating to the unit, the station or the user. This requires the Variable Path to be specified.
41. Select Component.
The property list updates.
42. Select Product_Code for the Component property.
The @productcode parameter is now set up correctly.
43. Repeat the steps for @serial and @colorID input parameters.
44. Click OK.
The Create Unit form is accessed from the Main screen by clicking on the Commit button on the Go to unit control.

The form will open and you can enter the required details.
When you click OK the unit will be created and selected at the station.
To use this form the station property On commit must be set to Prompt. For further information see here.
