The reasons for downtime that an operator can select or that can be associated with automated downtime are specified within a Reason Tree. Different reason trees can be created for different types of equipment.
Once a reason tree has been created it can be associated with equipment here.
Downtime reasons are placed under two levels of categorisation. For example:
| Top Level | 2nd Level | Downtime Reason |
Electrical |
Power supply |
Power outage |
Spike |
||
Mechanical |
Motor |
Split bearings |
Overheating |
||
Rollers |
Broken |
|
Sticking |
||
Misaligned |
1. Select the Equipment & Downtime tab.
2. Click Reason Tree.
A list of the existing Reason Trees is displayed.

3. Click the add icon ( ) below the left-hand Reason
Trees pane.
The reason tree creation dialog opens.
4. Enter a name for the Reason Tree.
5. Click OK.
The new reason tree is added.
6. Drag and drop a Top Level Category from the Add Items panel on the right into the middle panel.

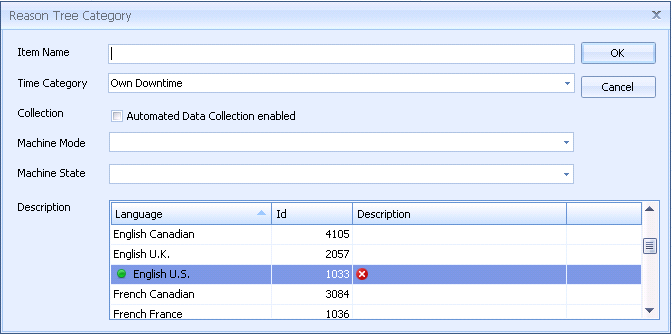
The following screen is shown:

7. Enter a name and description for the category.
8. Select a Time Category (the list is taken from the Time Model).
9. If you are using automated data collection to record downtime (see here) enable Automated Data Collection enabled. You will then need to specify the Machine Mode and Machine State to associate with the downtime reason.
If the downtime reason will be entered manually you don't need to specify a Machine Mode or Machine State.
10. Click OK.
The item is added to the Reason Tree.
11. You can now build the rest of the Reason Tree by dragging items from the right panel into the center panel, remembering that 2nd Level Categories must be added to Top Level Categories whereas Downtime Reasons must be added to 2nd Level Categories.
When you add a 2nd Level Category or Downtime Reason it will automatically be assigned the time category of the level above, unless it is modified.
It is also possible to use the add
icon ( ) below the right
Reason Trees panel to add
items.
12. Assign the reason tree to equipment in the Downtime tab for that equipment in the equipment hierarchy. For information on how to do this see here.