The Data Command Generator Utility is a simple command line tool that is used to resolve specific database discrepancies between the CM4D and Results databases (e.g., new db columns) following a version upgrade. This utility is installed with CM4D Server (.\CM4D\Database Utilities folder) and should only be run as directed by ATS support by users with a clear knowledge of CM4D databases and configuration.
- Missing Datasource IDs for some Routines - Following a version upgrade, searching for data in Peruse returns this warning message. If any of the Routines table in your Results database do not have a valid DataSourceId, run the Data Command Generator and choose option 1 - Routines Payload. This payload includes the relevant information from all Routines in all CM4D Managed Datasources (enabled to generate Results data) and is placed in the Results Command Queue to be picked up by the Results services for processing into the Results database. After running the utility, the DataSourceId column should contain valid GUIDs.
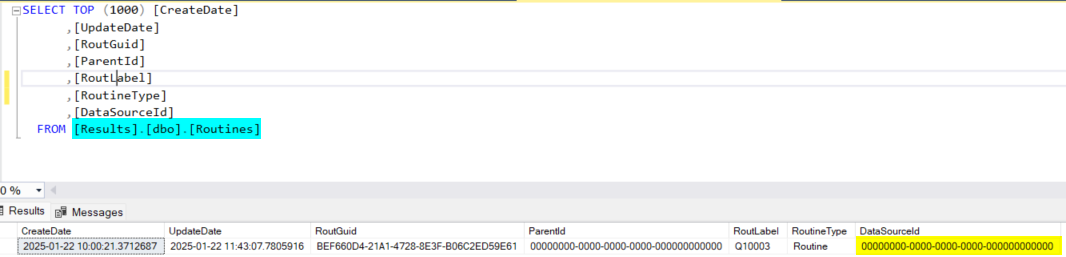
Results database Routines table before running Data Command Generator option 1 Routines Payload.
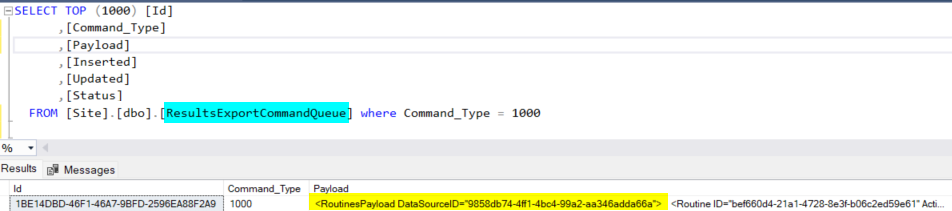
CM4D Site database Results Export Command Queue displaying the entry for Routines Payload.

Results database Routines table after Data Command Generator option 1 Routines Payload.
This utility is located in the following directory: .\Applied Tech Systems\CM4D\Database Utilities\Data Command Generator
Database Connection
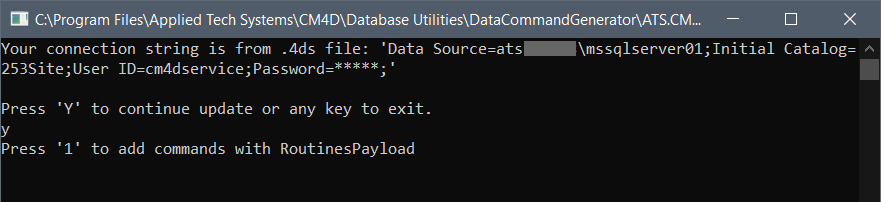
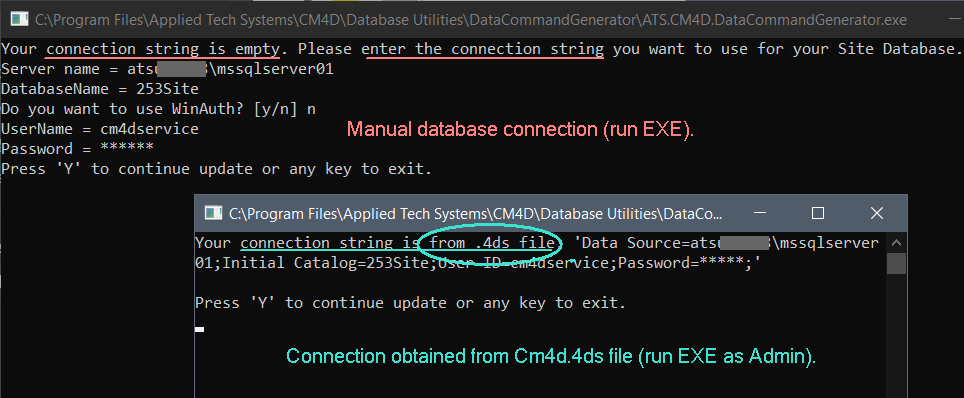
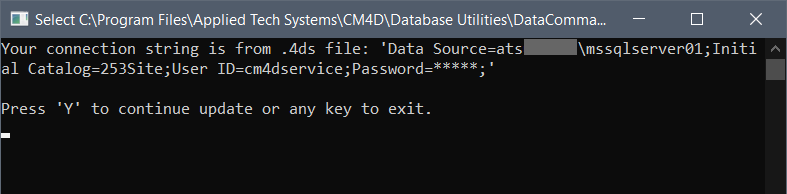
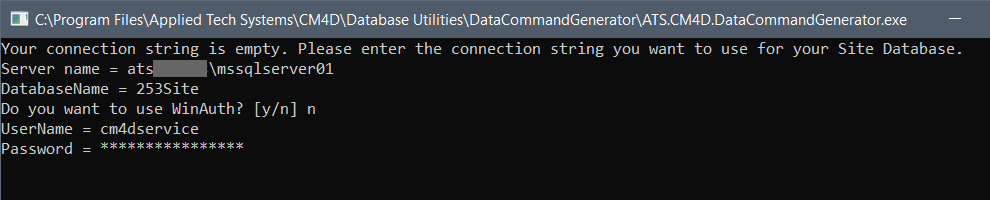
The Data Command Generator requires a Site connection to the SQL database. By default, this string is obtained from the Cm4d.4ds file (configured with DB Connect) registered with your CM4D installation. If this is not accessible, you are prompted to enter the string manually in the command window.
To ensure you have sufficient system privileges to run the database utilities, it is recommended executing the tool using 'Run as administrator'.
Connection information may also be entered as command line arguments when running the application via Command Prompt. See the topic Database Utilities for more information on how to Run Utility via Command Prompt Line Arguments.
Connect with Cm4d.4ds File
Before running Data Command Generator, run DB Connect and enter the Site database connection information as you normally would when connecting to an existing database. The authentication user must have sufficient privileges to create/modify databases in SQL Server.
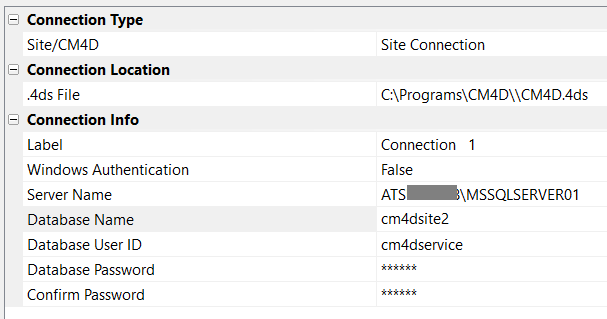
Run Data Command Generator (as Administrator) and follow the prompts to complete the required database task.
Connect with Manual Entry
If the Cm4d.4ds file cannot be accessed when Data Command Generator is run, you are prompted to type the CM4D Site database connection information one line at a time. Once you have entered all of the required connection details, press 'Y' to continue.
Database Task Options
Once the database connection is established, choose from the available options:
- 1 - Routines Payload: Executing this option triggers an export of the relevant information from all Routines in all CM4D Managed Datasources (enabled to generate Results data) which is placed in the Results Export Command Queue to be picked up by the Results services for processing into the Results database.