This guide contains the general steps for installing ATS Security and Configuration Manager, which is a pre-requisite to installing the CM4D Configuration plugin.
For the full ATS Security and Configuration Manager Help documentation, visit ATS-HELP.
Prepare for Installation
| 1. Download the ATS Security and Configuration Manager installer. | ||
|
2. Download and install the required .NET Core. This is only required if you plan to run the installer on a machine that does not have an internet connection. With an internet connection, the prerequisite is downloaded during installation. |
||
Microsoft .NET Core Hosting Bundle Runtime 2.1.7  |
||
Install ATS Security and Configuration Manager
- Run the ATS Security and Configuration Manager install executable (as Administrator).
- Click Next.
- Agree to the terms and conditions, then click Next.
- The default installation folder is C:\Program Files (x86)\Applied Tech Systems\ATS Configuration Manager\.
- To change the install folder, click Browse.
- Select the new folder and click Select Folder.
- Click Next.
- Enter the database information.
- Enter the Server Name, or leave the default (local) if installing on the local machine. The default (local) is automatically resolved to the computer name in the installed configuration files.
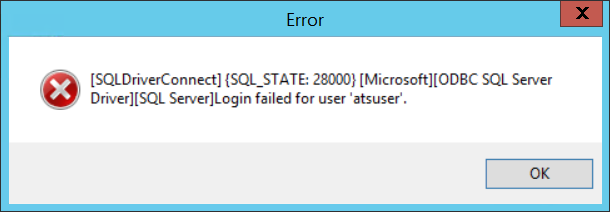
- Enter the user credentials to access the database. This user must have a sufficient privilege level to create and modify databases.
- To use the current Windows user account, leave the Trusted Connection box checked.
- To use a SQL login, uncheck the Trusted Connection box and enter a username and password.
- Set the database.
- To allow a new database to be created by the installer, enter a unique name.
- To choose an existing database, click the ellipses button and select a database from the dropdown menu.
- Click Test Sql Connection to confirm that the user connection is successful.
- If the connection is successful, click Next.
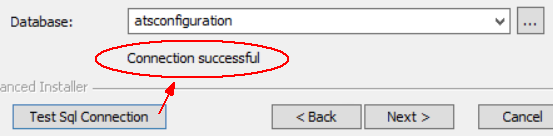
- If the connect fails, correct the user login and retest.
- If the connection is successful, click Next.
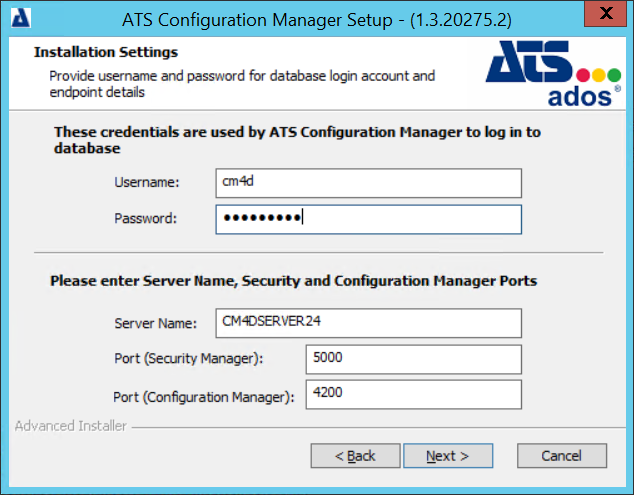
- Enter the database credentials that the Configuration Manager uses to access the database. This does not have to be the same as the database user entered in the previous page.
- To use SSL, check the box and enter the required information.
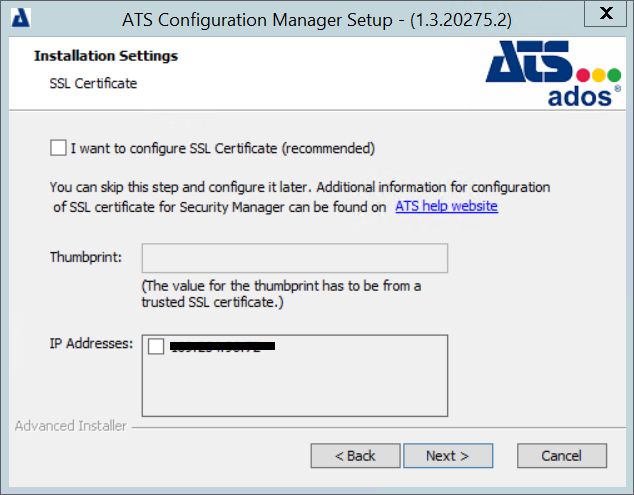
- Enter the SSL certificate Thumbprint.
- Select the IP Address.
- Click Next.
- Click Install.
Log in to ATS Security and Configuration Manager
- Browse to the Security Manager URL (https://servername:5000/).
- Log in using the default username (Admin) and password (Admin2018!).
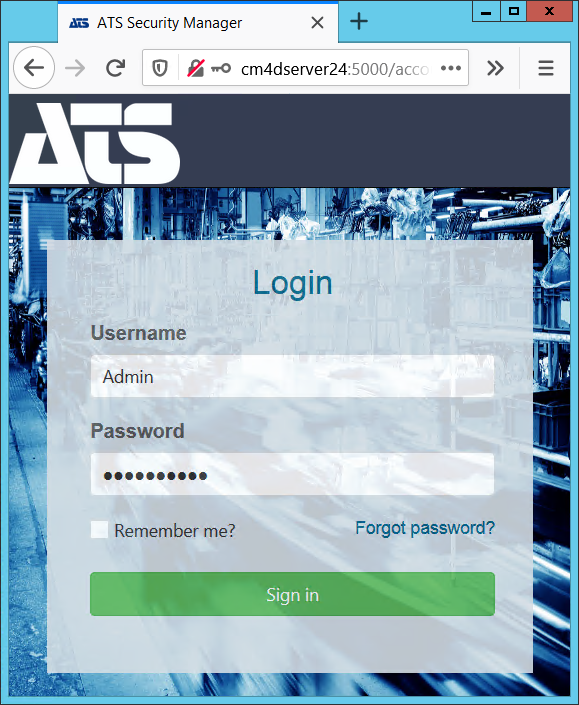
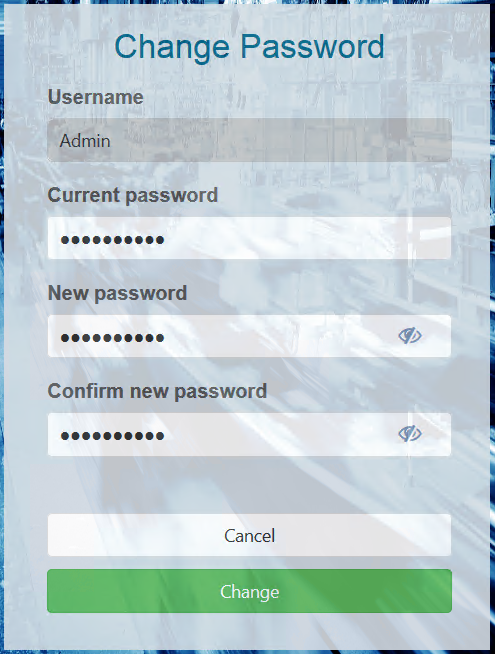
- When prompted, set a new password for the Admin user. Once logged in, you should also change the default Guest user password (Guest2018!).
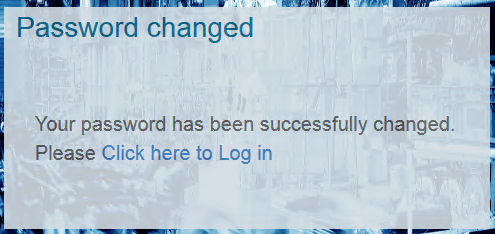
- Once the password has been successfully changed, click the link to log in with the Admin account.
- On the Security card, click Open.
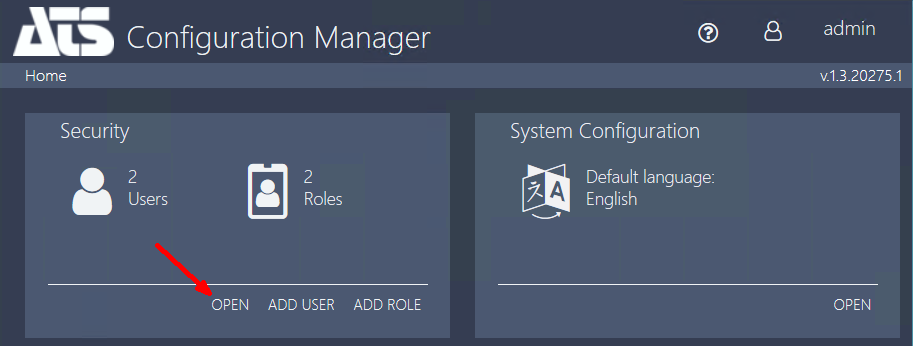
- Create users, roles, applications, etc.