View Categories are created in Cockpit but Views are created in View Composer.
What are View Categories?
View categories allow a large number of views to be organized into just a few view categories. If you assign the category to a button, this feature gives an inspector quick access to a set of related views, reducing clutter on the main inspection screen. Instead of listing several individual views separately, the inspector is shown just the one view category button. When the inspector clicks the button, the individual views are displayed.
View categories are different to view folders. View folders provide basic organization of views, allowing you to group related views into a single location and more easily manage a large number of views.
Creating view categories
Select the Products tab.
Click View in the Categories section.
The View Categories window opens. It consists of four panes.
Top-left: Categories
Top-right: Items
Bottom-left: Products
Bottom-right: Category References (the category/product combinations that the currently selected view is assigned to)
Click the add icon (![]() ).
).
Enter a description and code for the view category.
If required, an image can be assigned to the View Category. Click the change icon (![]() ). For further information see here.
). For further information see here.
Click OK.
The view category is added to the list.
Assigning views to categories
First of all, a product must be assigned to the view category.
Select the Products tab.
Click View in the Categories section.
A list of the existing view categories is displayed in the upper-left pane.
Drag and drop a product from the bottom-left pane onto a view category.
Views can now be assigned to the product.
Drag and drop a view the right-hand pane onto the product assigned to the view category.
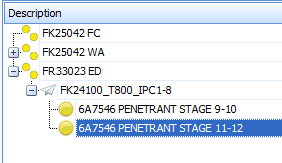
Drag and drop the views to re-order them. This will be the order in which they are presented to the operator.
The view category can now be assigned to a step in a station. For further information see here.
Ordering Views in Categories
The order in which views are displayed within the categories in Cockpit will be the order in which they are presented to the operator. There are a few different options for re-arranging them.
You can either drag and drop views into the required order or you can select a product or view category and click  . The views will then be placed in alphabetical order.
Removing Views from View Categories
Select the Products tab.
Click View in the Categories section.
A list of the existing view categories is displayed in the upper-left pane.
Expand the required category to display the products associated to it.
Expand the required product to display the views associated to it.
Select a view.
Click the Delete button ( ).
).
The view is disassociated from the view category.