What Are Scheduled Events?
Scheduled Events are executed on a specific schedule determined by the administrator. They are commonly used to send updates to recipients. For example, they could send a list of the top ten defects to an overhead display every five minutes.
All of the logic about the content of the output is contained in the script that is associated with the scheduled event. A schedule is assigned, which specifies the occurrence, frequency and duration of the event. Once a script and schedule have been assigned, the start date of the event and the recipients can be defined.
Create a Script
A script must be created before attempting to create a scheduled event.
- For more information, please review the Creating Scripts document.
Create a Schedule
A schedule must be defined before attempting to create a scheduled event.
Select the Services tab.
Click Schedules.
The Schedules window opens.
Click the Add button (![]() ).
).
The Schedule popup opens.
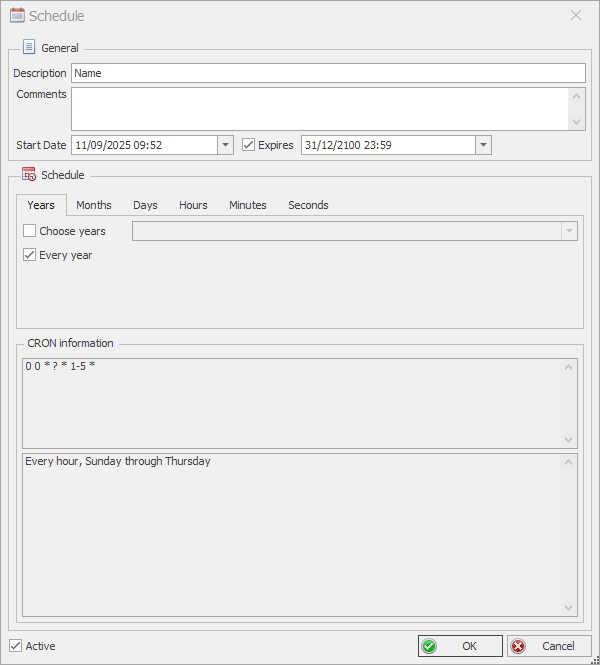
In the Description field, enter the description or name of the schedule.
Select the start date of the schedule in the Start Date field.
If the schedule is required to end on a particular date, place a tick in the Expiry checkbox. Enter a date in the date to the right.
The schedule can be defined using the following tabs: Years, Months, Days, Hours, Minutes, Seconds.
Select each tab as required to define the period the schedule will run.
For example, on the Days tab the user can configure the schedule using the following checkboxes:
- Choose Days: Runs on specific days i.e. Monday, Wednesday, Friday,
- Every Day: Runs on every day of the week.
- Monday to Friday: Runs on Monday through to Friday.
- Weekends: Runs on Saturday and Sunday.
A summary of the configured schedule is displayed in the CRON information section.
Press OK.
Create a Scheduled Event
Select the Services tab.
Click Scheduled Events.
The Scheduled Events window opens.
Click the Add button (![]() ).
).
The Create Scheduled Events popup opens.
In the Description field, enter the description or name of the scheduled event.
Select a Script from the drop-down list.
Only Scheduled Event scripts will be shown.
Select a Schedule from the drop-down list.
The Start and End date defined in the Schedule is displayed.
Place a tick in the Active checkbox.
Select the Recipients tab.
The upper-pane contains the recipients and groups that are already assigned to the event. The lower-pane contains the recipients and groups that can be assigned to the event.
In the lower-pane enable the checkboxes next to the recipients and groups that will be sent notifications when this event is triggered.
Drag and drop the groups or recipients from the lower pane to the upper pane.
The recipients and groups are assigned to the event.
Click OK.
The scheduled event is saved.