The following travel ticket types are available.
Built In Ticket Types
Basic

Basic with Barcoded Defect IDs
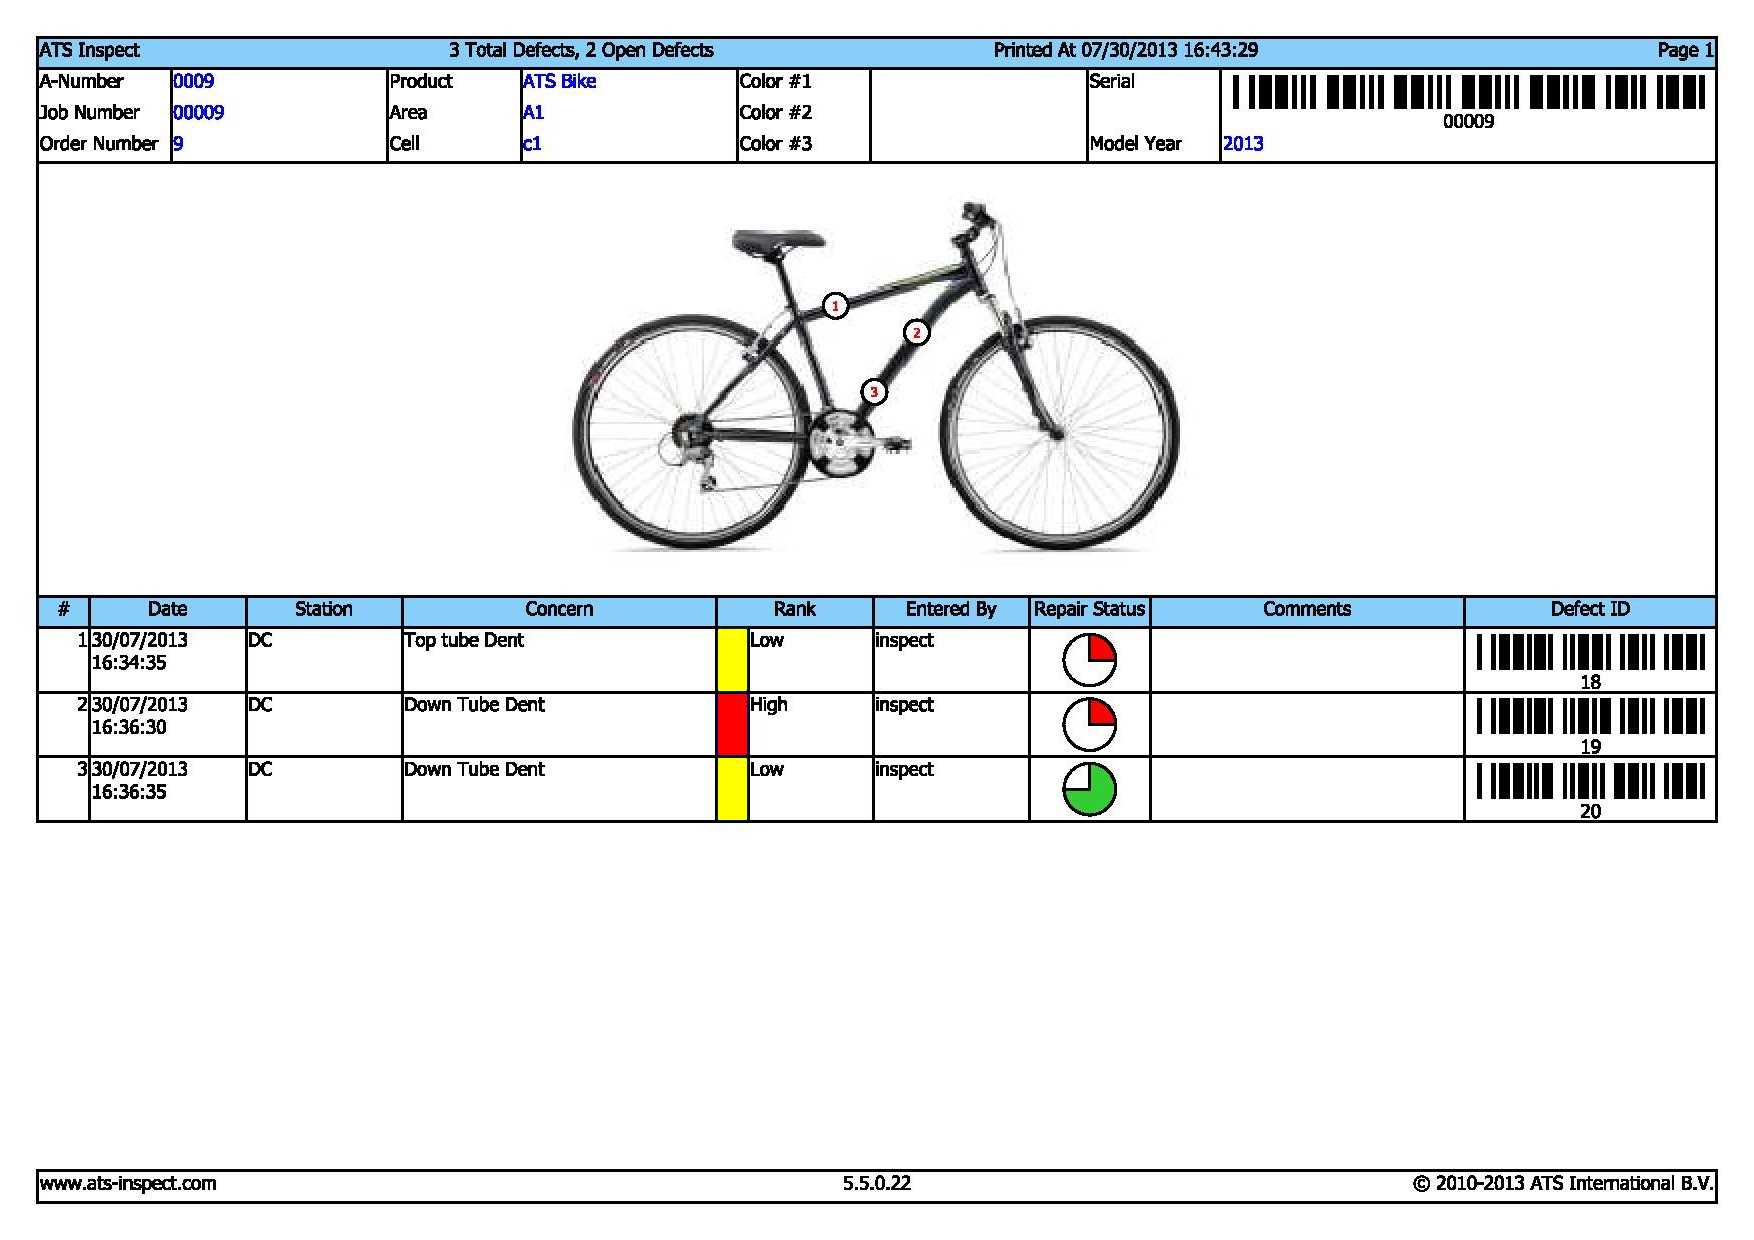
Basic with Barcoded Defect IDs, Checklist (Letter, Landscape)
.jpg)
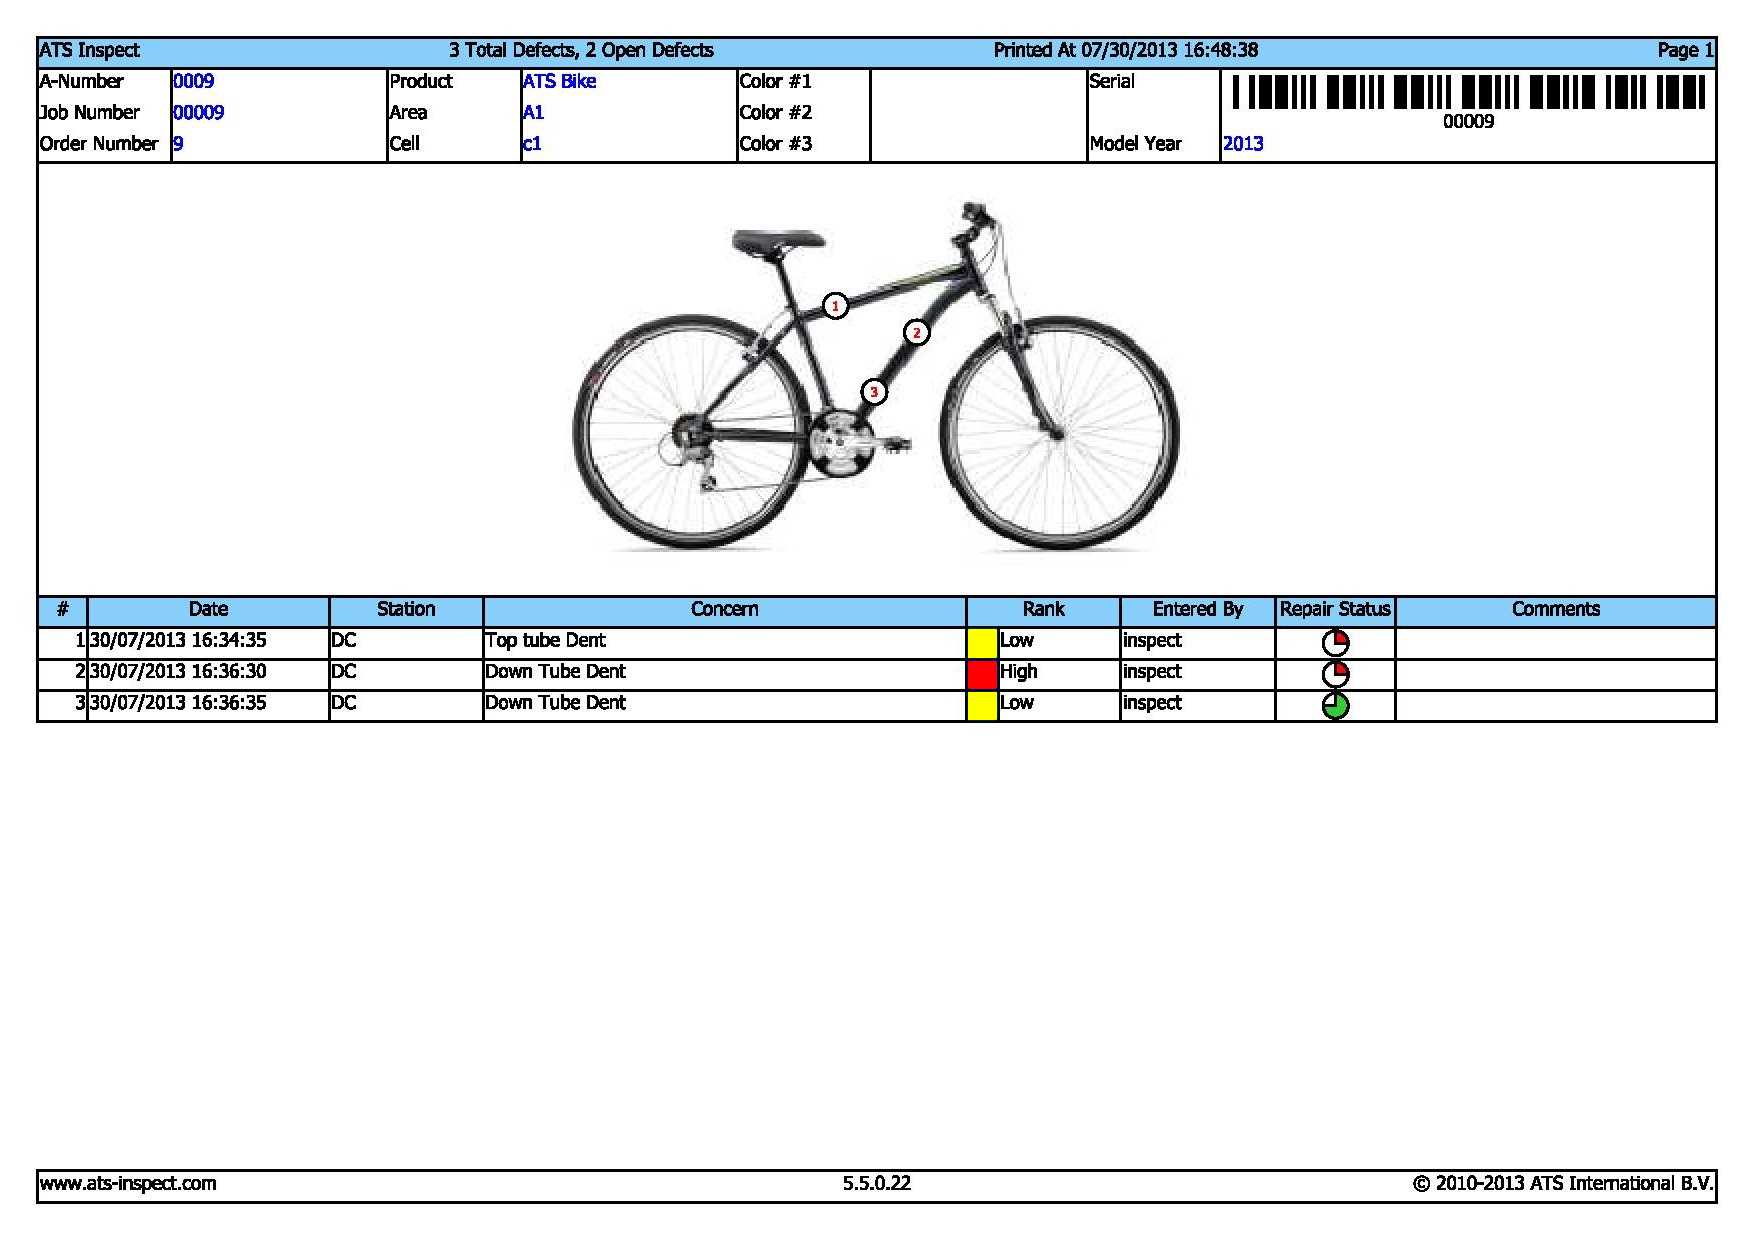
Basic with Barcoded Defect IDs, Checklist (Legal, Portrait)
.jpg)
Basic with Extended Defect Description
Custom Assembly and SSRS
Custom Assembly
Customers are able to design their own travel tickets and use the ATS.Inspect.Service.Travel.Tickets.dll located in C:\Program Files\Applied Tech Systems\Inspect\Services as a starting point.
Once the new DLL has been created for the custom travel ticket it must be stored in C:\Program Files\Applied Tech Systems\Inspect\Services.
To implement the travel ticket, follow the steps below:
Select the Services tab.
Click Ticket Types.
Press the Add  button.
The Travel Ticket Type Wizard is displayed. Press Next.
Select Custom Assembly.
Enter a name for the travel ticket in the Description field.
If the Travel Ticket is to be made active at a later date, uncheck the Active tick box. Press Next.
Enter the name of the custom travel ticket DLL in the Assembly field.
Enter the class name of the travel ticket in the Class Name field. Press Next.
Assembly Name and Class Name cannot be verified until runtime.
Assembly Name and Class Name are case-sensitive.
The assembly must be stored in the same folder as the Travel Service.
Press Finish.
The travel ticket will now appear in the list of Travel Ticket Types. If the Travel Ticket Control is used in Data collect, the new ticket will be available from the drop down list.
SSRS
SSRS reports can be configured as Travel tickets. An SSRS server needs to be configured in Cockpit. For further information, please click here.
To implement the travel ticket, follow the steps below:
Select the Services tab.
Click Ticket Types.
Press the Add button.
The Travel Ticket Type Wizard is displayed. Press Next.
Select SSRS.
Enter a name for the travel ticket in the Description field.
If the Travel Ticket is to be made active at a later date, uncheck the Active tick box. Press Next.
Select a report server from the Report Server drop down box. If a Report Server has not been configured, click the Add button.
The Edit button enables the user to edit existing Report Servers. The Refresh button refreshes the list of reports configured on the report server.
Select a report from the list in the Reports pane and press Next.
Default values cannot be defined on reports for the parameters you wish to include in the Travel Ticket. For example, The SUH (900) report has “?????” in the Identifier field. This needs to be removed as the default value because it will overwrite the runtime value configured in Cockpit for the custom ticket. For further information on how to customise reports, please visit the Microsoft website by clicking here.
SSRS reports that are run as Travel Tickets are a bit slower than native tickets.
Enter any required values for the report in the Parameters pane and press Next.
Press Finish.