Select the Plants tab.
Click Stations.
A list of the existing stations is displayed.
Select Data Collect from the drop-down list above the right-hand pane.
If you are looking for existing Data Collect stations you can also filter using the Area drop-down list.
Click the add icon (![]() ) below the right-hand pane.
) below the right-hand pane.
The station creation dialog opens.
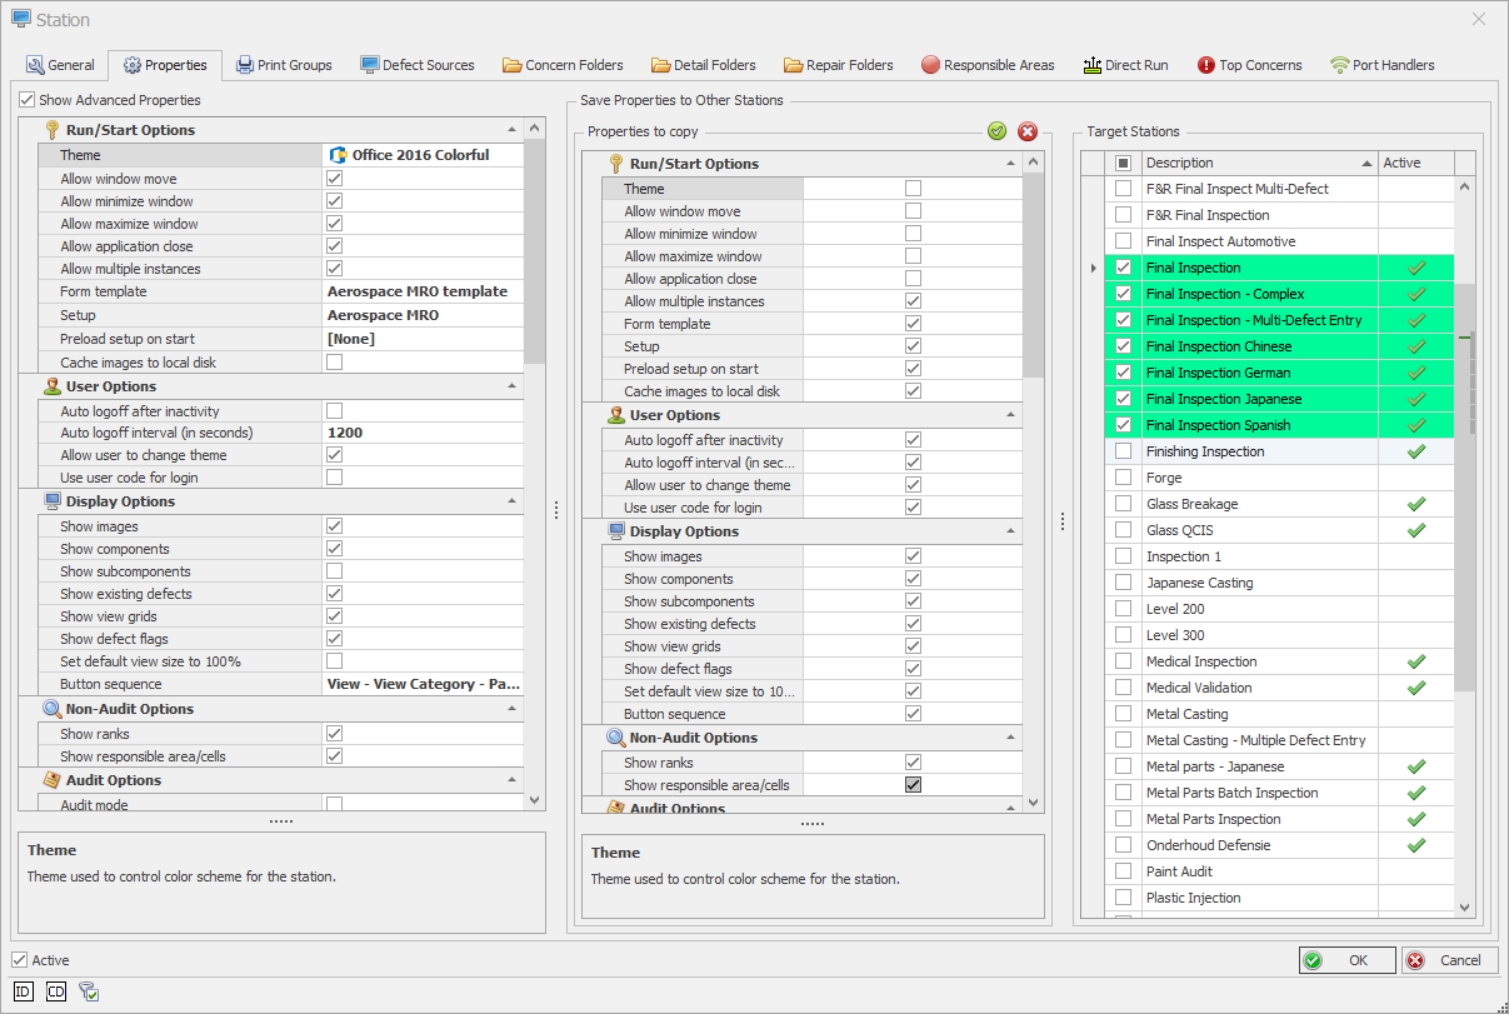
Select the Properties tab.
Use the check boxes and fields on this tab to define the settings for this station.
Enable Show Advanced Properties to view all properties. If needed, you can change which properties are viewed as advanced.
|
Run/Start Options |
|
|
Theme |
Color scheme for the station. |
|
Allow window move |
Allow operator to move the Data Collect window. |
|
Allow minimize window |
Allow operator to minimise the Data Collect window. |
|
Allow maximize window |
Allow operator to maximise the Data Collect window. |
|
Allow application close |
Allow operator to close the application by clicking on the application close icon in the top-right corner. |
|
Allow multiple instances |
Allow multiple instances of Data Collect to run at the same time on the same PC. |
|
Form template |
Select the template created in Form Composer. |
|
Setup |
Choose an attribute setup. The setup controls the inspection content available on the station. For further information click here. |
|
Preload setup on start |
Preload entire setup at program start. For further information click here. |
|
Cache images to local disk |
Cache view images to local disk. For further information click here. |
|
User Options |
|
|
Auto logoff after inactivity |
Should the user be automatically logged out after a period of inactivity? |
|
Auto logoff interval (in seconds) |
Inactivity period in seconds. |
|
Allow user to change theme |
Allow the user to change the theme. |
|
Use User Code for login |
Allows user to login using a user code. |
|
Display Options |
|
|
Show images |
Display images. |
|
Show components |
Display components. |
|
Show subcomponents |
Display subcomponents. They will appear on top of the component. |
|
Show existing defects |
Display defects entered before the current unit pass. |
|
Show view grids |
Display any view grids for views. |
|
Show defect flags |
Display defect flags if checked, simple markers if unchecked. |
|
Set default view size to 100% |
Display views at 100% of normal size or size to fit. |
|
Button sequence |
Determines order of view, view category and part category buttons. |
|
Non-Audit Options |
|
|
Show Ranks |
Show rank page in Defect control. |
|
Show resp area/cells during defect entry |
Show responsible area/cell page in Defect control. |
|
Show resp area/cells during repair entry |
Show responsible area/cell page in Repair control. |
|
|
|
|
Audit mode |
Is Data Collect operating as an Audit station. |
|
Use rule codes over descriptions. |
Display rule codes instead of descriptions. |
|
Use reference codes over descriptions. |
Display reference codes instead of descriptions. |
|
Action Options |
|
|
Use defect sources |
Limit the defects shown on a single station to defects entered in a station listed on the Defect Sources tab. |
|
Use responsible areas |
Limit the display of responsible areas to areas associated with this station. |
|
Use concern folders |
Limit the concerns shown for a part to those belonging to folders assigned on the Concern Folders Tab. |
|
Use detail folders |
Limit details to those contained in the folders associated with this station. |
|
Use repair folders |
Limit repair types to those contained in the folders associated with this station. |
|
Use print groups |
User is prompted to select a particular Print Group (see here) when printing a travel ticket. |
|
Alert mode |
When should the alert messages (if any) appear? Manually (by clicking on the Show Alerts button) or at the beginning of the inspection? |
|
Focused control on unit switch |
Specify the screen automatically presented to the user when switching units. |
|
Last unit being inspected at station automatically loads when a user logs in? |
|
|
Default action mode |
Default mode when Data Collect starts - Enter Defect, Repair Defect or Remove Defect. |
|
Defect/Repair Options |
|
| Automatically select the responsible area/cell based upon the concern. (Does not apply to Audit Mode). | |
|
Keep responsible area/cell during multiple defect repair |
Keep the default responsible area/cell (from the defect) when repairing multiple defects at once. |
|
Force defect comments |
Force the user to enter comments when entering a defect. This option will not work on the Multiple-Defect Entry screen. |
|
Force defect detail |
When detail(s) are available for a defect, force the user to select one. |
|
Force repair comments |
Force the user to enter comments when entering a repair. This option will not work on the Multiple-Defect Entry screen. |
|
Force the user to enter length of repair time when entering a repair. |
|
|
Default defect status filter |
Default defect status filter state when starting collector. |
|
Checklist Options |
|
|
Randomize checklist answers |
Answers to questions will appear in a random order to ensure the operator reads the answers before selecting. |
|
Use validation sounds |
Play sounds to indicate a correct or incorrect answer. |
|
Default checklist question status filter |
Filter the questions that are displayed to the operator. Select Show All Questions, Show Unanswered Questions or Wrongly Answered Questions. |
|
Image Acquisition |
|
|
Path to shared images |
Select the folder from which defect images can be retrieved. For further details on image acquisition see here. |
|
|
|
|
Common |
These properties relate to Current Unit Defects Grid, Custom Defects Grid, Generic Grid and Last Defect Grid controls added in Form Composer. |
|
Refresh interval (in seconds) |
How often should this information be refreshed? |
|
Max rows |
The maximum number of rows that any spreadsheet control will retrieve from the database. |
|
Defects |
These properties relate to Top Concerns Grid and Top Defects Grid controls added in Form Composer. |
|
Time interval |
What unit of time should be used for the time interval below? |
|
Max intervals |
The amount of time to look backwards for defects. |
|
Max rows |
The maximum number of rows that any spreadsheet control will retrieve from the database. |
|
Refresh interval (in seconds) |
How often should this information be refreshed? |
|
Units |
These properties relate to the Unit Color Grid control added in Form Composer. |
|
Refresh interval (in seconds) |
How often should this information be refreshed? |
|
The maximum number of rows (units) that any spreadsheet control will retrieve from the database. The list of units displayed will be 50% above and 50% below the max rows value of the current unit. I.e. Max rows = 25. Unit list will display 12 units before and after current unit. |
|
|
Override tracking group |
Override tracking group. Use this to override the default tracking point associated with the station. It allows for aggregation of data from more than one tracking point. |
|
Travel Service |
|
|
Server |
Network machine name for travel service. |
|
Default printer |
The default printer for travel tickets. |
|
The printers that can be selected when clicking Select Printer. The printers listed are the ones available to the travel service. |
|
|
Print mode |
Which items should be printed on the travel ticket? PrintImages PrintRepairedDefects PrintOpenDefects ShowDefectFlags Please note that PrintImages will only print images when used in conjunction with PrintRepairedDefects and PrintOpenDefects. |
|
Ticket type |
The type of travel ticket to be printed. |
|
Checklist print mode |
Choose to print all checklist categories or just categories associated to the station. |
|
Unit Info |
|
|
Inspection type |
Batch or Serial station? |
|
Where should Data Collect retrieve the next unit from? Get next unit from queue: Next unit will be loaded from queue. Prompt: On a serial station the focus will switch to the Goto Unit control. On a batch station a batch form will open. End inspection: Ends inspection and clears unit from screen. |
|
|
Default Identifier Type |
Set the default identity type for the GoToUnit button. I.e. Serial, Identity 1 etc. |
|
Tracking Options |
|
|
Tracking point |
Select the tracking point to use with the station. |
|
Select when a tracking pass should be used. When a station is in Audit mode this property will always work as Insert pass only if none exists. |
Save properties to other stations
The properties for a station can be copied to other stations.
Tick or untick the required boxes in the Properties to copy pane.
Tick the stations the selected properties should be copied to in the Target Stations pane.
Press OK.