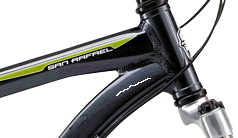
Although there are several reasons an image might be attached, the most common use is to attach a photo of the actual defect as it is entered.
An image can either be downloaded from a digital camera or from a folder location specified for the station.
In this instance we will attach the following photo of a scratch to a defect:

First the image above must be stored somewhere so that it can be used in the tutorial. Right-click on the image and store it at the following location:
<Inspect installation path>\Inspect\Documentation\Temp
This is the location specified for image storage during the Cockpit tutorial (see here).
Back in Data Collect, click Next Unit.
Select ATS Bike and click OK.
Add a defect in the location shown in the image above.
Enter the following defect parameters:
Concern: Scratch
Detail: >7mm
Rank: Major
Responsible Area: N.A.
Responsible Cell: N.A.
Click the Attach Image button ( ).
).
The lower pane contains the images that are available to be attached to the defect. The upper pane contains the images that are already attached to the defect.
Drag and drop Downtube scratch.gif from the lower pane to the upper pane.
The image is associated to the defect.
Click  . The defect is applied to the unit.