The next step in configuring concerns is to define ranks. A rank is the severity of a quality concern. You can provide a numeric value to ranks (such as "1" for a minor rank) as well as associate a certain color with a specific rank (such as red for a "critical" ranking).
Ranks must be assigned to at least one group.
The Ranks for this tutorial will be:
|
Description |
Value |
Color |
|
Minor |
1 |
Yellow |
|
Major |
5 |
Orange |
|
Critical |
10 |
Red |
Select the Attribute tab.
Click Ranks.
A list of the existing ranks and rank groups is displayed.
Click the add icon (![]() ) below the right-hand pane.
) below the right-hand pane.
The rank creation dialog opens.
Enter Minor in the description field and Minor in the code field.
The description is the seriousness of the rank and should accurately reflect the point value that you assign to it.
Select yellow as the Color. This color will be shown as a strip on the right side of the defect flag after a defect is entered.
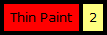
For example, on the flag below, the color strip is yellow, indicating a low rank. The number simply indicates that it was the second defect to be added to the unit.
The color on the left indicates the status. Red indicates that it needs to be repaired and green indicates that it has been repaired. The example below has not been repaired.
In the Point Value field, enter 1. A higher number indicates a more important (serious) ranking. This point value provides critical data for reporting which uses a user to view reports for only specific ranks.
Click OK.
The rank is added to the list.
Repeat the steps for the other two ranks.
Ranks must be assigned to at least one rank group.
Create a Rank Group
Rank Groups allow ranks to be grouped by area of use. For example, the Paint department may include ranks such as Spot Repair or Touch Up, while the Chassis department may use ranks such as Hoist Minor or Electrical. Creating rank groups keeps an inspector from viewing unnecessary ranks at an inspection station.
In this tutorial we will just have one group for Bike Ranks.
Click the add icon (![]() ) below the left-hand pane.
) below the left-hand pane.
The Rank Group creation dialog opens:
Enter Bike Ranks in the description field.
Click OK.
The group is added to the list.
Drag and drop the ranks created above from the right-hand pane onto the Bike Ranks group in the left-hand pane to associate them.