After adding the shifts, you can create shift schedules to specify weekly schedules for different areas of your plant. An individual schedule defines when each shift begins and ends, whether the schedule ever expires, and which day defects should be associated with (for shifts that pass through midnight).
Shifts that cross midnight
Let's assume that a night shift begins at 6:00 PM and runs to 6:00 AM. This means that it crosses two different calendar days. Defects being entered on that single shift are occurring on two different calendar dates.
You can specify which day the defects in that shift are assigned to:
All assigned to the first day.
All assigned to the second day.
Each assigned to the day on which it actually occurred (very rarely done)
Create a Shift Schedule
We will create a single shift schedule in this tutorial.
Select the Plants tab.
Click Schedules.
Click the add button (![]() ).
).
The shift schedule creation window opens.
General Settings
Enter Master Schedule as a description.
The Begin Date is set in the past by default. We can leave it as that.
Ensure Never Expires is enabled.
Enable the checkboxes for all the Areas created in the tutorial. This means that the schedule will apply to all these areas.
Add Shift Times
Select the Shift Times tab.
Use the Day of Week drop-down list to select Sunday.
Click the edit button.
The Modify Shift Times dialog opens.
Click the add button (![]() ) to add a shift time to the selected day.
) to add a shift time to the selected day.
The Shift Segment dialog opens.
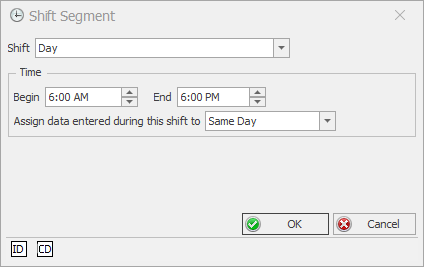
Select the Day shift.
Specify beginning time as 06:00 and end time as 18:00.
Select Same Day in the Assign data entered during this shift to field.
Click OK.
The shift segment is added to the list.
Create two further entries that will be assigned to the Night shift. The first will go from 18:00 to 00:00 and the second will go from 00:00 to 06:00. Ensure that the segment from 00:00 to 06:00 assigns defects to the Previous day. This will mean that all defects recorded on the night shift will be recorded on the same day.
Click Done.
The shifts are displayed in the chart.
Copy Shift Plan to Other Days
Click the Select All button ( ) to enable all of the days of the week.
Click the confirmation button ( ) to confirm.
The shift pattern is copied to those days.
Click OK.
The shift schedule is saved.