View time periods
Time periods are defined on a central level in ATS Reporting for all report instances. When time periods are enabled initially for a report all defined time periods are automatically assigned. Later time periods can be deleted or added from the "global" time periods to a particular report from the Time periods tab in the report details blade.
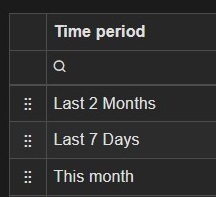
View time periods in the Time periods grid
To load the Time periods grid, click on the Time periods menu option in the main ATS Reporting menu.
The Time periods grid shows information for the configured time periods in two columns: Time period and Description.
Time period names are multilingual, meaning that, depending on the language you have selected from your header menu, if a translation for a specific time period is available, it will be shown in that language; otherwise, the default translation is in English.
Each row in the Time periods grid has a context menu which you can open by clicking on the context menu icon (...). There are two context menu options available: Open and Delete.
The Time Periods grid can be reordered by dragging a time period to a different position.
View Time period details in the Time period details blade
Selecting the Open option from the context menu loads the Time period details blade on the right. The Time period details blade is simple (no tabs). Here you can see configuration details for the selected time period as well as an example time period.
Edit time periods
Each row in the Time periods grid has a context menu which you can open by clicking on the context menu icon (...). The context menu options available are:
Open
Delete
Delete a time period
To delete a time period:
Select the Delete option from the context menu.
Click on the Yes button in the confirmation pop-up window.
A success notification appears once the delete operation is successfully completed. The deleted time period is no longer visible in the grid.
Edit time period from Time period details blade
Select the Open option from the context menu. The Time period details blade is loaded on the right. The Time period details blade is simple (no tabs). Here you can see configuration details about the Time period:
Display name: The value that will appear for selection in the Time period select list. There is multilingual support.
Description: A description for the time period.
Time span: Select from a list of the following options: Hour, Day, Week, Month, Quarter, Year.
Duration: Enter the duration of the selected time span.
Offset: Offset the current or the previous time span ( for example: this week includes days of this week, last week does not include days of this week).
Week starts on: This option becomes available when Week is selected in the Time span field. Select from a list of the following options: Monday, Sunday.
Starts at beginning of time span: Place a tick in the check box to start the time period a the beginning of the time span. This option is unavailable when Quarter is selected in the Time span field.
Once values have been set in the previous fields a Check example period section is displayed
Day of activation: The date that the time period should be activated, which is prefilled with today's date by default. Changing the activation date will update the the example listed below.
Preview of time period: An example is displayed using the values entered in the previous fields.
Steps to edit a time period:
Make the desired changes in details blade.
The Save option becomes enabled.
Click on Save and Save and close options become enabled.
When clicking the Save option all entered data is saved and blade remains open.
When clicking the Save and close option all the entered data is saved, the blade is closed, and the user is redirected to the All time periods blade.
A success notification appears.
Add time periods
Time periods are added through the New time period blade.
To open the New time period blade, click on the Add button in the top right corner above the Time periods grid.
To add a new time period:
Provide Display name (this must be unique). The text field is adapted so that a multilingual Display name can be defined. This also must be unique per language.
Provide a description for the new time period. This field is optional.
Provide the configuration details, see examples below.
Click on Add and Add and edit options become enabled.
When clicking the Add option all the entered data is saved, the blade is closed, and the user is redirected to the All time periods blade.
When clicking the Add and edit option all entered data is saved and the blade remains open.
A success notification appears.
At the bottom of the form there is an example section where you can see the From and To dates for the selected time period.
By default the example period is generated for the current date.
There is a possibility to select a Day of activation for the time period, in which case the From and To dates will be adjusted accordingly based on the selection.
Examples
Example 1
Time period example: Last week - from start of week till end of week (Monday to Sunday)Time span: Week
Week starts on: Monday
Duration: 1
Offset: Previous
Starts at beginning of time span: checked
Example 2
Time period example: Last week - from today (example Tuesday) last week till yesterday (i.e. Monday) this week
Time span: Week
Week starts on: Monday
Duration: 1
Offset: Previous
Starts at beginning of time span: not checked