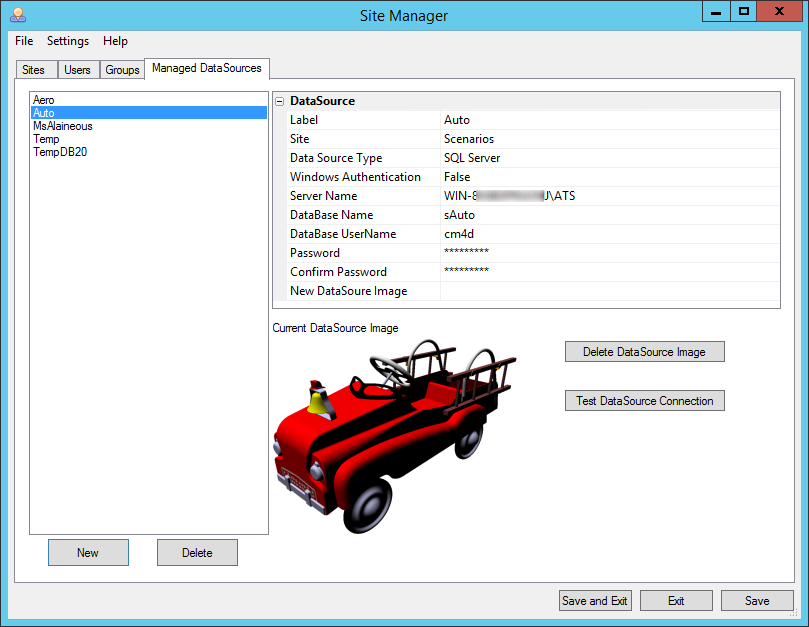
With the Managed DataSources tab of Site Manager, you can add and delete Managed DataSources, edit information, and link an image to them. Managed DataSources contain collections of routines, which, in turn, are collections of features and samples. Managed DataSources belong to Sites. A Managed DataSource cannot belong to more than one site.
Information about a DataSource can be viewed in the grid to the right of the DataSource list by selecting a DataSource label.
To add a new Managed DataSource to the Site:
1. Click New to add a DataSource
2. A default new DataSource will appear called "New DataSource 1" along with a grid of DataSource Information on the right.
3. In the Grid, enter the following information:
a. Label: Enter a label for the DataSource
b. Site: Select the Site you want to add the Managed DataSource to from the dropdown menu.
Keep in mind that once a DataSource is managed by a Site, it cannot be added to another Site.
c. DataSource Type: Click the dropdown menu in the Type field and select either Oracle or SQL Server.

i. If you are using SQL Server:
(1) Windows Authentication: If you are using Windows Authentication to allow users to access the database, select True from the dropdown menu.
(2) Server Name: Enter the server or service name where your database lives.
(3) DataBase Name: Enter the label of the database or schema
(4) New DataSource Image: This option is obsolete.
(5) Continue to step 4.
ii. If you are using Oracle:
(1) Server Name: Enter the server or service name, then enter the schema or database name.
(2) DataBase Name: Enter the label of the database or schema
(3) DataBase UserName: Enter the UserID for the database
(4) Password: Enter the password for the database
(5) Confirm Password: Re-enter the password for the database
(6) New DataSource Image: If you would like to assign an image to the datasource, click the browse button and locate the image you wish to associate to the database.
(7) Continue to step 4.
4. Test DataSource Connection: Once you have entered all required information, you can test the connection to the DataSource to verify that your information has been entered correctly using the Test DataSource Connection button located beneath the Delete DataSource Image button.
5. Click Save to apply and save your settings.
6. To add another Managed DataSource to the Site, repeat Steps 1-5.
To modify an existing Managed DataSource:
1. Select a DataSource to open the corresponding DataSource Information grid on the right side of the interface.
2. After you have made your changes to the DataSource, click Save.
The Current DataSource Image region shows the image that is currently associated with the selected DataSource. If no image is assigned, this region will remain blank.
To remove the image currently associated to the selected DataSource, click the Delete DataSource Image button. Later, if you want to re-assign an image to that DataSource, you can do so using the New DataSource Image field in the DataSource Information grid.
To delete a Managed DataSource, select the DataSource name from the left-hand list and click the Delete button on the bottom left of the interface.