
Before CM4D Server can be installed, there is come configuration that must be completed in order for the CM4D products to function properly.
· Web Server (IIS) with ASP, ASP.NET and Windows Authentication
· CM4D Service User as part of the Administrators group
· Windows Firewall Rule to open a port required by the CM4D Scheduler services.
This walkthrough is based on installing CM4D Enterprise 64-bit on Windows Server 2008 R2. The following instructions are only a simple example and your local system Administrator should always be consulted.
Before the CM4D Enterprise installer can be run, you must have a Web Server (IIS) with specific Roles installed on your server.
See the topic System Requirements for more information.
1. Select Start > Administrative Tools > Server Manager.
2. Scroll down to the section Roles Summary.
a. Click Add Roles.
b. Click Next.
c. Select Web Server (IIS) and click Next.
d. Click Next.
e. Select Web Server > Application Development > ASP.
i. Click Add Required Role Services.
f. Select Web Server > Application Development > ASP.NET.
i. Click Add Required Role Services.
g. Select Web Server > Security > Windows Authentication.
h. Click Next.
i. Click Install.
j. When you get the message Installation Successful, click Close.
3. Close Server Manager.
Next, you need to create a User that will be used to run the CM4D Services and CM4D Web Applications.
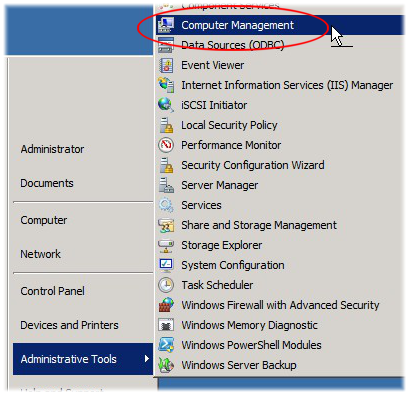
1. Select Start > Administrative Tools > Computer Management.
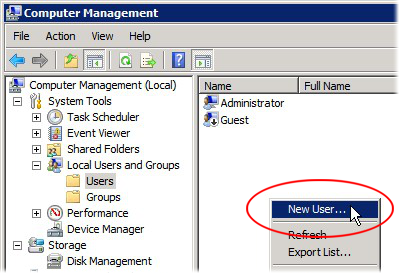
2. Select Computer Management > System Tools > Local Users and Groups > Users.
3. Right-click in the Users window and select New User.
a. In the New User dialog:
i. Enter a User name (e.g., CM4D_Service).
ii. Enter the Full name (e.g., CM4D Service User).
iii. Enter a Description (e.g., CM4D Service User).
iv. Enter a strong Password and Confirm Password.
v. Uncheck User must change password at next logon.
vi. Check User cannot change password.
vii. Check Password never expires.
viii. Click Create.
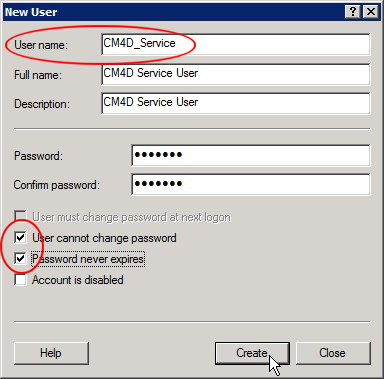
ix. Click Close.
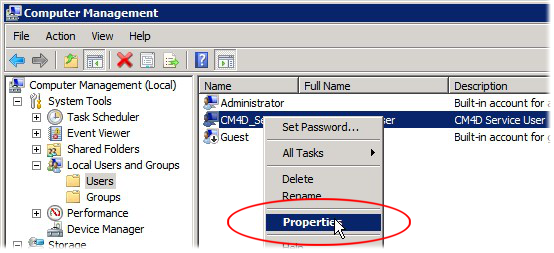
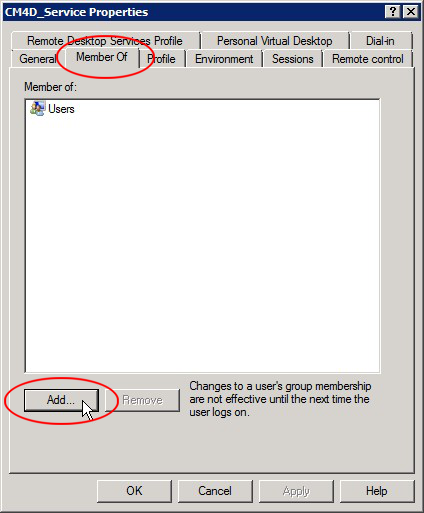
4. Right-click on the user you just created (e.g., CM4D_Service) and select Properties.
a. Select the Member Of tab.
b. Click Add.
i. Enter the object name for your administrator account (e.g., Administrators) and click Check Names.
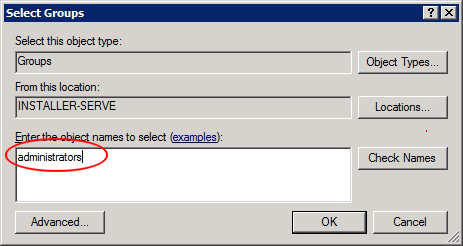
ii. If the correct account is found, click OK.
5. Close Computer Management.
Once the Web Server is installed and your Services user has been created, continue the installation process by running the CM4D Enterprise Installer.
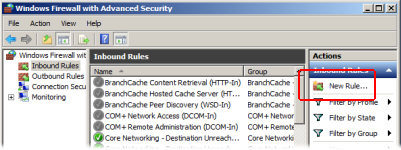
1. Select Start>Administrative Tools>Windows Firewall with Advanced Security.
2. Select Inbound Rules.
3. Click New Rule.
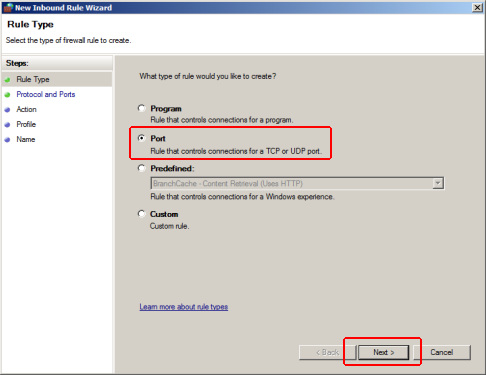
4. In the New Inbound Rule Wizard dialog, select Port and click Next.
5. Select TCP and Specific local ports.
6. Enter the value 36057 in the field.
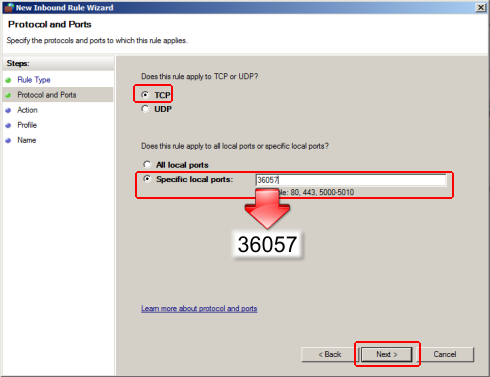
7. Click Next.
8. Select Allow the connection and click Next.
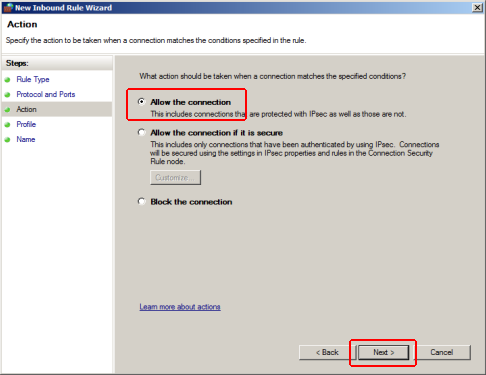
9. Clear the Public check box and click Next.
10. Enter a Name for the rule. In this example, the rule is labeled 'SQL Server TCP'.
11. You can enter a Description, but it is not required.
12. Click Finish.
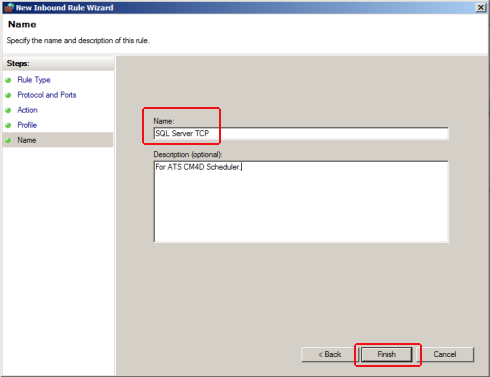
13. The new rule now appears in the list of Inbound Rules.

14. Close the Windows Firewall dialog.