Site Manager - Managed DataSources
The Managed DataSources tab of Site Manager is where you can add and delete Managed DataSources, edit connection information, test connections and synchronize nominal data with the Results database. Managed DataSources contain collections of routines, which, in turn, are collections of features and samples. Managed DataSources belong to Sites. A Managed DataSource cannot belong to more than one site.
Information about a DataSource can be viewed in the grid to the right of the DataSource list by selecting a DataSource label.
|
|
|
|
Delete |
Removes the selected Managed DataSource from the list. |
|
Delete DataSource Image |
Deletes the Current DataSource Image for the database. |
|
Export Job Count |
Displays the number of items in the Export Queue of the Site database. This count updates periodically as jobs are processed through the queue. |
|
Export to Results Database |
Sends all Nominal data (Routines and Features) from the selected Managed database to the Results database. See here for details. |
|
Exit |
Closes the dialog without saving any changes. |
|
New |
Create a new Managed DataSource. |
|
Save |
Saves any changes. |
|
Save and Exit |
Saves any changes and closes the dialog. |
|
Test DataSource Connection |
Validates the selected Managed DataSource connection. Once you have entered all required information, you can test the connection to the DataSource to verify that your information has been entered correctly using the Test DataSource Connection button located beneath the Delete DataSource Image button. |
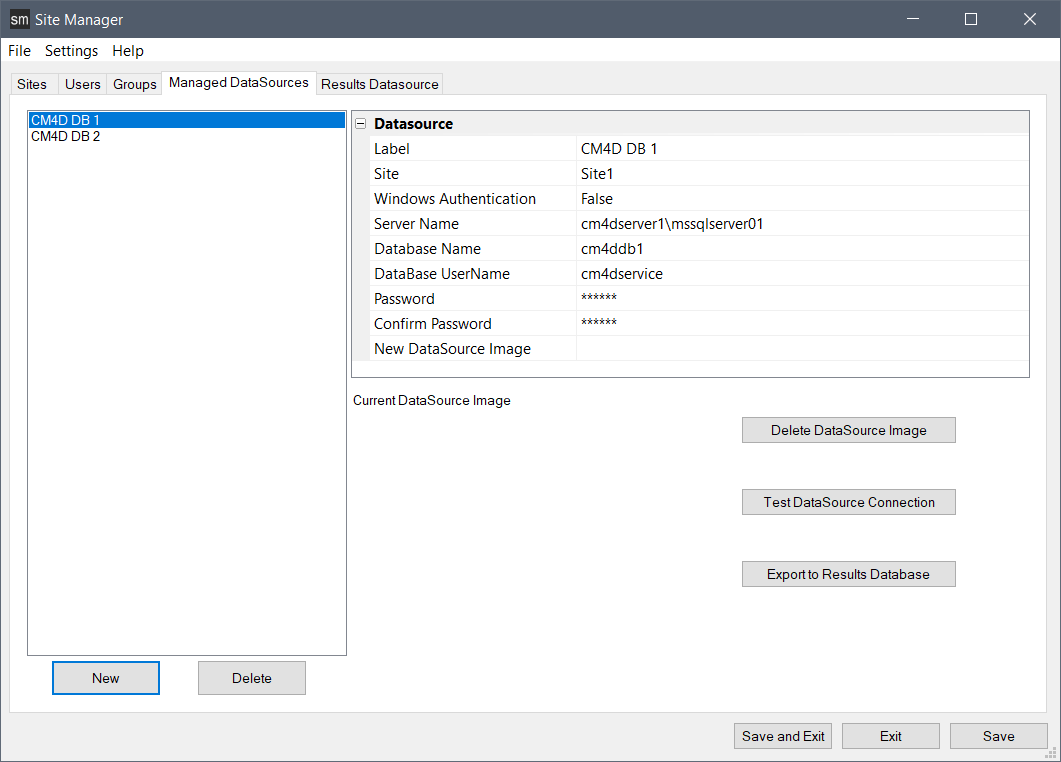
DataSource Properties
The properties of the DataSource defines the connection to the CM4D database.
|
Property |
Description |
|
Label |
The label of the DataSource. This is the label displayed in various areas of CM4D, such as database selection dialogs. This label can be the same as the Database name, but it is not required to match in most cases. The only instance where this must be the same is when the database is used with the Drop Files to Load Data functionality in Classic. |
|
Site |
The Site that manages the DataSource. Most installations use a single Site. Once a DataSource is managed by a Site, it cannot be added to another Site. |
|
Windows Authentication |
Determines the connection security used to connect to the database. This can be either Windows Authentication (True) or SQL Server Authentication (False). |
|
Server Name |
The name of the database server. |
|
Database Name |
The name of the CM4D database. |
|
DataBase UserName |
If using SQL Server Authentication (Windows Authentication = False), this is the SQL login user name that will be used to access the database. |
|
Password |
The SQL login user password. |
|
Confirm Password |
Re-enter the SQL user password. |
|
New DataSource Image |
Select an image to assign to the database, to visually identify the Managed DataSource. To see the image in the Current DataSource Image area, click Save. Once it is saved, the image is stored in the database and the original file path is deleted. |
Create a New Managed DataSource
To add a new Managed DataSource to the Site:
Click New to add a DataSource
A default new DataSource will appear called "New DataSource 1" along with a grid of DataSource Information on the right.
In the Grid, enter the following information:
Label: Enter a label for the DataSource
Site: Select the Site you want to add the Managed DataSource to from the dropdown menu.
Windows Authentication: If you are using Windows Authentication to allow users to access the database, select True from the dropdown menu. If you are using SQL Authentication, select False and also enter the user name and password.
Server Name: Enter the name of your database server.
DataBase Name: Enter the label of the CM4D database.
Continue to step 4.
Test DataSource Connection: Once you have entered all required information, you can test the connection to the DataSource to verify that your information has been entered correctly using the Test DataSource Connection button located beneath the Delete DataSource Image button.
Click Save to apply and save your settings.
To add another Managed DataSource to the Site, repeat Steps 1-5.
Modify a Managed DataSource
To modify an existing Managed DataSource:
Select a DataSource to open the corresponding DataSource Information grid on the right side of the interface.
After you have made your changes to the DataSource, click Save.
Delete a Managed DataSource
To delete a Managed DataSource, select the DataSource name from the left-hand list and click the Delete button on the bottom left of the interface.
Can we improve this topic?