Select Data Files
Add Files
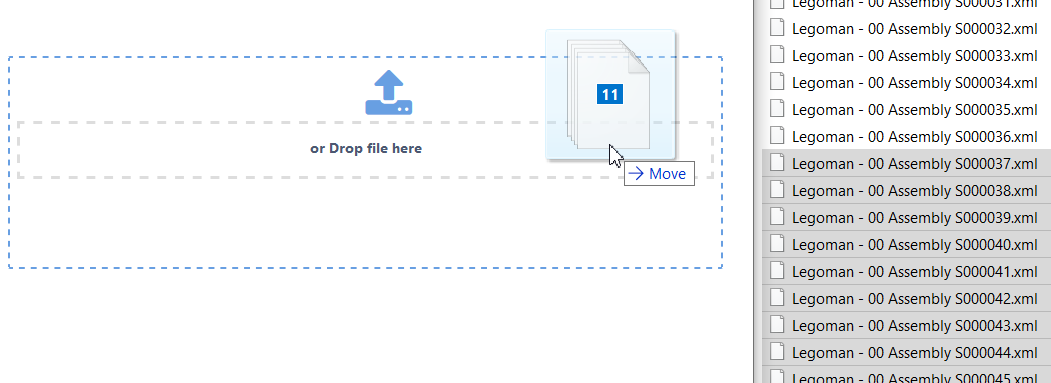
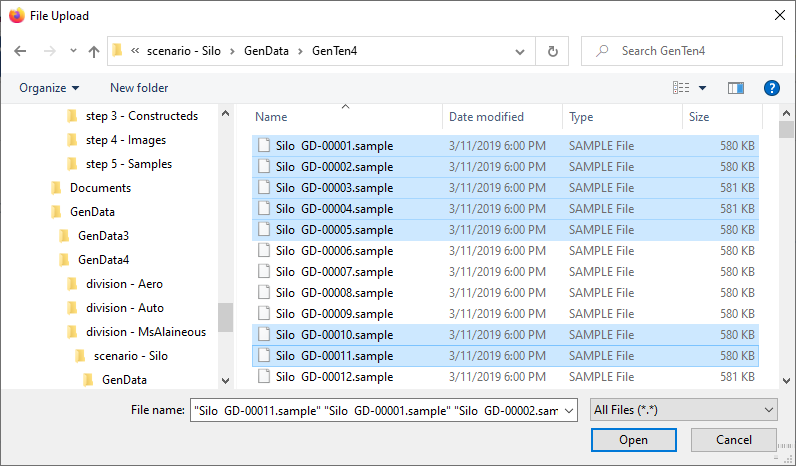
Files are added individually or in batches to the selected project by either browsing to the file(s) or dropping files from the file explorer onto the indicated area in the web browser. Once you have selected the files to upload, the file(s) can be submitted to the database.
When at least one file has been selected, you have two action options:
- Preview Data - view a grid to see what data is identified for processing
- Submit to DataSmith Batch - send the data file to be processed into the CM4D database

Drag & Drop Files 
Browse for Files
Virus Detection
If a selected file contains a virus, a notification will alert you and the file will not be permitted for uploading.

A virus scanner may or may not be enabled for your project, as this is an optional feature configured by the CM4D system administrator.
Remove Files
Click the  on the right side of the file row to remove it from the upload list.
Navigating to a different page (home, or back) without submitting any selected files will remove these files from the upload list without submitting the files for processing. A prompt allows you to confirm or cancel the file removal.

Supported Files
Some projects only allow files with specific extensions to be uploaded. If the project has such restrictions, the list of supported file extensions is displayed below the project name. The file browser will automatically default to the supported file extensions.
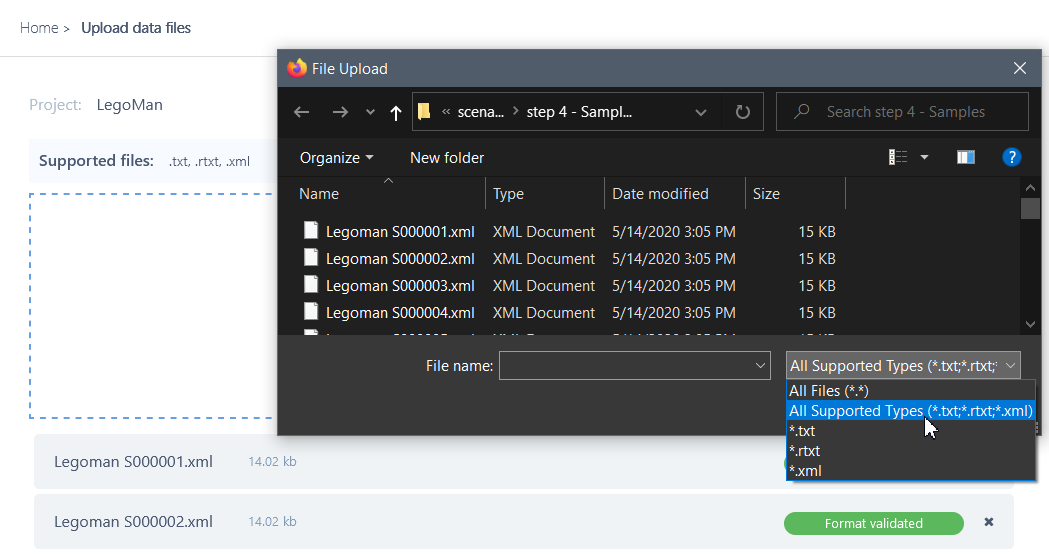
If an unsupported file extension is selected, an error will appear and the file will not be added to the upload list. Allowed file extensions are configured as part of the project properties and cannot be changed via Upload Portal.
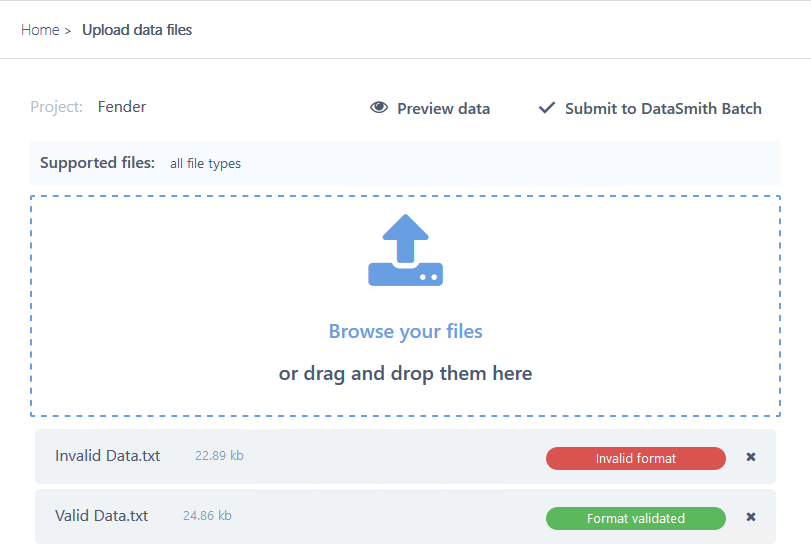
Format Validation
When a file is added, it is automatically scanned for an initial validation against the DataSmith translator. If the data file meets the requirements specified in the translator it is considered valid for upload.
- Format Validated - The file meets the requirements specified in the DataSmith translator and can be submitted for processing.
- Invalid Format - The file does not meet the requirements specified in the DataSmith translator and cannot be submitted for processing. If you have the required user rights, a file marked as an 'Invalid Format' can still be submitted for upload to the database, but it may fail to process.
Preview Data
The Preview Data option runs a pre-check on the selected file(s) to show what data will be extracted. This allows you to check that the file format is correct for the selected project before committing the upload. The grid contains a column for each unit of data that is configured for the project to extract from the data file. Each row in a column represents expected data values for the selected project.
If the grid is empty, confirm that you have the correct project selected and have uploaded the right file type for the project.
See here fore more details.
Submit Data
Submitting the selected file(s) sends the data to the DataSmith Batch service for processing. Once you have submitted a file, processing cannot be cancelled from CM4D Upload Portal. Check the Upload History to monitor the status.
Can we improve this topic?