Defining users and security settings controls the access a particular user will have to the Inspect applications. User and security configuration is comprised of the following steps:
2. Set up users
3. Assign security groups to users
4. Assign labor rates to users
A security group defines security rights that you can assign to users or groups of users at your facility.
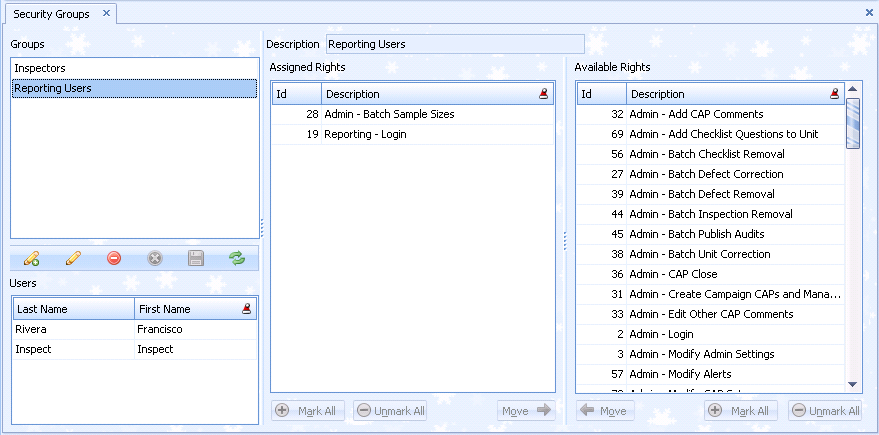
1. Click the Manage Security Groups and Rights button. All security groups will be displayed.
Security Groups are displayed in the left upper pane.
When you select a Security Group the users in the group are displayed in the lower left pane and the rights assigned to it are selected in the middle pane.

1. Click the Add icon ( ) in the lower-left corner of the screen.
2. Enter a name for the security group.
3. Click the Save icon ( ) to save the group.
4. Repeat as necessary to define other security groups.
1. Click the desired security group. Any rights already assigned to the group will be shown in the middle pane.
2. Click the Edit icon ( ) in the lower-left corner of the screen.
3. Click on the Rights to be assigned to the security group in the right hand pane.
4. Use the Mark All and Unmark All buttons, if needed.
5. Click Move.
The Rights will be added to the Assigned Rights list in the middle pane. The Rights can be removed again by selecting and moving them from the middle pane.
1. Select the desired group.
2. Click on the Delete icon ( )
)
A confirmation dialog will be displayed asking “Are you sure?”.
3. Select Yes. The Security Group is deleted.
The following security rights currently are available in Inspect. Select an item to view the possible settings:


In Inspect, users are those individuals who use any of the Inspect applications. There are security rights and security groups that are then assigned to the users.
Each user has customized settings in Inspect's web-based reporting. For this reason, it is important that each user be given unique user names and passwords.
1. Click the Manage Users button. All users will be displayed.
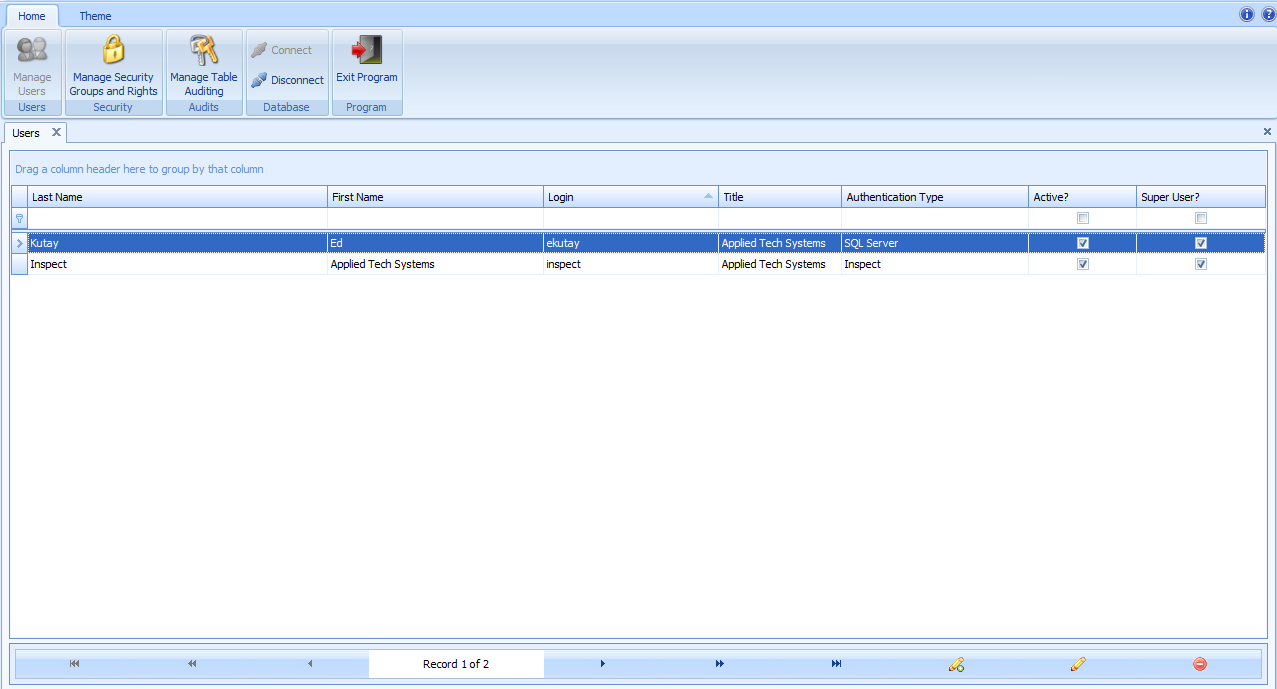
The following buttons allow you to navigate through the list:
 Takes you to the First record in the list.
 Scrolls to the Previous Page in the list.
 Moves to the Previous record in the list.
 Moves to the Next record in the list.
 Scrolls to the Next Page in the list.
 Takes you to the Last record in the list.
1. Click the Add icon ( ) in the lower-right corner of the screen.
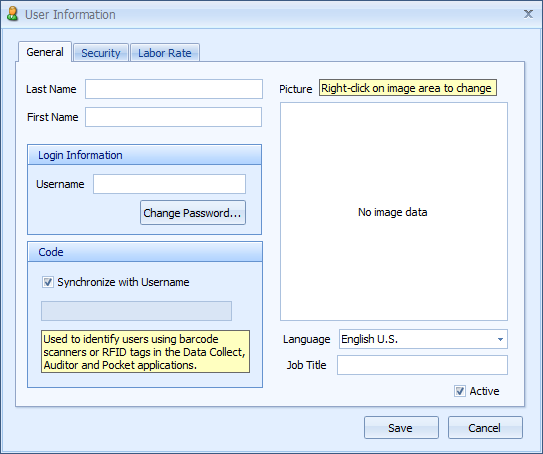
2. Enter the new user's Last Name and First Name.
3. In the Login field, type the unique Inspect Username. (Maximum length is 20 characters.)
4. Click Change Password and enter the password.
The password must be unique as it acts as a user identifier in Data Collect and Auditor.
5. Use the Synchronize with login? checkbox if you want the inspector to be logged in automatically when using a magnetic card reader.
6. Use the Language field to choose a language from the list. Languages other than English (US) must be set up and maintained by the Inspect administrator.
7. Enter the Job Title.
8. Right-click the Picture area and select Load to browse and select the user’s picture.
9. Use the Active? checkbox to indicate whether or not this user is active.
1. Click the Delete ( ) icon in the lower-right corner of the screen.
2. Click Yes to confirm the deletion.
The user is deleted from the system.
The relationship between users and security groups determines what each user is allowed to do in the Inspect System.
1. Click the Manage Users button. All users will be displayed.
2. Double-click the desired user.
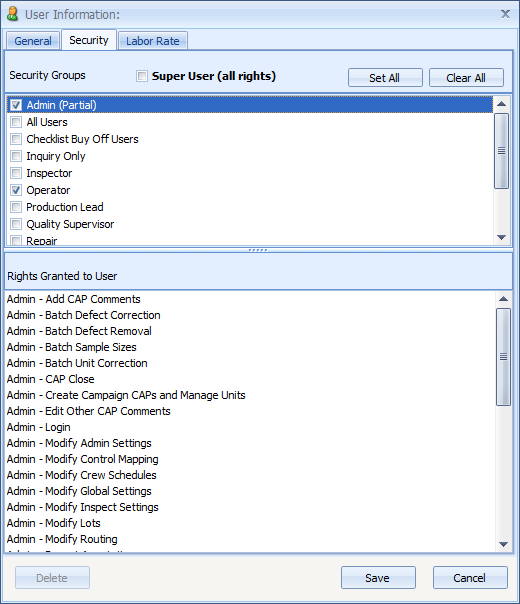
3. Click the Security tab.
4. Select the Security Groups that the user will belong to. The pertaining privileges will be displayed under Rights Granted to User.
o The Super User checkbox gives total Administrative rights to the selected user.
The Super User checkbox must be used carefully. Users with this privilege will have the ability to make any changes to the system configuration, so it must be assigned only to the System Administrators.
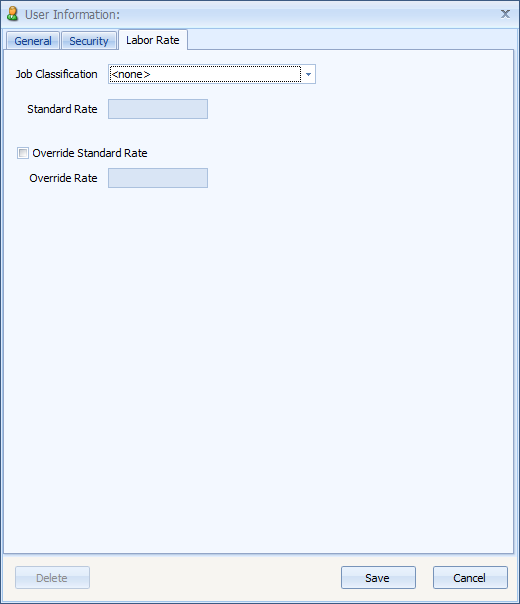
The Labor Rate is only available when the Costing application is enabled.
1. Click the Manage Users button. All users will be displayed.
2. Double-click the desired user.
3. Click the Security tab.
4. Select the Job Classification to which the user belongs.
The Standard Rate is automatically displayed in the default currency for the selected Job Classification.
For information on how to change the standard rate or to create a new job classification refer to the Costing section.
The Override Standard Rate checkbox allows you to set a different rate for this particular user, even though they belong to the selected Job Classification. To use this function check the box and enter the Override Rate.
5. Click Save.