The Administrator's role includes setting up and defining all the inspection screens. The Administrator must also anticipate all the quality data to be collected.
Terminology
A common mistake during the setup process is configuring items incorrectly. For example, Locations are often configured for non-image based inspections when Details should be used instead. Be sure to consider the following distinctions between these fundamental elements in Inspect.
Part - An inspectable item in the Inspect system. Examples include door, hood, rocker panel, motor mount, etc.
Concern - A quality concern or defect. Examples include loose, missing, wrong, dirt, contamination, etc.
Location - The location of a part as it relates to the entire product. For example, a door is a part and the left side is the location.
Component - The combination of Part + Location.
Details - A detail can be used two ways:
The first is to give more information about the circumstance of the part and concern. For example, the part and concern might be engine [part] and shudders [concern]. The detail would then be "while accelerating" or "while braking."
The second is to give a more precise location of the defect on the part, which is used primarily when inputting defects via text buttons. The part, location and concern might be fender [part], left side [location] and paint contamination [concern]. The detail might be "upper left" or "quadrant 3."
Remember that Inspect Reporting makes extensive use of the terms parts, concerns, locations and details. Take care not to use location and detail interchangeably. If the setup data does not consistently adhere to these definitions, the reporting may not yield the desired results.
Relationship between Items
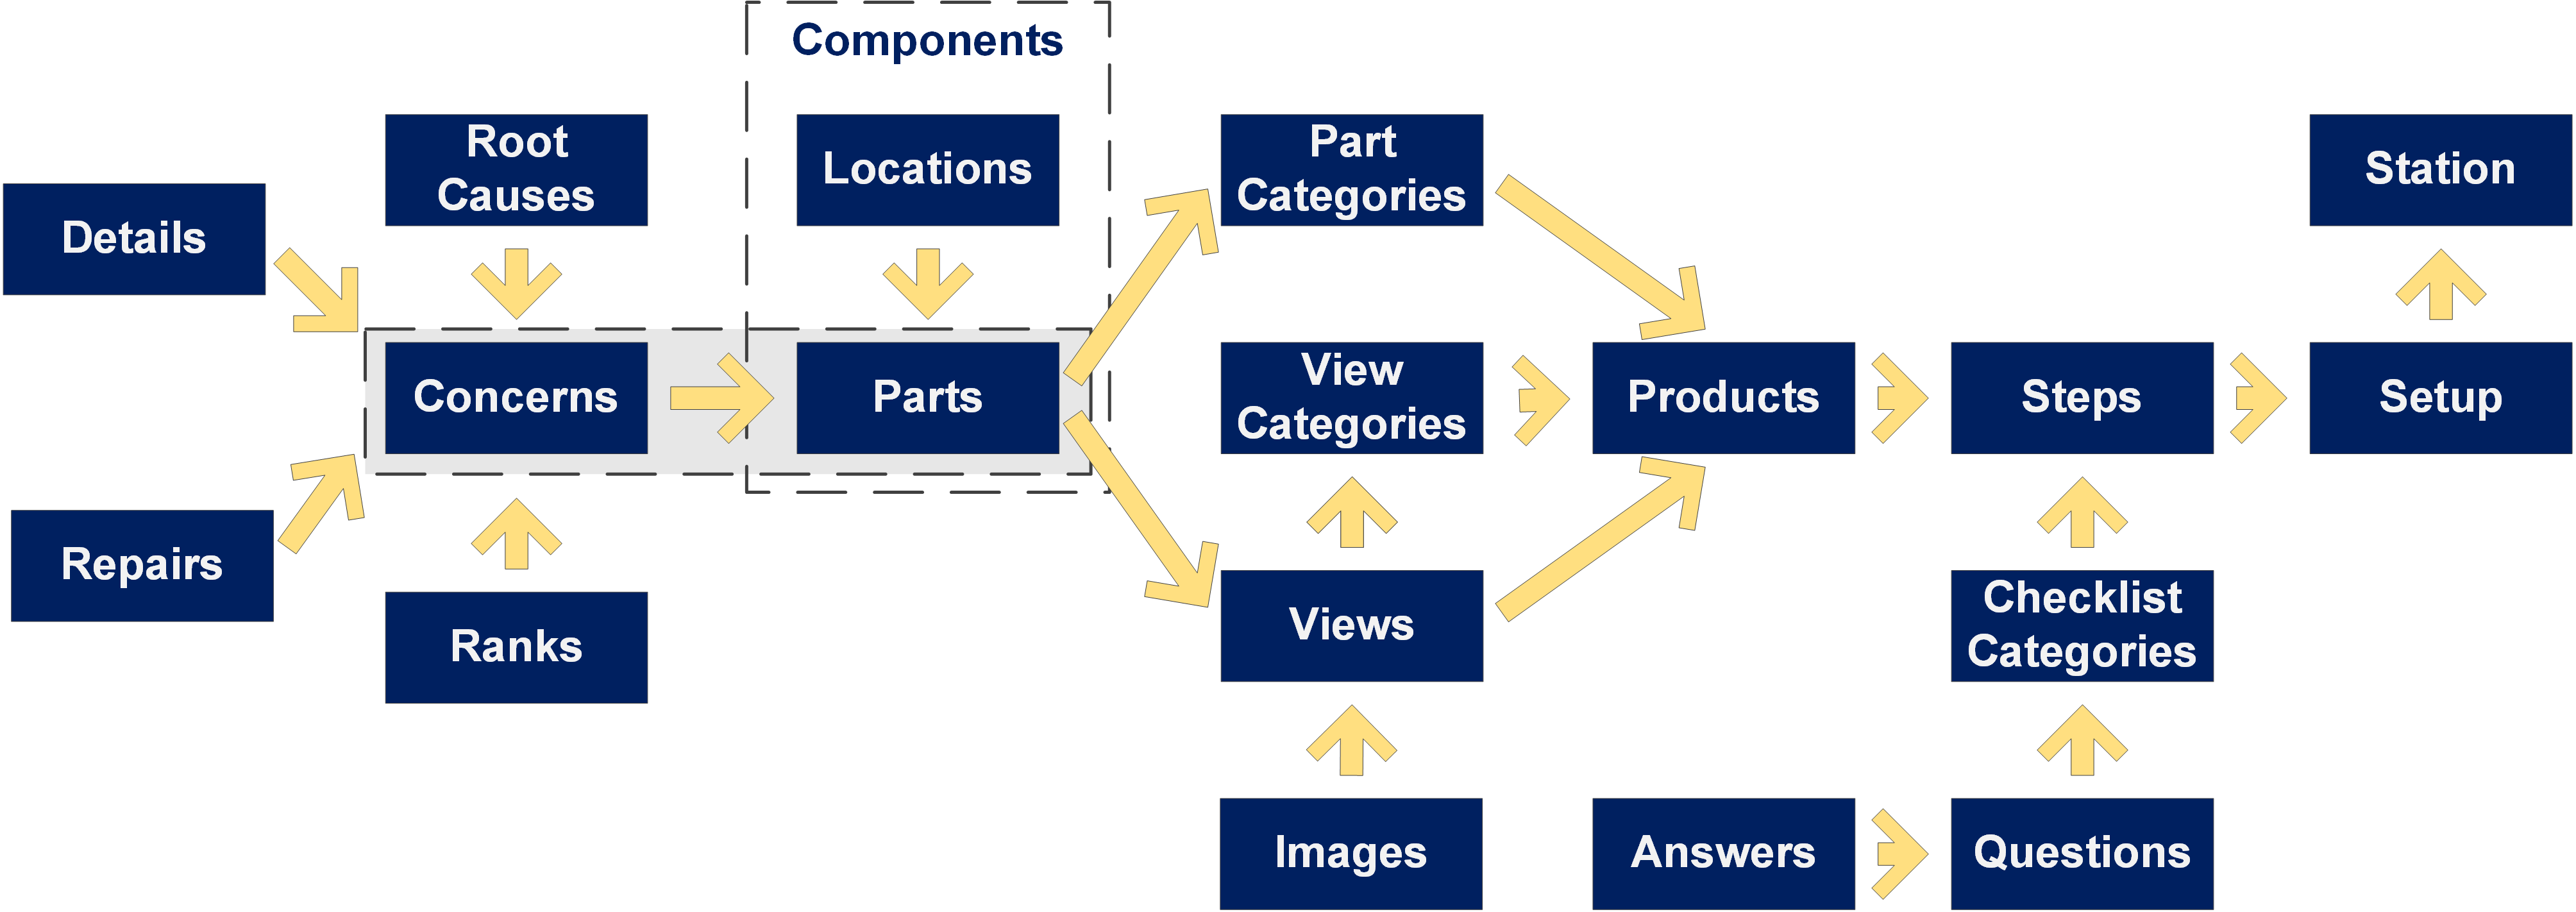
This configuration diagram explains how some of the most important Inspect items are related to each other.

All the sample data illustrated in this user guide is test data only and is not taken from a real source. In addition, all products and product quality data have been created at ATS and do not reflect true customer data.
Example of Attribute Inspection Setup Using Views & Images
Using Views and Images, the hood of a vehicle should be set up like this:
Part - Hood.
Location - N/A (not applicable). When inspection is performed using images, Inspect already knows whether it is left or right side. In this case, you could set up a location as "N/A."
Concern - Dirt in the paint.
Detail - Optional. If used for image inspections, the Detail is used more as a description about the defect. For example, you might define whether the dirt in the paint occurred in the clear-coat or base-coat.
In an image inspection, it is not usually necessary to select a detail because the inspector has touched a precise location on the image. As a result, Inspect already knows the location and stores this X/Y coordinate in the database.
Example of Attribute Inspection Setup Using Text Buttons
Using Text buttons, the fender of a vehicle should be set up like this:
Part - Fender.
Location - Left or Right. When inspecting using text buttons, Inspect prompts the inspector for a location. In this case, you could set up a location as left or right.
Concern - Dirt in the paint.
Detail - Upper Left, Upper Center, Upper Right, Lower Left, Lower Center, and Lower Right. With text buttons, details are usually used to better pinpoint a location of where the defect is located on the part.