What is a Print Group?
A print group controls which views, view categories and part categories appear on a travel ticket. This can be useful when an operator is only carrying out repairs on certain components or areas of an item and they don't want to sort through all the defects that aren't of interest to them.
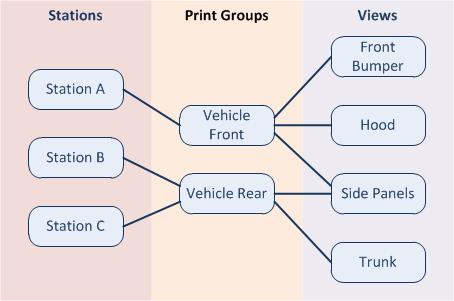
Print groups are assigned to stations. Travel tickets printed by that station will use the views, view categories and part categories contained in any print groups associated to it. If a print group isn't assigned to a station, or print groups aren't enabled for the station, then all views, view categories and part categories can be included in the travel tickets produced by that station.
The example below shows how stations, print groups and views, view categories and part categories can be linked together.

Create a station print group
Select the Plants tab.
Click Print Groups.
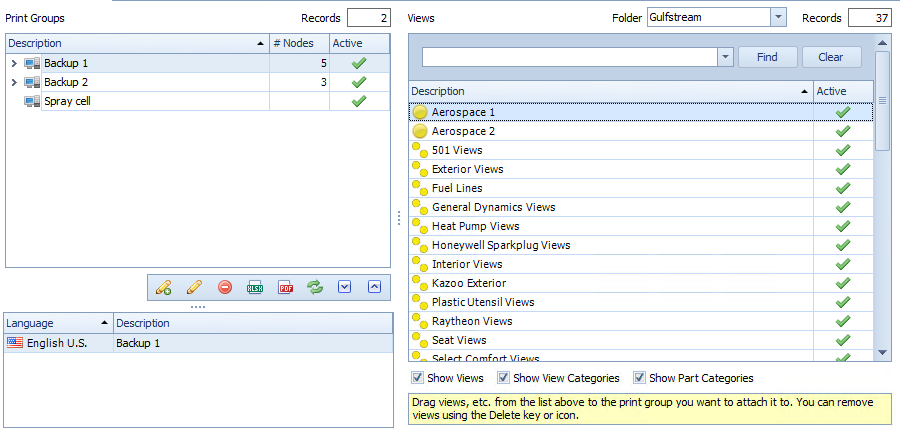
A list of print groups is shown in the left pane and views, view categories and part categories are shown in the right pane.

Click the add icon (![]() ) below the Print Groups pane.
) below the Print Groups pane.
Enter a description of the print group in the default language and any other languages required.
Click OK.
The print group is added to the list.
Assigning items to a print group
The right pane contains the views, view categories and part categories that can be added to a print group.
Use the Folder field in the top-right corner to filter by a folder. Alternatively, you can enter a search term to go directly to an item.
Use the tick boxes below the right pane to hide and show item types.

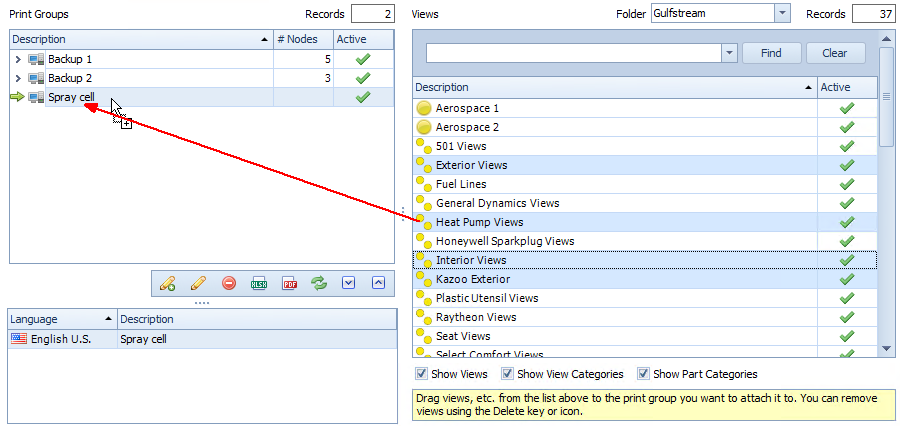
Select and drag views, view categories or part categories from the right side onto the desired print group in the left side.
You can use the Ctrl key to select multiple items.

The Print Groups must now be assigned to station in the station's Print Groups tab. See here.