The Downtime page allows the operator to record downtime manually. It is possible to have both manually entered and automatically collected downtime in the same shift.
Enter the required date, shift and equipment (see here).
Click Downtimes.
A list of the downtimes entered for the currently selected date, shift and equipment is shown.
Add Downtime
Click Add.
The following screen appears.
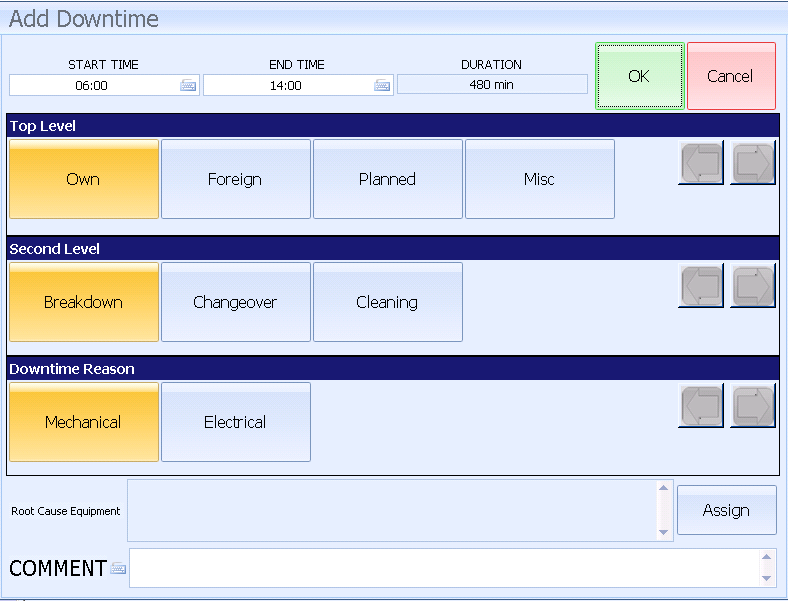
Enter a Start Time and End Time.
Enter a Top Level, Second Level and Reason.
If required, enter Comments.
If required, assign a root cause equipment by clicking Assign.
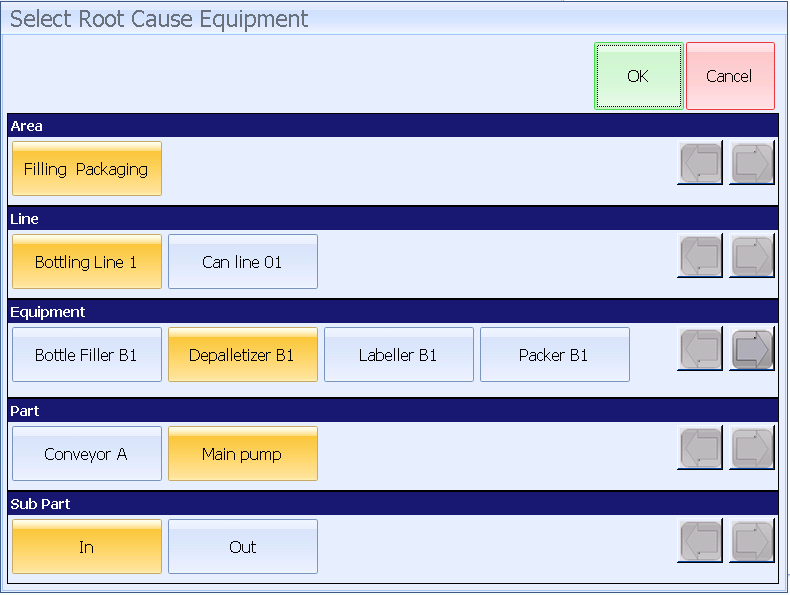
Select the Area, Line, Equipment, Part and Sub Part.
Click OK.
The Root Cause Equipment is assigned to the downtime.
Click OK.
The downtime is assigned and displayed in the list.
Split Downtime
Select a downtime.
Click Split.
The following screen appears.

Enter the Split Time.
Select the reason for the second half of the split downtime.
If you want to change the reason for the first half you must edit it separately after the split.
Click OK.
Merge Downtimes
You can only merge two downtimes where the end time of the first equals the start time of the second. However, it is possible to merge automatic and manual downtimes.
Select two adjacent downtimes to merge using the Ctrl key.
Click Merge.
The system merges the selected downtimes. The resulting downtime will run from the earliest start time to the latest end time of the merged downtimes. The downtime reason will be taken from the earliest merged downtime.
Delete Downtime
Select a downtime.
Click Delete.
The downtime is deleted.