What the Data Transfer Wizard Does
Transfer Data Between Databases
The main function of the Data Transfer Wizard is to move licensing data (imported licenses in the license store) from one database to another. This is useful when you have been using the licensing server for a while with one database type but you want to switch to using a different database type. The Data Transfer Wizard in this case will move all licensing data from the original database to the new database. The source and destination databases can be any of the three supported database types
Embedded
Microsoft SQL
Oracle
By default, ATS Licensing Manager uses an embedded database to store licensing information.
Create New Databases
The Data Transfer Wizard can also be used immediately after the initial installation when no licenses have been imported to create a Microsoft SQL or Oracle licensing database. See more details about this here.
Using Data Transfer Wizard
The Data Transfer Wizard is located in the installation directory of the ATS Licensing Server, under the Utils folder. The default location of the Data Transfer Wizard is:
Default file location: C:\Program Files (x86)\Applied Tech Systems\Licensing\Utils\DataTransferWizard
To run the Data Transfer Wizard double click on the DataTransferWizard.exe file which can be found in the location specified above.
To start using the wizard, click Next in the Welcome screen.
If the ATS Licensing service is running you will be prompted by the wizard to stop it. It can be stopped from within the wizard.
Select the Source database type on the left and the Destination database type on the right.
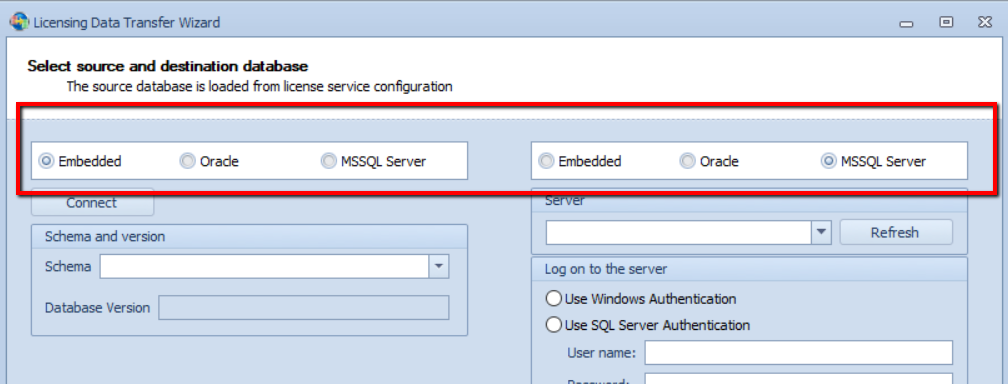
Enter the database connection details in the respective fields (fields on the left are for the source database, fields on the rights are for the destination database).
Click the Connect button for both the source and the destination database.
For an Oracle database select the correct Schema from the Schema drop-down which loads after you click Connect
Enable the Delete data in destination? check box (it is checked by default).
Optionally change the location of the data transfer log (default location is the Documents of the logged in computer user and the default log file name is DataTransferLog.txt).
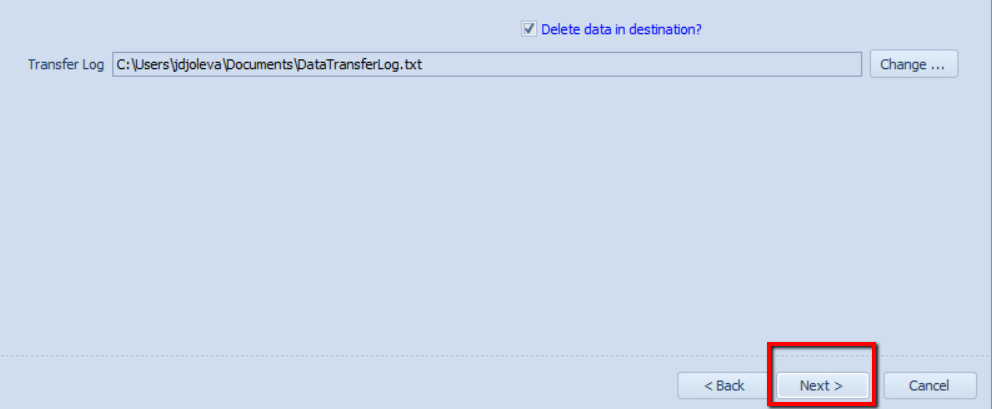
Click Next.
The Data Transfer Wizard will copy all data from the source to the destination database and report how many records have been copied in each table.
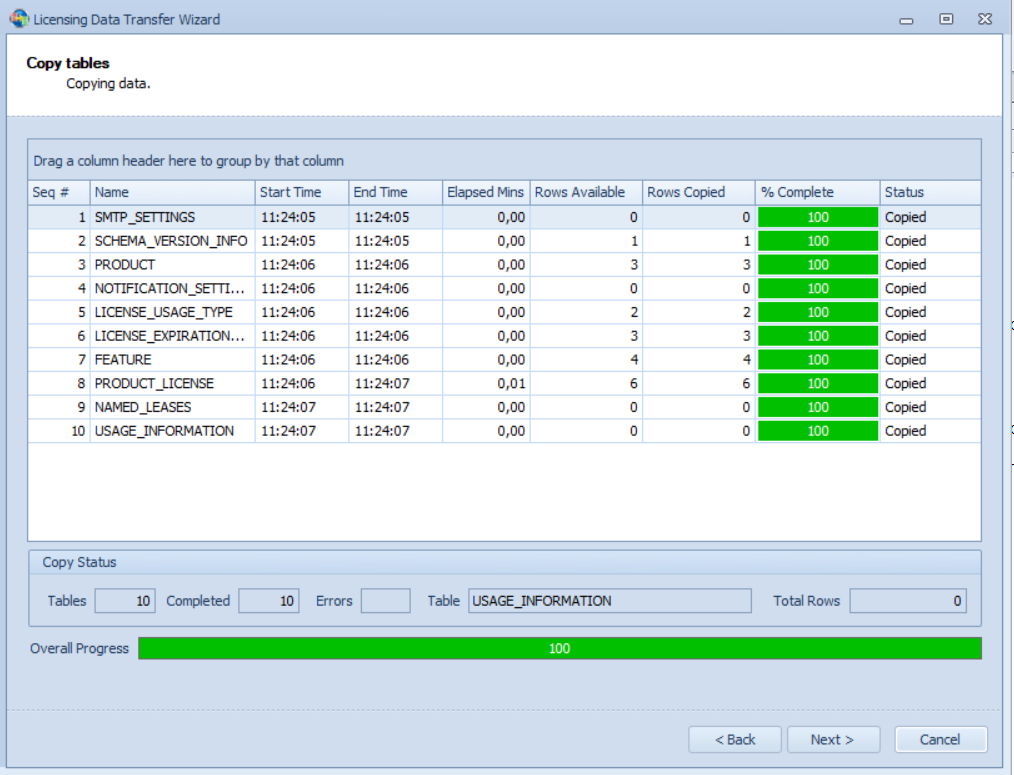
Click Next.
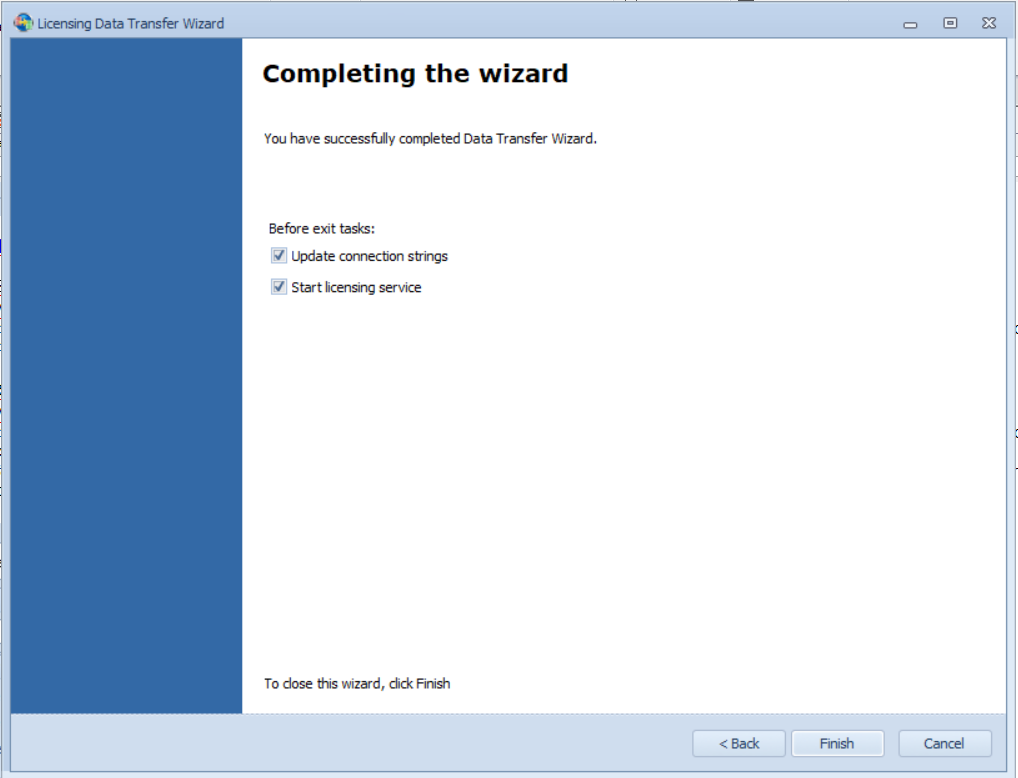
Select whether you want to adjust the connection string for the ATS Licensing service to point to the destination database.
Select whether you want to start the ATS Licensing service. These two activities can also be done manually after exiting the Data Transfer Wizard.
Click Finish to close the Data Transfer Wizard.
Specific Database Details
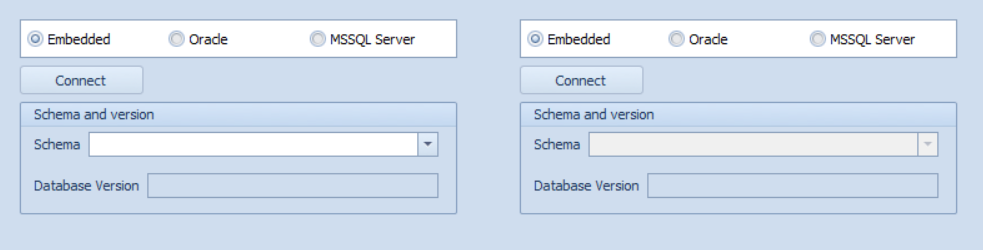
Embedded database
No specific details need to be provided for an embedded source or destination database. The location of the embedded source database is known to the wizard. The wizard will create a new embedded destination database and copy all data from the source embedded database.
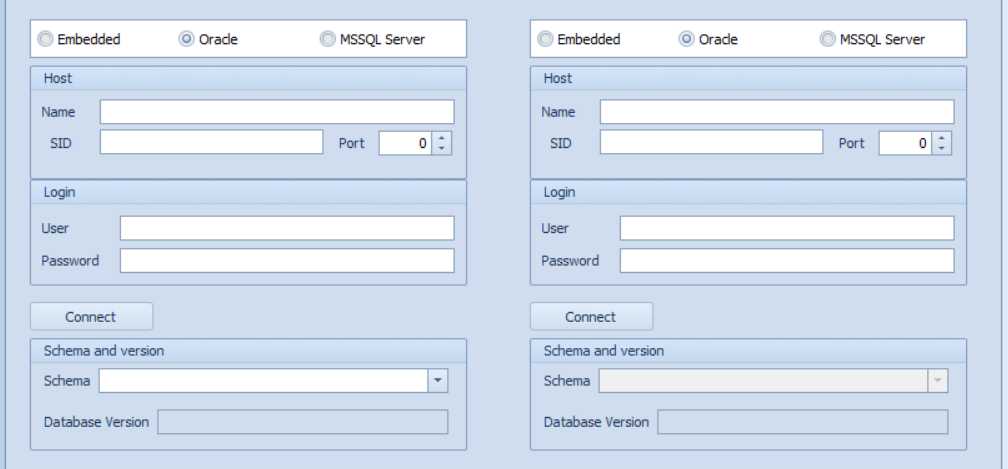
Oracle database
For an oracle source or destination database enter:
Name, SID and port of the Oracle host (database server).
Login details (user and password).
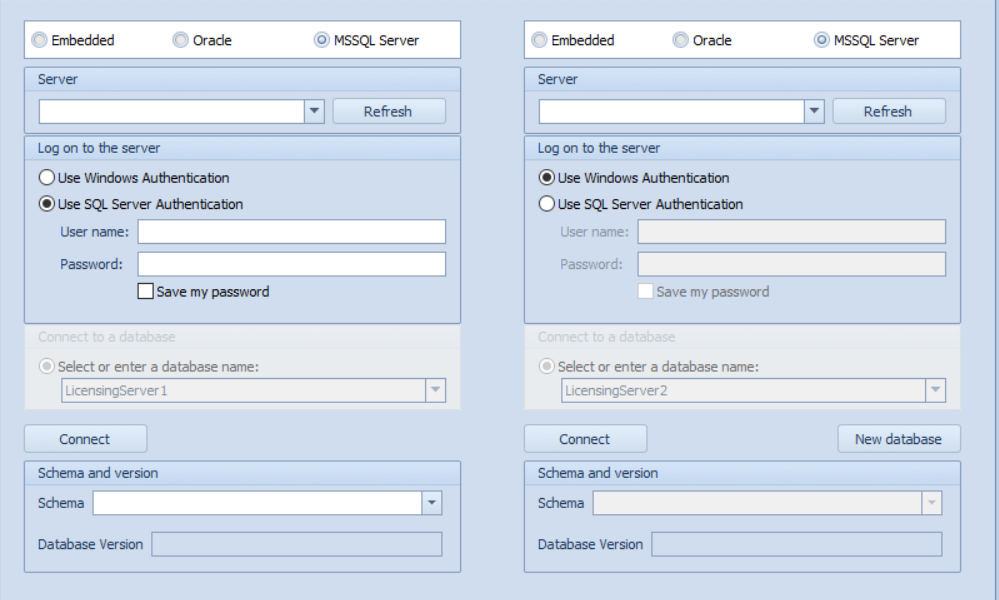
Microsoft SQL database
For an MSSQL source database enter:
The MSSQL database server name.
Select log on type: Windows or SQL Server Authentication. For SQL Server Authentication provide a correct SQL login account (User name and Password).
Select a database from the drop-down list and make sure the Select or enter a database name radio button is selected.
For the MSSQL destination database enter:
The MSSQL database server name.
Select log on type: Windows or SQL Server Authentication. For SQL Server Authentication provide a correct SQL login account (User name and Password).
Select an existing database from the drop-down list and make sure the Select or enter a database name radio button is selected OR
Create a new destination database: Click on the New database button and Provide a database name in the pop-up. The new database will be created on the database server specified in the destination form fields of the wizard.
- When using an SQL login account in the case of creating a new destination database the provided login must have rights for creating new databases on the database server.