Topic Contents: Hide
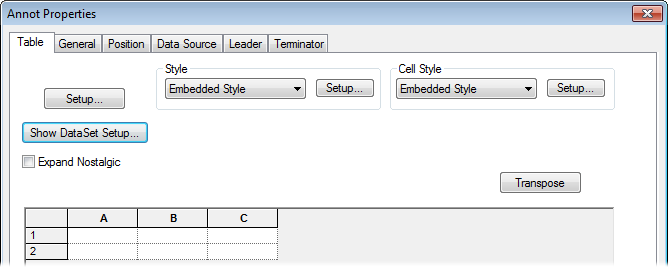
With all table annotation editing completed, right click within the table's border and select the Properties option from the menu. This will give you access to all of the table’s general properties.
Tables can be used to show multiple characteristics for a particular feature.
Clicking Setup opens the Table Properties dialog. The Table Properties setting determine the overall properties of a table. Individual cells can have their own properties.
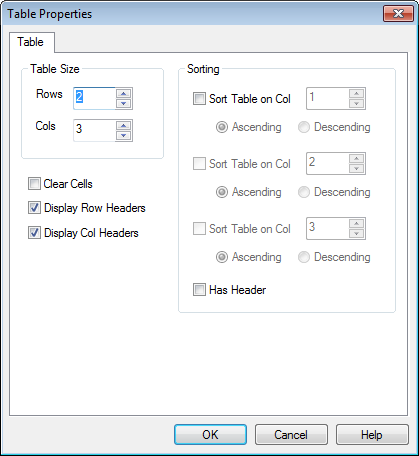
· Table Size - With the Table Size settings you can set the number of rows and columns in your table. Modify the tables size by entering the number of rows and columns desired.
· Clear Cells - Checking the Clear Cells check box will cause all table cells to be cleared.
· Display Row Headers - Selecting Display Row Headers turns on the row headers.
· Display Col Headers - Selecting Display Col Headers turns on the column headers.
· Sorting - Using the Sorting settings, you can sort up to three columns in ascending or descending order. When a table has been sorted, the headers of the columns can be displayed by selecting Has Header.
The Show... options will be grayed out (disabled) until you check the Show Table as DataSet box. Check the boxes next to the table options you want to show, then select a display option from the available dropdown menus to the right.
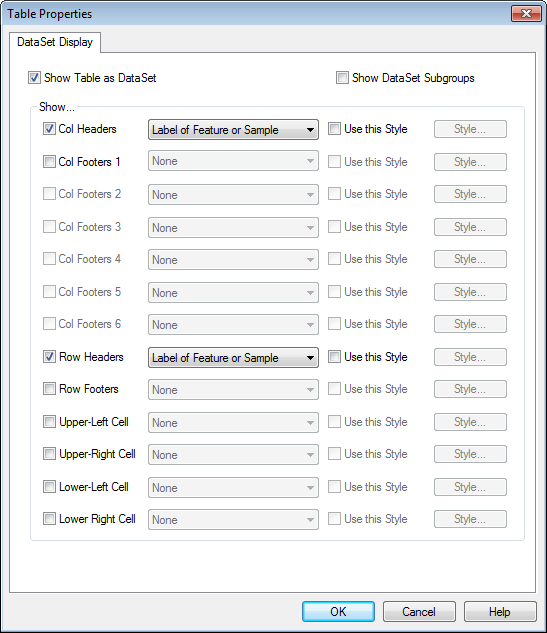
· Show Table as DataSet - Showing a table as a DataSet is an easy way to display the data for each subgroup. Functions include displaying subgroup data on a chart, calculate subgroup stats, and display raw data for a subgroup.
· Show DataSet Subgroups -
· Show...
§ Col Headers
§ Show Col Footers 1
§ Show Col Footers 2
§ Show Col Footers 3
§ Show Col Footers 4
§ Show Col Footers 5
§ Show Col Footers 6
§ Show Row Headers
§ Show Row Footers
§ Show Upper-Left Cell
§ Show Upper-Right Cell
§ Show Lower-Left Cell
§ Show Lower-Right Cell
· Use this Style - You can select a custom style for each row or column type by enabling the Use this Style check box and then clicking the Style button.
A fix made to tables in v20.2 changed how Table annotation using variables resolved when subsets of DataSet rows are used as the DataSource. To support the migration of existing tables, a new option has been added to the Table annot properties called Expand Nostalgic. What this means is that tables with the Expand Nostalgic property turned on will expand in the same way as seen in older versions.
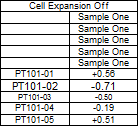
For example, a table set up to load rows 1 through 5 from the DataSet and did not use Expansion of Features and/or Samples (at the Cell Property level) would produce something like the following:
| v20.2.3 (and earlier) | v20.2.4 | |
| Table Resolved |
|
|
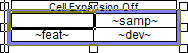
| Table Setup |
|
|
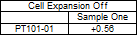
Another example is of a table that uses the same DataSource as the first example, but the way the variables are inserted into the cells may display information in way that appears correct:
| v20.2.3 (and earlier) | v20.2.4 | |
| Table Resolved | 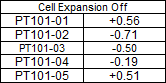 |
 |
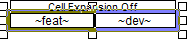
| Table Setup |
|
|
By default, Expand Nostalgic will be turned on for any existing table annotation in documents created prior to v20.2.4. Any new tables will have this option turned off by default, but can be turned on if you want tables to behave the same way they did in an earlier version.
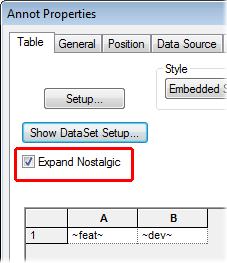
To enable this option, you would go to the Table Properties and select the check box called Expand Nostalgic.
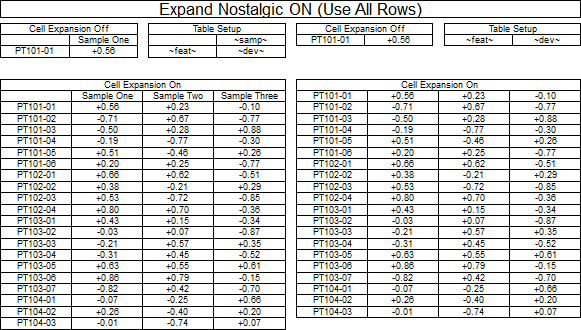
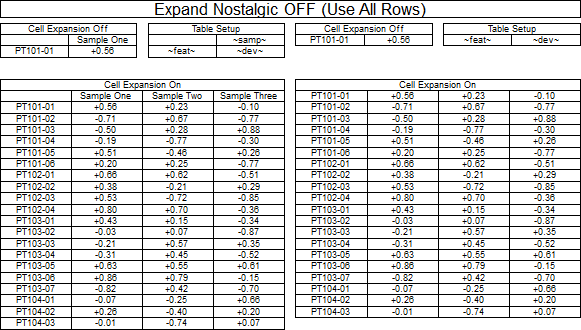
Tables that have Expand Features and/or Samples turned on (in the Cell Properties), or tables that Use All Rows from the DataSet, will not appear any differently than in previous versions. They will appear the same whether the new Expand Nostalgic is turned on or not.
In the Style section of the Annot Properties dialog a table’s background and border properties can be edited by clicking Style.
In the Cell Style section of the Annot Properties dialog, the style properties of the cells of a table can be edited by clicking Style
A row or a column can be added, inserted, deleted or its value can be set by right clicking in the table, then selecting an option from the menu.