CM4D is easier to operate with a mouse. The mouse button controls are slightly different when manipulating the sheet area than when editing a view image in a report.
 Tip
Tip
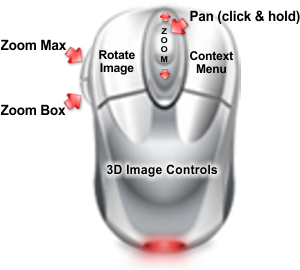
In order for Image controls to be
active, the View must be in Edit Mode (double click the view area
or click the ( ) button
so the view has a blue border).
) button
so the view has a blue border).
If any of the mouse operations are not available due to mouse hardware or setup, you may enable some of the optional toolbar buttons that will perform those functions. Open View > Customize. The two toolbars that you would need to enable are:
Sheet Controls
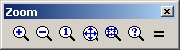
View Controls

Standard Windows mouse operations are also used to interface with CM4D. If you are unfamiliar with these operations may wish to review them below:
The mouse pointer will change shape as it is positioned over different screen areas within CM4D. Standard pointer shapes that represent certain Window’s states can be defined by the user from the Windows Control Panel.
CM4D uses standard Windows pointers along with some custom pointers. For example, a standard hourglass pointer typically represents a busy state where CM4D is busy performing a requested operation. An example of a custom pointer is a text creation pointer that is displayed when the user is creating a text annotation.
Pointing with the mouse is accomplished by moving the mouse until the pointer is positioned over a desired area or object on the screen. Typically a user will point and perform some form of mouse button click. Additionally, certain CM4D objects provide feedback information by simply pointing to key areas with the mouse.
A left click is typically used to select an object or press a window button.
A right click is typically used to invoke a context-sensitive (what object the mouse is located over) menu. The menu will contain one or more items that invoke actions or other sub-menus. Right clicks display different menus when an object is in different states (i.e. when being editing versus not being edited).
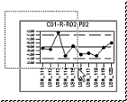
A unique feature of CM4D is the use of menus that can be accessed by right mouse button clicks. To access a right mouse button menu, click once on an Annotation to get a border. A right mouse button click in the Annotation window will reveal the first menu. This menu allows you to quickly access zoom and orientation features, as well as Property options.
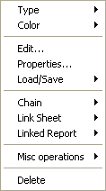
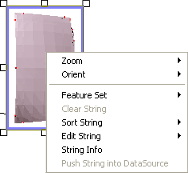
Double-clicking on an Annotation puts it into edit mode. The edit mode can be distinguished by the bold blue border. A right mouse button click in the Annotation window will reveal a second menu. This menu not only has the zoom and orient features, but it also contains the edit options. These options are outlined in the topic Annotation Overview.
A double click has a variety of uses such as opening an object or window (perhaps for editing), closing an object or window, or changing an object or windows state (i.e. from minimized to maximized). A double click is accomplished by pointing the mouse at the desired object (or screen area) and pressing and releasing the left mouse button two times in quick succession
Tip
A double click is affected by the
mouse control settings under Windows. If you are having trouble getting
double clicks to register try clicking faster or adjust your mouse
settings under the Windows Control Panel.
Follow the steps below to resize an annotation:
1. Select the annotation by left clicking on it.
2. Move the mouse pointer over one of the squares
on the selection rectangle. The pointer will change to the resize tool
 .
.
3. Click and hold the left mouse button while dragging it outward or inward. The annotation will grow and shrink as you drag the resize tool.
4. Release the left mouse button when the desired size is achieved.
You can move an annotation by dragging and dropping it.
1. Move the mouse pointer over the annotation you want to move.
2. Press and hold the left mouse button.
3. Drag the annotation to its new location.
4. Release the left mouse button.
An easy way to copy a CM4D annotation is to press and hold the Ctrl key as you drag and drop it. The original annotation stays where it was, while the copy will cling to your mouse pointer until you release it.
While holding down the left mouse button, drag the mouse pointer to create a box with dotted lines. Letting go of the left mouse button will capture the items the box contains or touches.