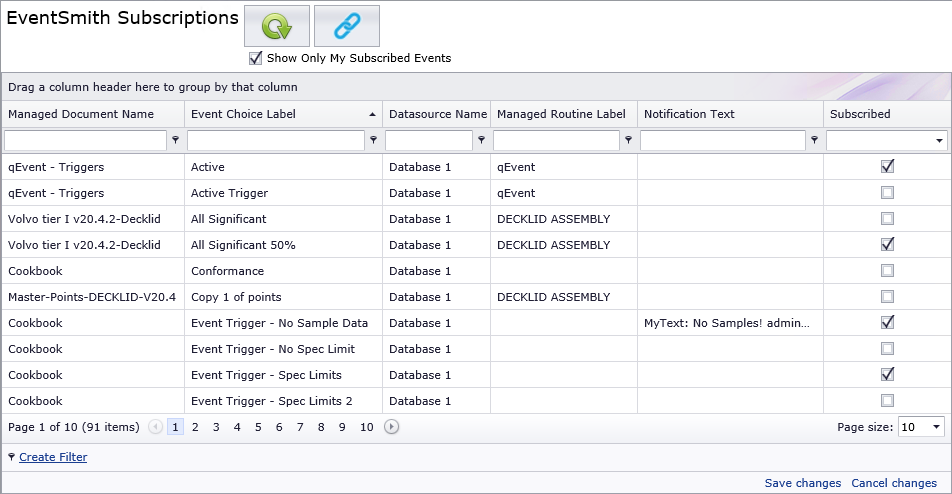
![]() The EventSmith
Subscriptions page allows you to subscribe to Events and create
or modify custom Notification Text for any email you may get as a result
of a particular event.
The EventSmith
Subscriptions page allows you to subscribe to Events and create
or modify custom Notification Text for any email you may get as a result
of a particular event.
If you have the Event Administrator and Event Manager privileges, you will see additional functionality to the standard user page for EventSmith Subscriptions. In addition to subscribing to Events for yourself, you can also subscribe other users to Events as a bulk operation. The two 'modes' of this page, Admin and User, each cache their grid layout, sorting, grouping, etc. independently.
 Tip
Tip
You can customize this page by sorting,
grouping or filtering. See the topic CM4D
Web Interface for more information on customizing the CM4D Web
interface.
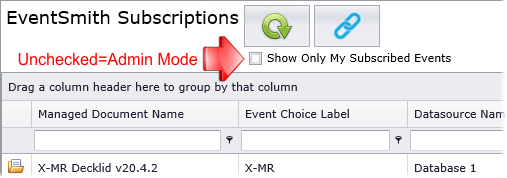
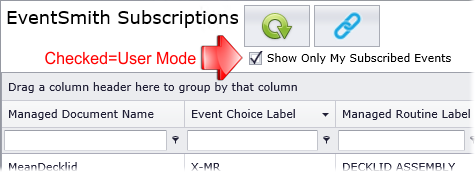
If you want to subscribe to events for all users in the database, the Show Only My Subscribed Events box below the Refresh and Share Link buttons must be unchecked.
While in the Admin mode you can subscribe multiple users to an event at one time, remove subscriptions for users that have subscribed themselves, and create or modify the Notification Text for each user.
Also, if you have the Event Administrator privilege, you can subscribe users to any event in a Managed DataSource to which the user has access. For example, if User A has access to Database 1, 3, and 4, you can subscribe User A to any events that have Routines in one of those three databases. However, if you as the Admin do not have access to those same databases, you cannot subscribe yourself in Admin mode to any of those events.
To make changes to the Subscribers of an Event, click the Manage Subscription
( )
icon for the event row.
)
icon for the event row.
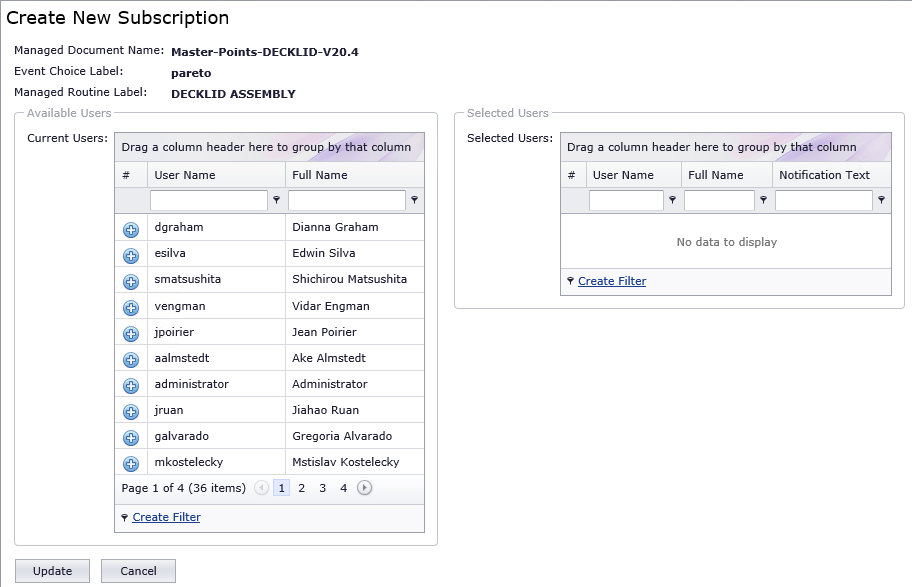
· For events that do not
have any users subscribed, the Create New Subscription page will open.
show/hide
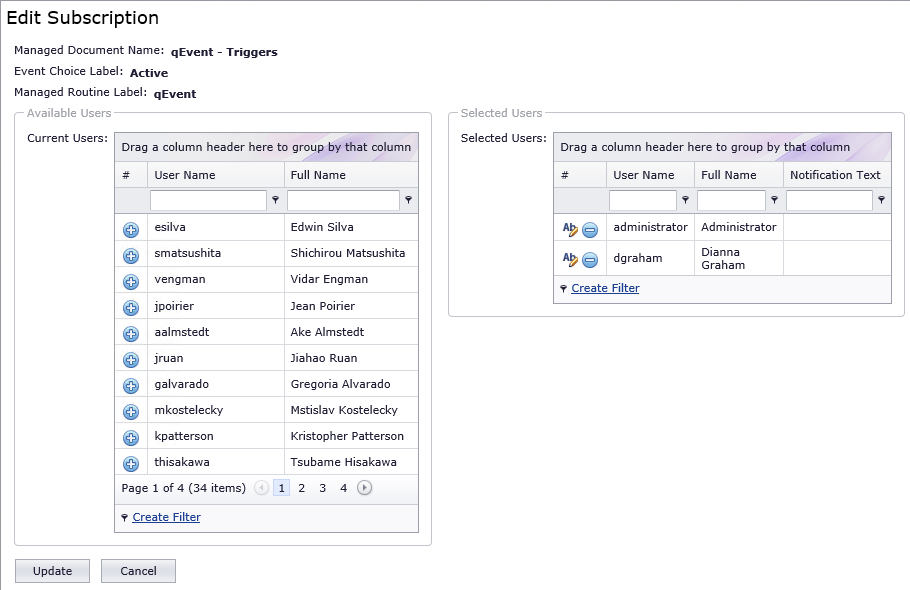
· For events that have one
or more users subscribed, the Edit Subscription page will open. show/hide
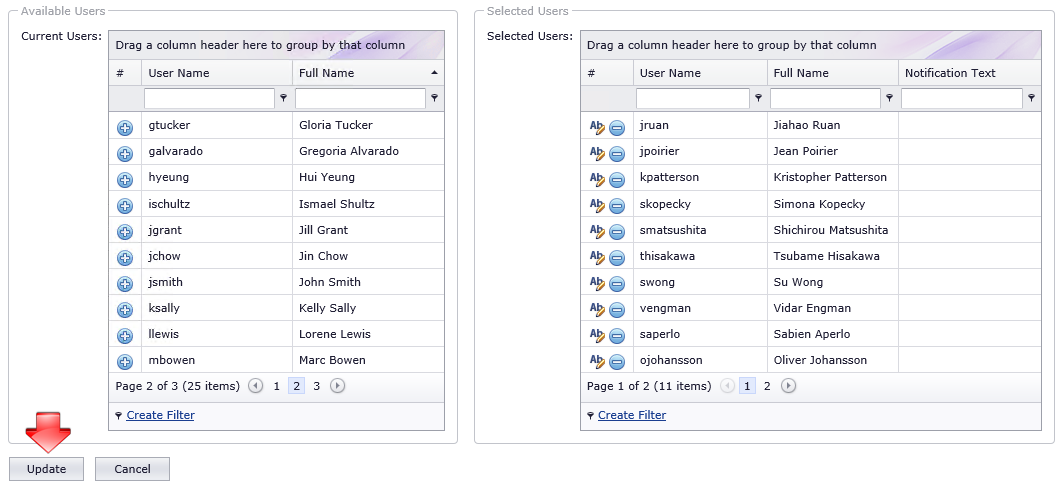
1. From the Available Users list in the left grid, find the user you want to Subscribe to the event. You can sort and filter by User Name or Full Name.
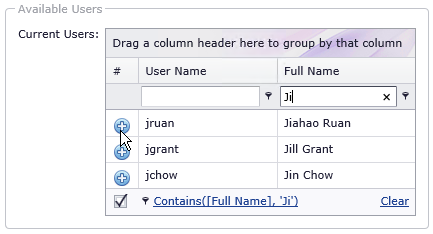
Tip
For a User to appear in the Available
Users list, they must have access to the Datasource with which the
selected Event is connected. No special group privileges are required.
2. Click the add ( ) icon in the row for the
user you want to subscribe.
) icon in the row for the
user you want to subscribe.
3. The user will be moved to the Selected Users grid on the right.
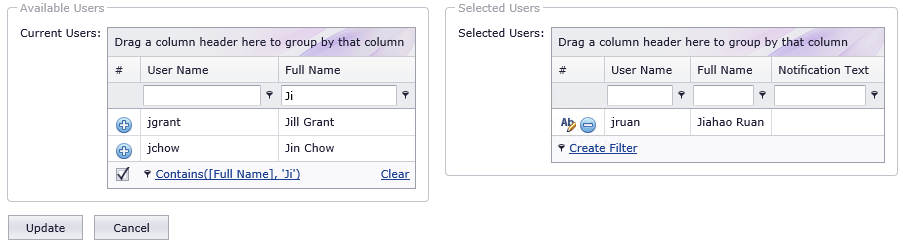
4. To remove any filtering, click Clear in the bottom right of the Available Users grid to return to the full list of users.
5. Repeat steps 2-5 for all users you want to subscribe to this event.
6. Click Update to save your changes to the database.
Once you have added users to the Subscription, you can also create or modify the Notification Text that each user will receive in their email for this event.
1. Go to the Manage Subscription page for an event.
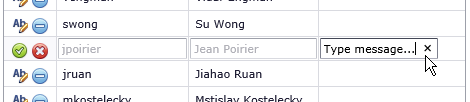
2. In the Selected Users list,
click the edit ( ) icon in the row for the user you
want to modify.
) icon in the row for the user you
want to modify.
3. Click in the Notification Text field and enter your message.
4. Click the apply ( ) icon, or click the cancel
(
) icon, or click the cancel
( )
icon if you want to discard your changes and stop editing the selected
user.
)
icon if you want to discard your changes and stop editing the selected
user.
5. Repeat steps 2-4 for each user for whom you want to add or modify the Notification Text.
6. Click Update on the bottom of the Subscription page to save your changes to the database.
1. Go to the Manage Subscription page for an event.
2. In the Selected Users list,
click the remove ( ) icon in the row for the user that
you want to unsubscribe.
) icon in the row for the user that
you want to unsubscribe.
3. Click Update on the bottom of the page to save your changes to the database.
If you want to subscribe to events only for yourself, you can switch to the User mode for this page by enabling the Show Only My Subscribed Events check box below the Refresh and Share Link buttons.
Tip
As an Event Admin, you may also subscribe
yourself to events through the same bulk editor that is used when
in Admin mode. However, putting this page into the user mode may make
it easier for you to locate and manage your own subscriptions.
Once this check box is enabled, the page functions the same way it does for standard web users. See the topic EventSmith Subscriptions to see the steps for subscribing to Events this way.
To return to the Administrator mode for this page, turn off the Show Only My Subscribed Events check box.