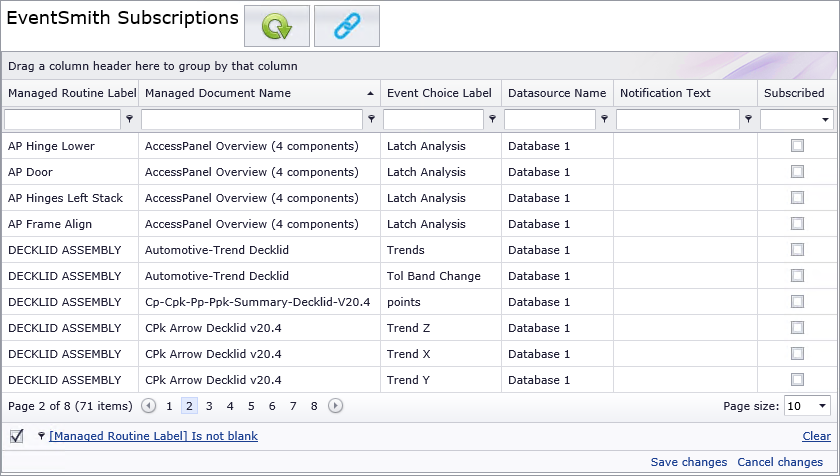
![]() The EventSmith
Subscriptions page allows you to subscribe to Events and create
or modify custom Notification Text for any email you may get as a result
of a particular event.
The EventSmith
Subscriptions page allows you to subscribe to Events and create
or modify custom Notification Text for any email you may get as a result
of a particular event.
 Reference
If you are an Event Administrator
and will be subscribing to events for multiple users, see the topic
EventSmith Subscription
Administration.
Events are triggered by settings in CM4D. For example, that a CM4D managed document contains a table, and the cells of that table are configured to turn red if the data in a DataSet is out of tolerance. Also, in the same managed document, the Event Properties have been set up so that when the data in the DataSet is out of tolerance, an event happens. At the time that CM4D changes the color of the cells of the table, it also sends information about the event to EventSmith, and EventSmith sends it by email to any users who have subscribed to that event.
When you subscribe to an event, EventSmith will notify you whenever the specific data condition occurs by sending you an email to the address you have defined in your User Profile Settings. The email will contain text describing the event. In addition, the email may include an attached image a sheet from the report that triggered the event. What is contained in the email is determined by the settings saved in the Managed Document.

· Save changes - saves all modifications to the database.
· Cancel changes - discards any unsaved modifications.
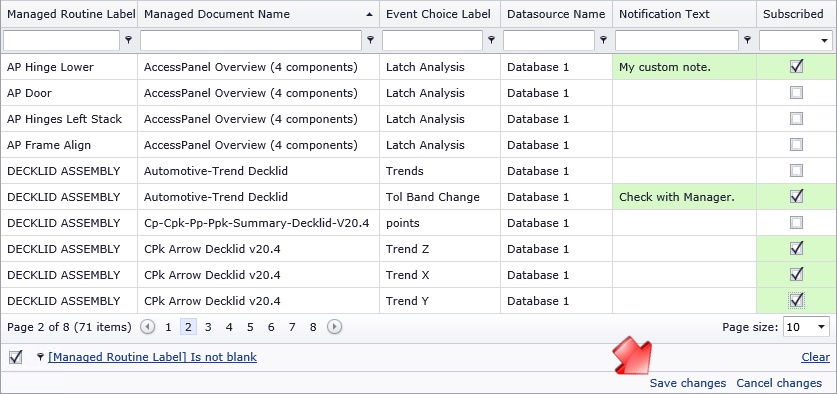
· Green Highlighted fields - indicate unsaved changes. If you navigate away from the EventSmith Subscriptions page while there are any fields highlighted, the browser will warn you that there are pending changes. If you disregard this message, all unsaved changes will be lost.
1. Locate the event to which you want to subscribe using sorting, searching, or grouping by one of the column headers.
2. Check the box in the Subscribe column for the event row.
3. Double click the Notification Text field to enter any text that you want included in your email notifications regarding this event.

4. Any modified fields will turn green.
5. Scroll to the bottom of the page and click Save Changes.

 Tip
Tip
You can customize this page by sorting,
grouping or filtering. See the topic CM4D
Web Interface for more information on customizing the CM4D Web
interface.