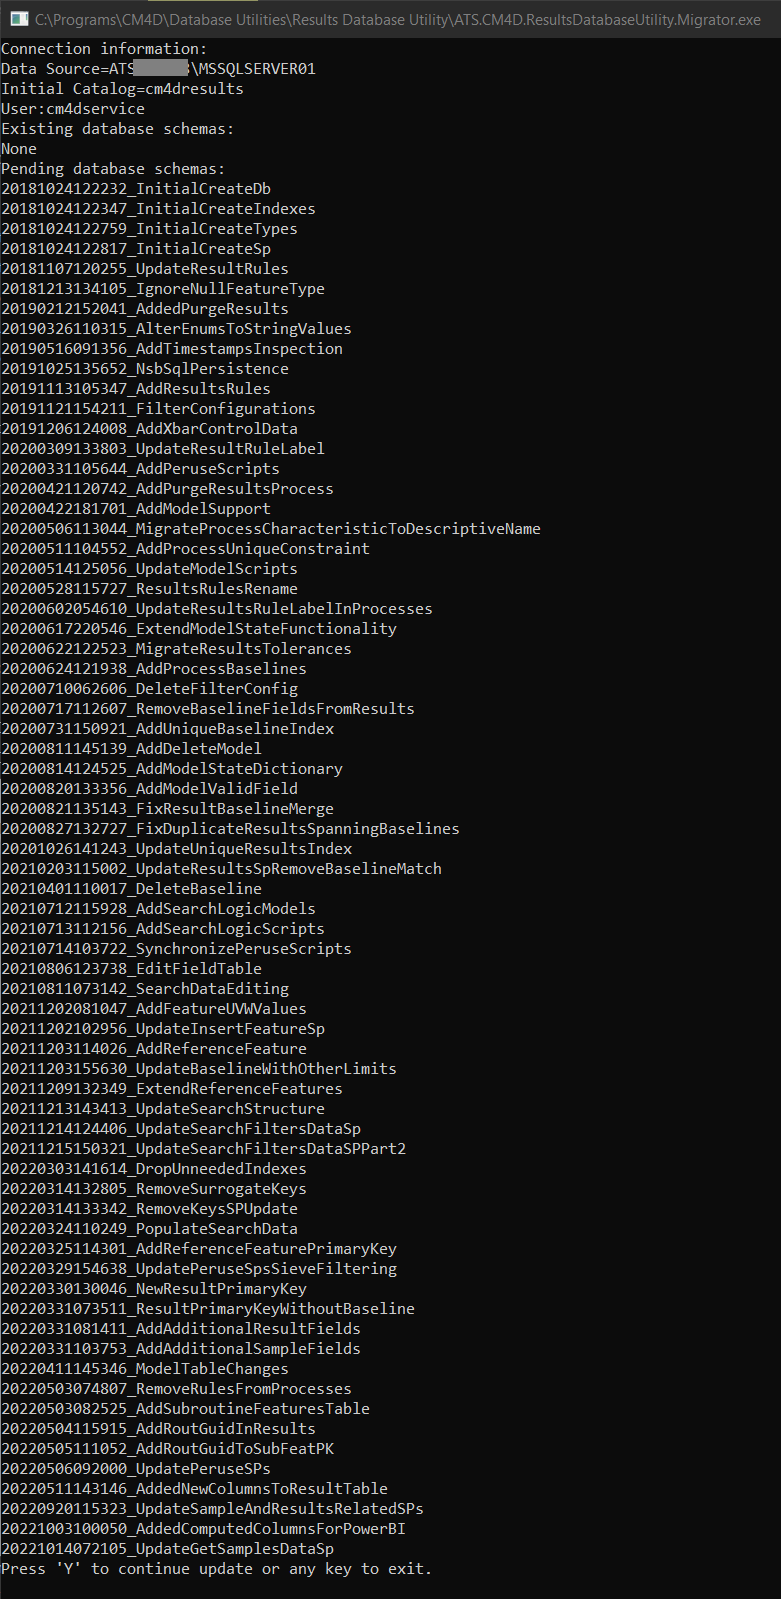
Results Database Utility is simple tool that create an entirely new Results database, create the tables for an empty database or upgrade an existing Results database from a previous version. In cases of upgrading, the tool automatically detects the existing database tables and adds or changes tables as needed. This application is included with the CM4D Server installation (.\CM4D\Database Utilities\) and should only be run by DBA users or someone with a clear knowledge of CM4D and its databases.
The version of CM4D and the version of the Results Database Utility must match. Do not run a version of the Results Database Utility that was not delivered with the version of CM4D you have installed.
This utility is located in the following directory: .\CM4D\Database Utilities\Results Database Utility
To ensure you have sufficient system privileges to run the database utilities, it is recommended to execute the tool using 'Run as administrator'.
Database Connection
The Results Database connection information must be set in Site Manager before you can run Results Database Utility. The Test Connection will fail if this is the first time the Results Database Utility is run (as the database does not yet exist). This is acceptable as long as you are sure that the information entered is correct.
Information for DBAs
Some organizations may have a dedicated Database Administrator outside of CM4D users that creates and maintains all databases, or may need to run Results Database Utility separately from CM4D for another reason. In such cases, the information here can be provided to a DBA or other qualified user that will create the CM4D Results Database. The Results Database Utility is included with the CM4D Server installation. After installation, the Results Database Utility folder can be copied directly from the CM4D installation folder and delivered separately to your DBA. The DBA needs to use either a command line argument or the launch settings file to connect to the Results database before running Results Database Utility.
See the topic Results Database for the DBA for more information.
Database Tasks
Based on the Database connection information provided, the utility will determine what actions can be applied. There are two sections:
- Existing database schemas - If you are upgrading an older Results database, you will see any information found in the connected database.
- Pending database schemas - If you are creating a new Results database, or adding Results tables/procedures to a new database object, you will see the tables/procedures which will be added to the database.
Run Results Database Utility and hit Y to proceed, or any other key to exit without executing any changes to the database.
Run Results Database Utility
Browse to .\CM4D\Database Utilities\Results Database Utility.
Run ATS.CM4D.ResultsDatabaseUtility.Migrator.exe.
When prompted, hit Y to continue.

Wait for the process to complete. When it is finished running, the Command Prompt will read ''Successful migration. Press any key to exit application".

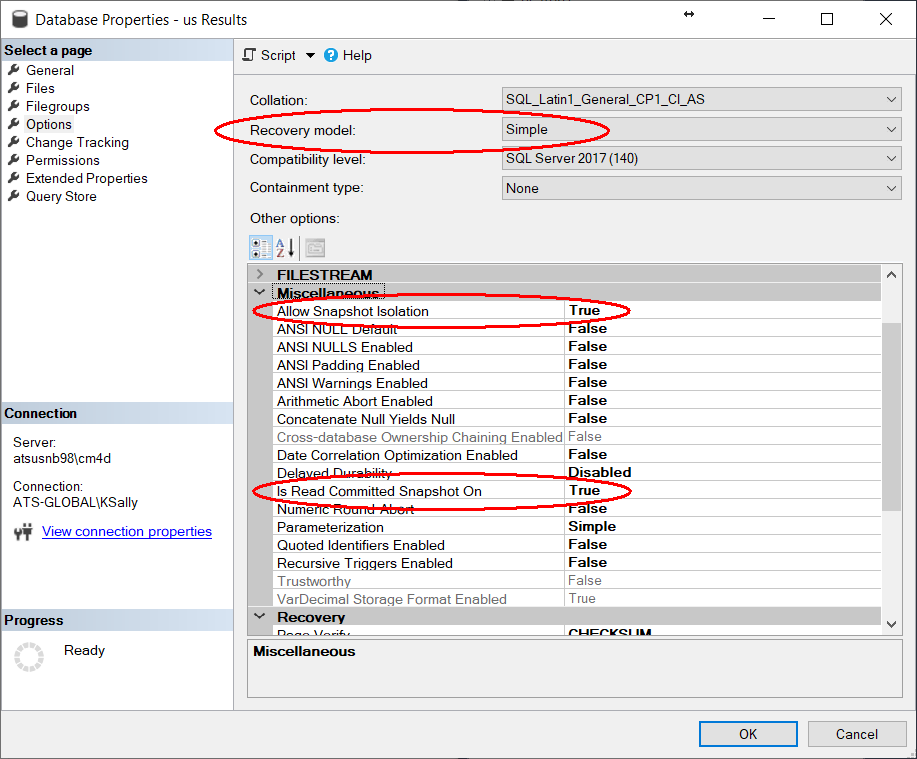
If you created the Results database object in SSMS before running the Results Database Utility, there are some settings that must be set manually in SQL server. Your SQL Server may already use some of these settings by default, but you should confirm these settings are correct or you may have issues with the Results database.
SQL Server DB Properties
After running the Results Database Utility tool, open SQL Server to confirm that the database object was created with the correct properties.
- Run SSMS.
- Right-click on the Results database created by Results Database Utility.
- Modify the Properties.
- Go to the Options page and check the following options are set:
- Recovery Model - Simple
- Allow Snapshot Isolation - True
- Is Read Committed Snapshot On - True

- Click OK.
Use Fiscal Year
By default, the Results database is configured to go by Calendar Year (Jan1-Dec31). However, if your organization uses a fiscal year you can customize your Results database to use a specific Start Month/Day. This allows search parameters which include the year parameter to adhere to the set fiscal year.
To set these dates, open the appsettings.json file from the .\CM4D\Database Utilities\Results Database Utility directory and modify the following information:
- FiscalStartMonth: Set the month of the start of your fiscal year. Enter a value of 1-12. The default setting is "1" (January).
- FiscalStartDay: Set the day of the month as the start of your fiscal year. Enter a value of 1-31. The default setting is "1" (first day of the month). Must be a valid day for the set month.
If you make these changes after the Results database has been created/updated, simply re-run the Results Database Utility to apply the modified app settings.
See also: