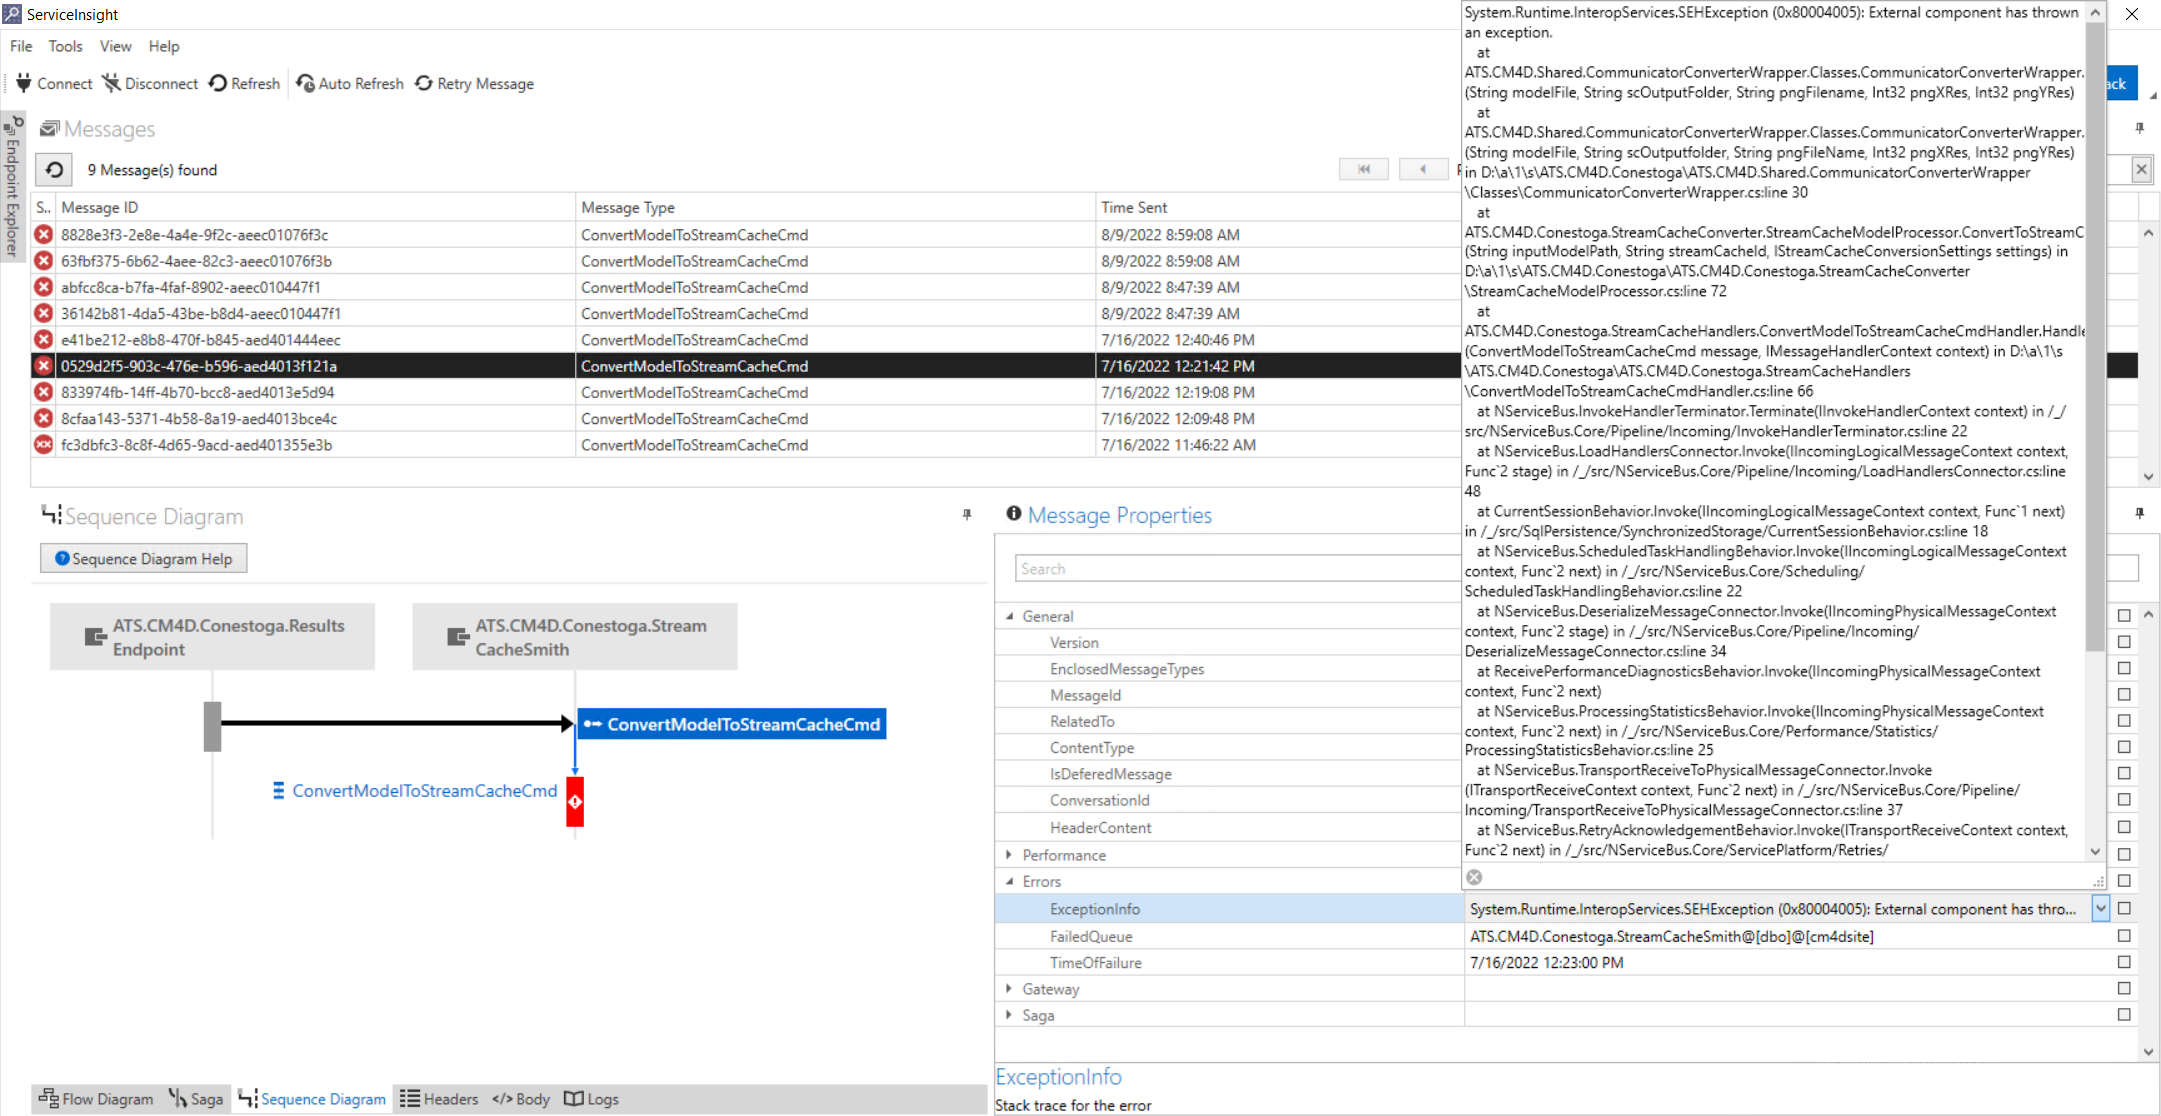
This guide contains the detailed steps to installing and configuring the CM4D Results Services.
Results Services Deployments
The Results services are typically installed on the same machine as CM4D Server, but the Results services are a separate installer from CM4D Server to allow one or more of the services to be distributed to additional servers. To support scalability for larger organizations the services can run on a single computer or multiple computers, and multiple instances of each service can be added and distributed throughout your network.
Only ONE instance of each of the three Results Services is supported per server.
The Results services can be deployed as Windows services (default install option) or as docker images.
The Results loader service can work without any connection to the Site database (e.g. in the cloud connected via a RabbitMQ queue). The connection is entered during the installation of the service.
Installation Overview
This installation includes the following sections:
- Run the CM4D Results Services Installer
- Features and Install Folder - Select the Results services to install. Only ONE instance of each of the three Results Services is supported per server.
- Configure Database Options - The connections strings for the CM4D Site Database and CM4D Results Database are the most important settings as they allow the services to connect to one another. Using the .4ds file provides both the Site and Results database connections.
- Configure Transport and Persistence - The CM4D Results transport system uses NServiceBus for messaging between applications, databases and services. NServiceBus is a high-performance messaging system that provides the deployment and scaling options needed for large data throughput as well as supporting smaller installations.
- Configure ServiceControl Queues - ServiceControl is a third-party application that supports the Results services communicating messages between the CM4D and Results databases.
- Enter SQL Credentials for Site/Results Database - The configuration steps for entering the Site and Results database connection information is only required if you select the Database Connection option 'Specify Database Credentials'. And depending on the services you selected in the first part of the installer, you may see only the Site database connection screen or both the Site and Results database screens. If you are installing only the Results Sender service, the Results database connection is not required.
- Enter SQL Credentials for Transport/Persistence - The configuration steps for entering the Transport and/or Persistence database connection information is only required if you select 'Other SQL Database' for the NServiceBus transport options.
- Start Results Services - Start the three Results services.
- Install and Configure ServiceControl Manager - NServiceBus (used by CM4D Results services) provides powerful error handling and monitoring tools. At a minimum, it is strongly recommended to use ServiceControl and ServicePulse. You need to configure at least one instance of ServiceControl and Auditing and one Monitoring instance for the transport method chosen during the installation of the Results service.
Quick Steps for Basic InstallQuick Steps for Basic Install
If you simply want to install one instance of the Results services to run local to your CM4D Server, select the following options during installation:
- CM4D Database Options - Use .4ds File
- NServiceBus Transport Options - Site Database (Transport and Persistence)
- ServiceControl Queues - Use default labels.

Run the CM4D Results Services Installer
- Run the CM4D Results Services install executable (as Administrator).
- Click Next.
- Accept the terms of the Licensing Agreement.
- Click Next.
Features and Installation Folder
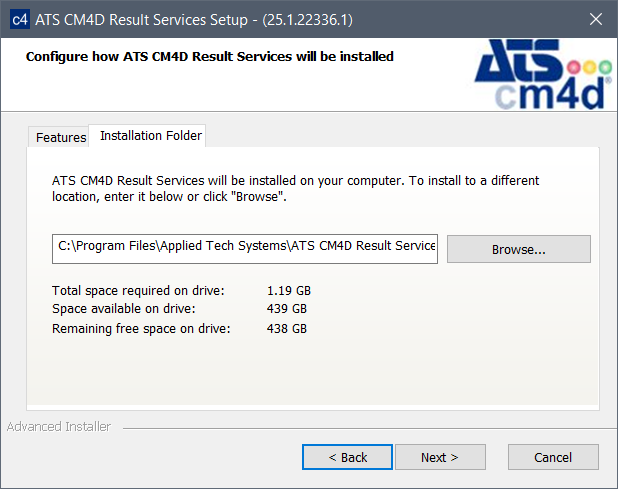
- The default options provided installs the Results Sender, Results Loader and StreamCacheSmith Windows Services to C:\Program Files\Applied Tech Systems\ATS CM4D Results Services\.
- Features: By default, all three services are selected. Only ONE instance of each of the three Results Services is supported per server. To change which service to install, uncheck the unwanted options:
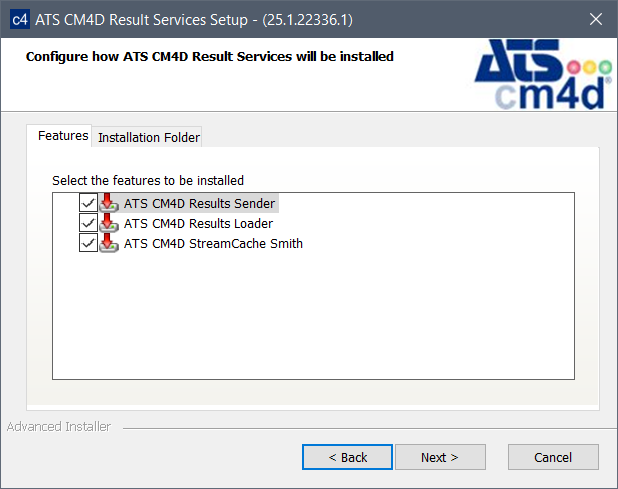
- ATS CM4D Results Sender - Install the CM4D Results Sender service. The Results Sender service processes the data events from CM4D, extracts the data from the databases and sends the data to Results Loader. In the case of a modified CAD image, a message is sent to the StreamCacheSmith service. This service requires a connection to the CM4D Site database and the Transport/Persistence database(s).
- ATS CM4D Results Loader - Install the CM4D Results Loader service. The Results Loader service updates the Results database with minimum database locks. This service requires a connection to the CM4D Results database and the Transport/Persistence database(s).
- ATS CM4D StreamCacheSmith - Install the StreamCacheSmith service. The StreamCacheSmith service converts 3D CAD images into the HOOPS streaming format used by web applications such as CM4D Peruse. The stream cache images are stored in the Site database and streamed to clients as-needed for rendering on the client-side HOOPS Viewer. This service requires a connection to the CM4D Results database and the Transport/Persistence database(s) and must be installed on the same machine as the HOOPS Communicator Server.
- Installation Folder: By default, the selected services are installed to C:\Program Files\Applied Tech Systems\ATS CM4D Results Services\. To change the installation folder, go to the Installation Folder tab and either enter a folder path or browse to a folder.
- Features: By default, all three services are selected. Only ONE instance of each of the three Results Services is supported per server. To change which service to install, uncheck the unwanted options:
- Click Next.
Configure Database Options
The connections strings for the CM4D Site Database and CM4D Results Database are the most important settings as they allow the services to connect to one another.
- Results Sender Service - Requires the database connection string for NServiceBus transport/persistence and the CM4D Site database connection string.
- Results Loader/StreamCacheSmith Services - Require the database connection string for NServiceBus transport/persistence and the CM4D Results database connection string.
If CM4D is installed on the same machine, the database connections are typically set via the CM4D.4ds file. However, this is not the case for Docker containers where the settings are typically set via environment variables. The Results Loader service can work without any connection to the CM4D Site database (e.g. in the cloud connected via a RabbitMQ queue) if the CM4DDSFilePath parameter it is explicitly set in the appsettings.json or via an environment variable.
- Select the method by which the services connect to the CM4D databases.
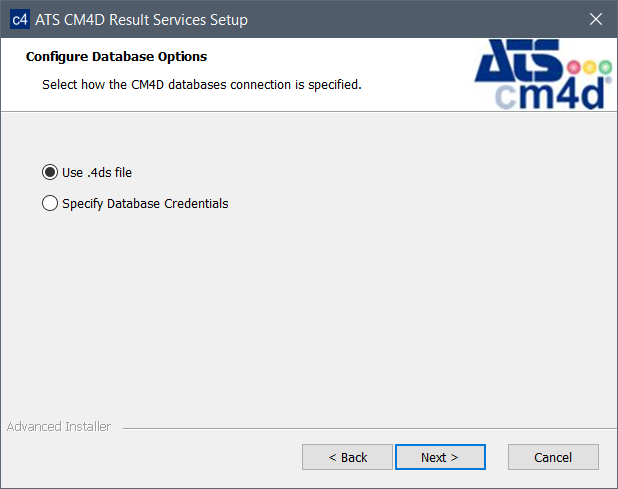
- Use .4ds File - If CM4D is installed on this machine, the services obtain database connection information from the DbConnect database connection file (CM4D.4ds) registered on the local system. The 4ds file provides both the Site Connection and the Results database connection strings to the Results Services.
- Specify Database Credentials - If CM4D is not installed on this machine, manually enter the database connection information during the installation. Later steps in this installation prompt manual entry of the database connection information for both the Site and the Results databases.
- Click Next.
Configure NServiceBus Transport Options
The CM4D Results transport system uses NServiceBus for messaging between applications, databases and services. NServiceBus is a high-performance messaging system that provides the deployment and scaling options needed for large data throughput as well as supporting smaller installations.
- Configure the same database for the ServiceControl configuration you are using.
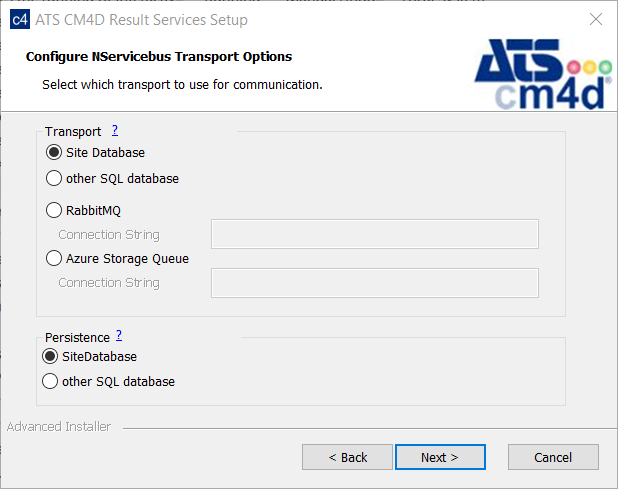
- Select the Transport option:
- For Site databases, the database connection information is obtained either from the 4ds file or entered in one of the next steps.
- For SQL databases, the database connection information is entered in one of the next steps.
- For RabbitMQ, enter a database connection string that includes the host, username, password and a virtual host.
- For Azure Storage Queue, enter the database connection string: DefaultEndpointsProtocol=https;AccountName=ACCOUNTNAME;AccountKey=ACCOUNTKEY
- Select a Persistence option:
- For Site databases, the database connection information is obtained either from the 4ds file or entered in one of the next steps.
- For SQL databases, the database connection information is entered in one of the next steps.
- Select the Transport option:
- Click Next.
Transport OptionsTransport Options
The NServiceBus transport is the way the messages are sent from one node to another. The system can be a distributed deployment, such as a local CM4D Site database and a cloud-based Results database. There are multiple transport options available.
- Site/SQL Database - The SQL transport uses database tables to implement the message queues that connect the different services. This service is simple to configure as it can use the SQL Server that is used for CM4D databases. However, it does not provide the same throughput and scalability as other transport options.
- RabbitMQ - RabbitMQ is a high-performance open-source message broker with wide industry usage. RabbitMQ can be installed on-premises on a server, as a container or used as a service at service providers like CloudAQMP. The free plan is sufficient to test this transport. A RabbitMQ connection string requires a host, username, password and a virtual host.
- Azure Storage Queue - Azure storage queues are a transport option for cloud-based or hybrid deployments. This option requires an Azure Storage Account. The connection string can be copied from the Azure storage account access key page.
Information about messages might need to be stored to ensure transactional consistency of long-running transactions. The persistency configuration defines where the data is stored. It is recommended to store it in the CM4D Site database, but another database can be configured if necessary. Additional persistency options will be available in future releases.
Configure NServiceBus Service Control
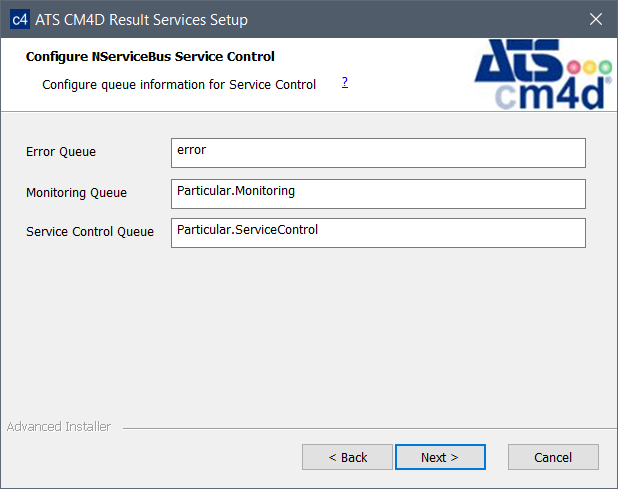
- Enter the name of the database queue tables for ServiceControl monitoring. These Queue labels must match what is defined as the Subscription Table in the connection string entered when configuring ServiceControl instances.
- Click Next.
Transport Queues/Subscription TablesTransport Queues/Subscription Tables
The Transport Queues are database tables created by ServiceControl where the Results services store monitoring information for ServiceControl. In ServiceControl Manager, these tables are specified as the Subscription Table in the transport connection string of each instance.
Configure SQL Connections for Site/Results Database
If you selected 'Use .4ds File', the installer skips this screen. Continue to the next section.
The configuration steps for entering the Site and Results database connection information is only required if you selected the Database Connection option 'Specify Database Credentials'. And depending on the services you selected in the first part of the installer, you may see only the Site database connection screen or both the Site and Results database screens. If you are installing only the Results Sender service, the Results database connection is not required.
- Enter the connection information for the database.
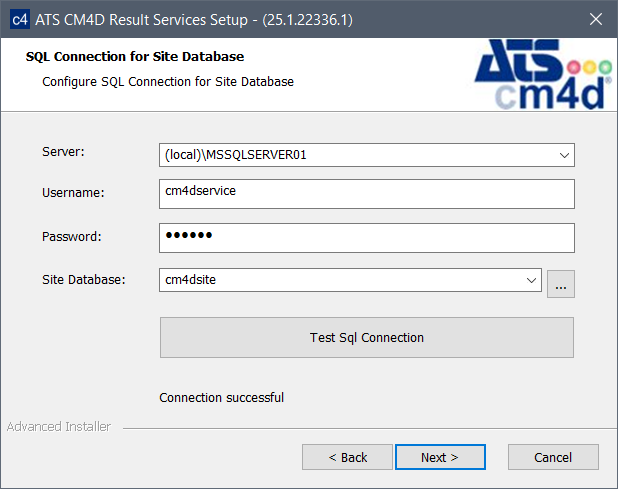
- Enter the fully qualified server name of the SQL Server database host machine, including the instance name.
- Enter the login credentials of the SQL authentication user accessing the Site database.
- Click the ellipses (
 ) to load the available databases.
- Open the dropdown menu and select the database.
- Click Test SQL Connection.
- Once you have a successful connection, click Next.
Configure SQL Connection for Transport/Persistence Databases
If you selected Site, RabbitMQ or Azure for your transport options, the installer skips this screen. Continue to the next section.
The configuration steps for entering the Transport and/or Persistence database connection information is only required if you selected 'Other SQL Database' for the NServiceBus transport options.
- Enter the connection information for the database.

- Enter the fully qualified server name of the SQL Server database host machine, including the instance name.
- Enter the login credentials of the SQL authentication user accessing the Site database.
- Click the ellipses (
 ) to load the available databases.
- Open the dropdown menu and select the database.
- Click Test SQL Connection.
- Once you have a successful connection, click Next.
Finish the Install
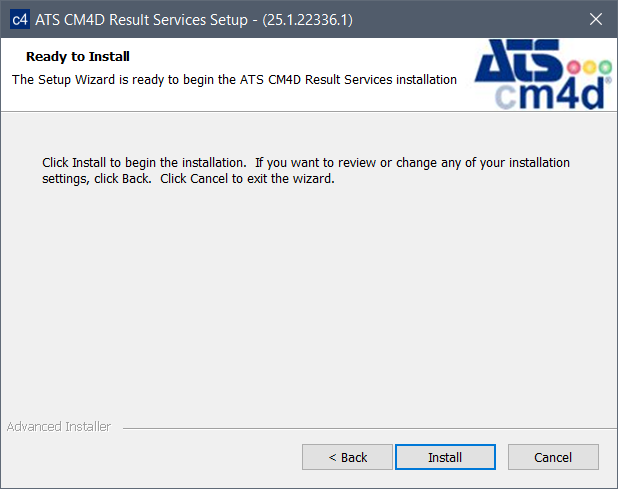
Click Install to complete the installation.
Start Results Services
- Open Control Panel > Administrative Tools > Services.
- Start the three Results services.
For new installations, the first service may not start if you are using a service user account that has never been granted the Log On As A Service rights. Re-enter the Log On credentials and try to start the service again.
Install and Configure ServiceControl Manager
NServiceBus (used by CM4D Results services) provides powerful error handling and monitoring tools:
- ServiceControl - Collects data from endpoints (CM4D Results Services).
- ServicePulse - A web-based application to inspect failed messages and resubmit them and to monitor the availability and performance of endpoints.
- ServiceInsight - Supports auditing of message details but has a major performance impact.
At a minimum, it is strongly recommended to use ServiceControl and ServicePulse. You need to configure at least one instance of ServiceControl and Auditing and one Monitoring instance for the transport method chosen during the installation of the Results service.
The downloads and installation instructions for the NServiceBus applications can be found on the Particular Software website.
The following installation instructions are only an example of a generic configuration of the ServiceControl tools for use with CM4D Results Services. Your system configuration may require different transport options or settings. Match the options with those selected during the installation of the Results services.
Transport OptionsTransport Options
The NServiceBus transport is the way the messages are sent from one node to another. The system can be a distributed deployment, such as a local CM4D Site database and a cloud-based Results database. There are multiple transport options available.
- Site/SQL Database - The SQL transport uses database tables to implement the message queues that connect the different services. This service is simple to configure as it can use the SQL Server that is used for CM4D databases. However, it does not provide the same throughput and scalability as other transport options.
- RabbitMQ - RabbitMQ is a high-performance open-source message broker with wide industry usage. RabbitMQ can be installed on-premises on a server, as a container or used as a service at service providers like CloudAQMP. The free plan is sufficient to test this transport. A RabbitMQ connection string requires a host, username, password and a virtual host.
- Azure Storage Queue - Azure storage queues are a transport option for cloud-based or hybrid deployments. This option requires an Azure Storage Account. The connection string can be copied from the Azure storage account access key page.
Information about messages might need to be stored to ensure transactional consistency of long-running transactions. The persistency configuration defines where the data is stored. It is recommended to store it in the CM4D Site database, but another database can be configured if necessary. Additional persistency options will be available in future releases.
Transport Queues/Subscription TablesTransport Queues/Subscription Tables
The Transport Queues are database tables created by ServiceControl where the Results services store monitoring information for ServiceControl. In ServiceControl Manager, these tables are specified as the Subscription Table in the transport connection string of each instance.
Install ServiceControl
Download the ServiceControl applications you want to use from Particular Software. Install the ServiceControl applications. The installation instructions for the NServiceBus applications can be found on the Particular Software website.
Configure ServiceControl
Once the ServiceControl installations are complete, run ServiceControl Management.
Add a License
- Click License.
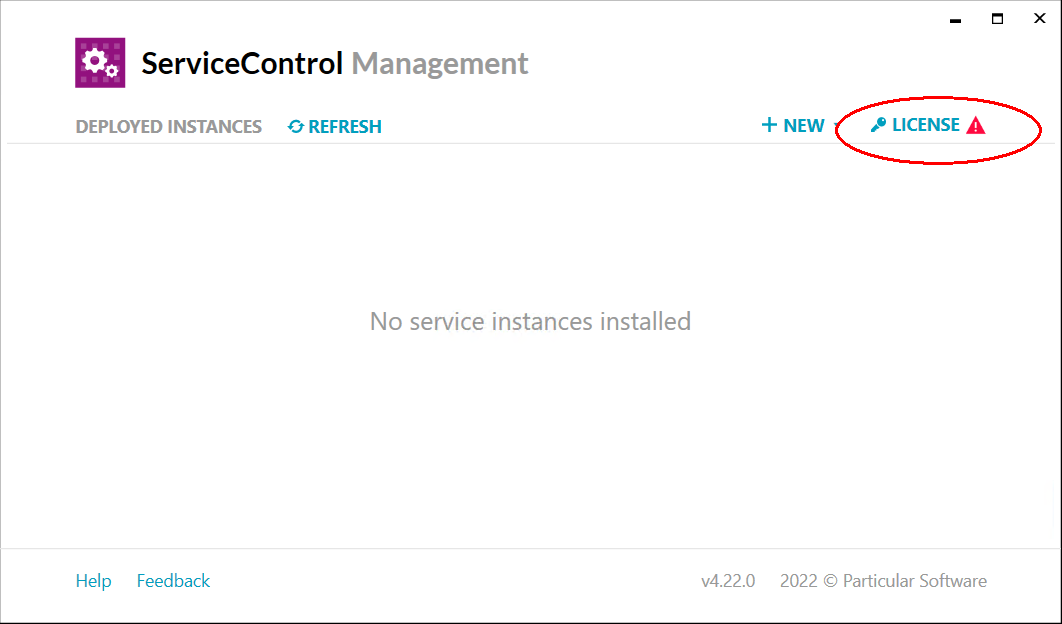
- Click Import License.
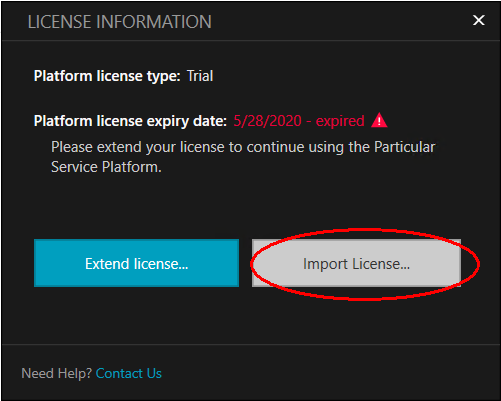
- Browse to the CM4D Results Services installation folder and locate the file 'License.xml' in one of the serivces' subfolder.
- Click Open.
Create a New Monitoring Instance
- Click New.
- Click Add Monitoring Instance.
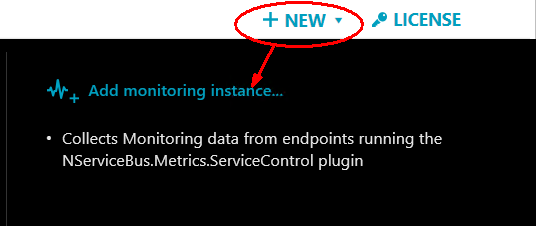
- Enter a Name for the Windows service (e.g. 'Particular.Monitoring').
- Enter a Description.
- Select User Account and enter the same user credentials as used for the CM4D Services (e.g., cm4dservice).
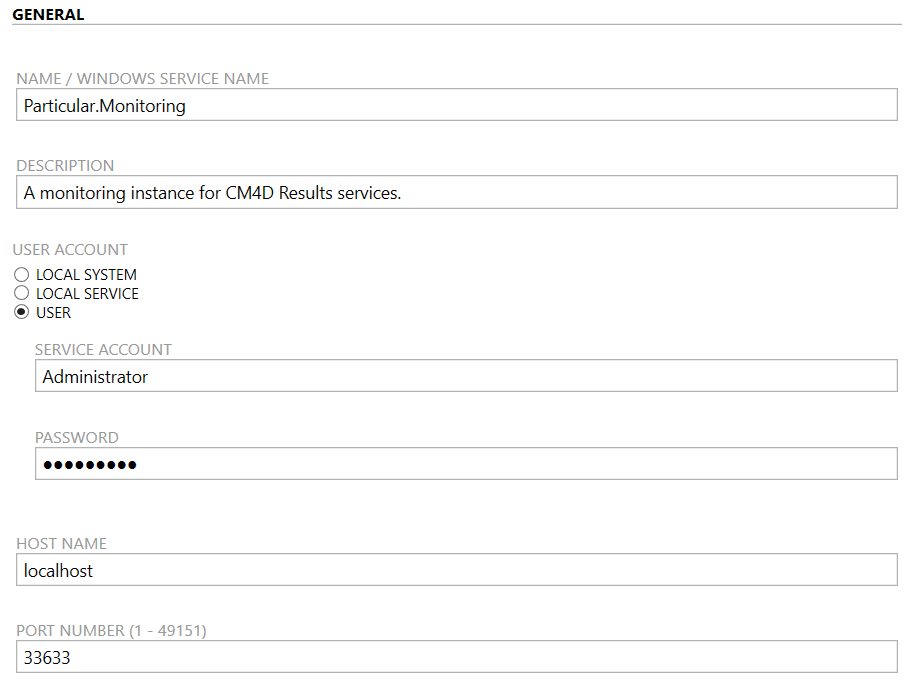
- Leave the Host set to 'localhost' unless a change is required.
- Enter the port number.
- Open the Transport menu and select the method selected during the CM4D Results Services installation. By default, this is SQL Server.
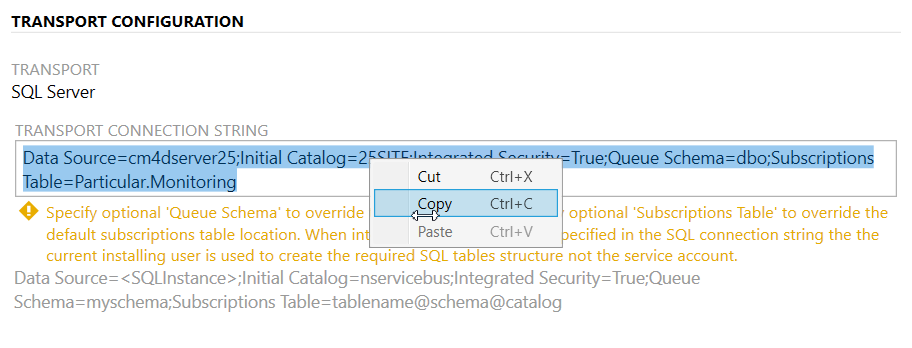
- In the Connection string, enter the full string for connecting to your CM4D Site database, according to the type of Authentication that grants access to CM4D databases.
- Windows Authentication [Data Source=cm4dserver25;Initial Catalog=25SITE;Integrated Security=True;Queue Schema=dbo;Subscriptions Table=Particular.Monitoring]
- Data Source - Enter the fully qualified server name of the SQL Server database host machine.
- Initial Catalog - Enter the name of the CM4D Site database.
- Integrated Security - Enter 'True' for Windows Authentication.
- Queue Schema (optional) - Enter a value to override the default schema (e.g., 'dbo').
- Subscriptions Table (optional) - Enter a value to override the default subscriptions table location (e.g., 'Particular.Monitoring').
- SQL Authentication [Data Source=cm4dserver25;Initial Catalog=25SITE;User id=sqluser;Password=pass1234;Queue Schema=dbo;Subscriptions Table=Particular.Monitoring]
- Data Source - Enter the fully qualified server name of the SQL Server database host machine.
- Initial Catalog - Enter the name of the CM4D Site database.
- User ID - Enter the username for the SQL Authentication used to access the database.
- Password - Enter the password for the SQL User account.
- Queue Schema (optional) - Enter a value to override the default schema (e.g., 'dbo').
- Subscriptions Table (optional) - Enter a value to override the default subscriptions table location (e.g., 'Particular.Monitoring').
- Windows Authentication [Data Source=cm4dserver25;Initial Catalog=25SITE;Integrated Security=True;Queue Schema=dbo;Subscriptions Table=Particular.Monitoring]
- Click Add.
Once you have the Connection String defined, keep a copy of the full string for use in the next section, adding a new ServiceControl instance.
Add New ServiceControl Instance
- Click New.
- Click Add ServiceControl and Audit Instances.

- Enter a Name for the Windows service (e.g. 'Particular.ServiceControl').
- Open the Transport menu and select the method selected during the CM4D Results Services installation. By default, this is SQL Server.
- In the Connection string, enter the full string for connecting to your CM4D Site database, according to the type of Authentication that grants access to CM4D databases.In the Connection string field, or paste the connection string from the ServiceControl instance.
- Hide InstructionsSee how to copy the string
- Hide InstructionsSee how to manually enter the string
In the Connection string, enter the full string for connecting to your CM4D Site database, according to the type of Authentication that grants access to CM4D databases.
- Windows Authentication [Data Source=cm4dserver25;Initial Catalog=25SITE;Integrated Security=True;Queue Schema=dbo;Subscriptions Table=Particular.ServiceControl]
- Data Source - Enter the fully qualified server name of the SQL Server database host machine.
- Initial Catalog - Enter the name of the CM4D Site database.
- Integrated Security - Enter 'True' for Windows Authentication.
- Queue Schema (optional) - Enter a value to override the default schema (e.g., 'dbo').
- Subscriptions Table (optional) - Enter a value to override the default subscriptions table location (e.g., 'Particular.ServiceControl').
- Data Source - Enter the fully qualified server name of the SQL Server database host machine.
- SQL Authentication [Data Source=cm4dserver25;Initial Catalog=25SITE;User id=sqluser;Password=pass1234;Queue Schema=dbo;Subscriptions Table=Particular.ServiceControl]
- Data Source - Enter the fully qualified server name of the SQL Server database host machine.
- Initial Catalog - Enter the name of the CM4D Site database.
- User ID - Enter the username for the SQL Authentication used to access the database.
- Password - Enter the password for the SQL User account.
- Queue Schema (optional) - Enter a value to override the default schema (e.g., 'dbo').
- Subscriptions Table (optional) - Enter a value to override the default subscriptions table location (e.g., 'Particular.ServiceControl').
- Windows Authentication [Data Source=cm4dserver25;Initial Catalog=25SITE;Integrated Security=True;Queue Schema=dbo;Subscriptions Table=Particular.ServiceControl]
- Expand ServiceControl and go to the General section.
- Select User.
- Enter the same user credentials as used for the CM4D Services (e.g., cm4dservice).
- Leave the default settings for the remaining options.
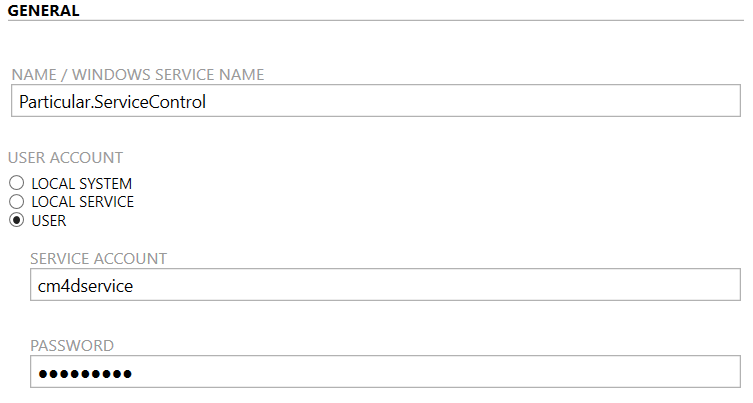
- Expand ServiceControl Audit and go to the General section.
- Select User.
- Enter the same user credentials as used for the CM4D Services (e.g., cm4dservice).
- Leave the default settings for the remaining options.
- Click Add.
Confirm Configuration
Once the monitoring and service control instances are set up, confirm the following:
- Windows Services - Check that the Particular services are running.

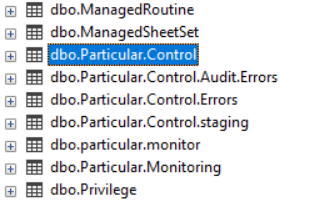
- Check Site Database Tables - Check that the five tables corresponding to the two new instances (1 for Monitoring, 4 for ServiceControl) appear in the CM4D Site database.
Run ServicePulse
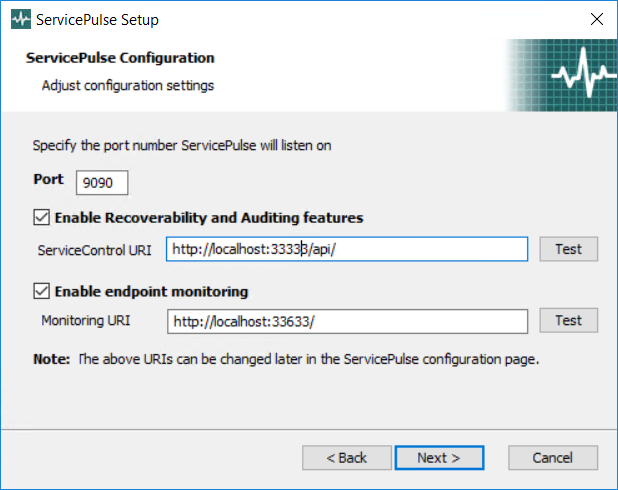
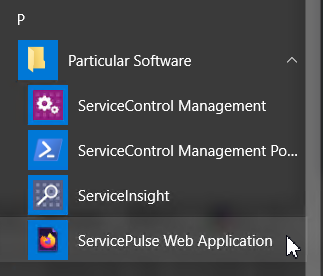
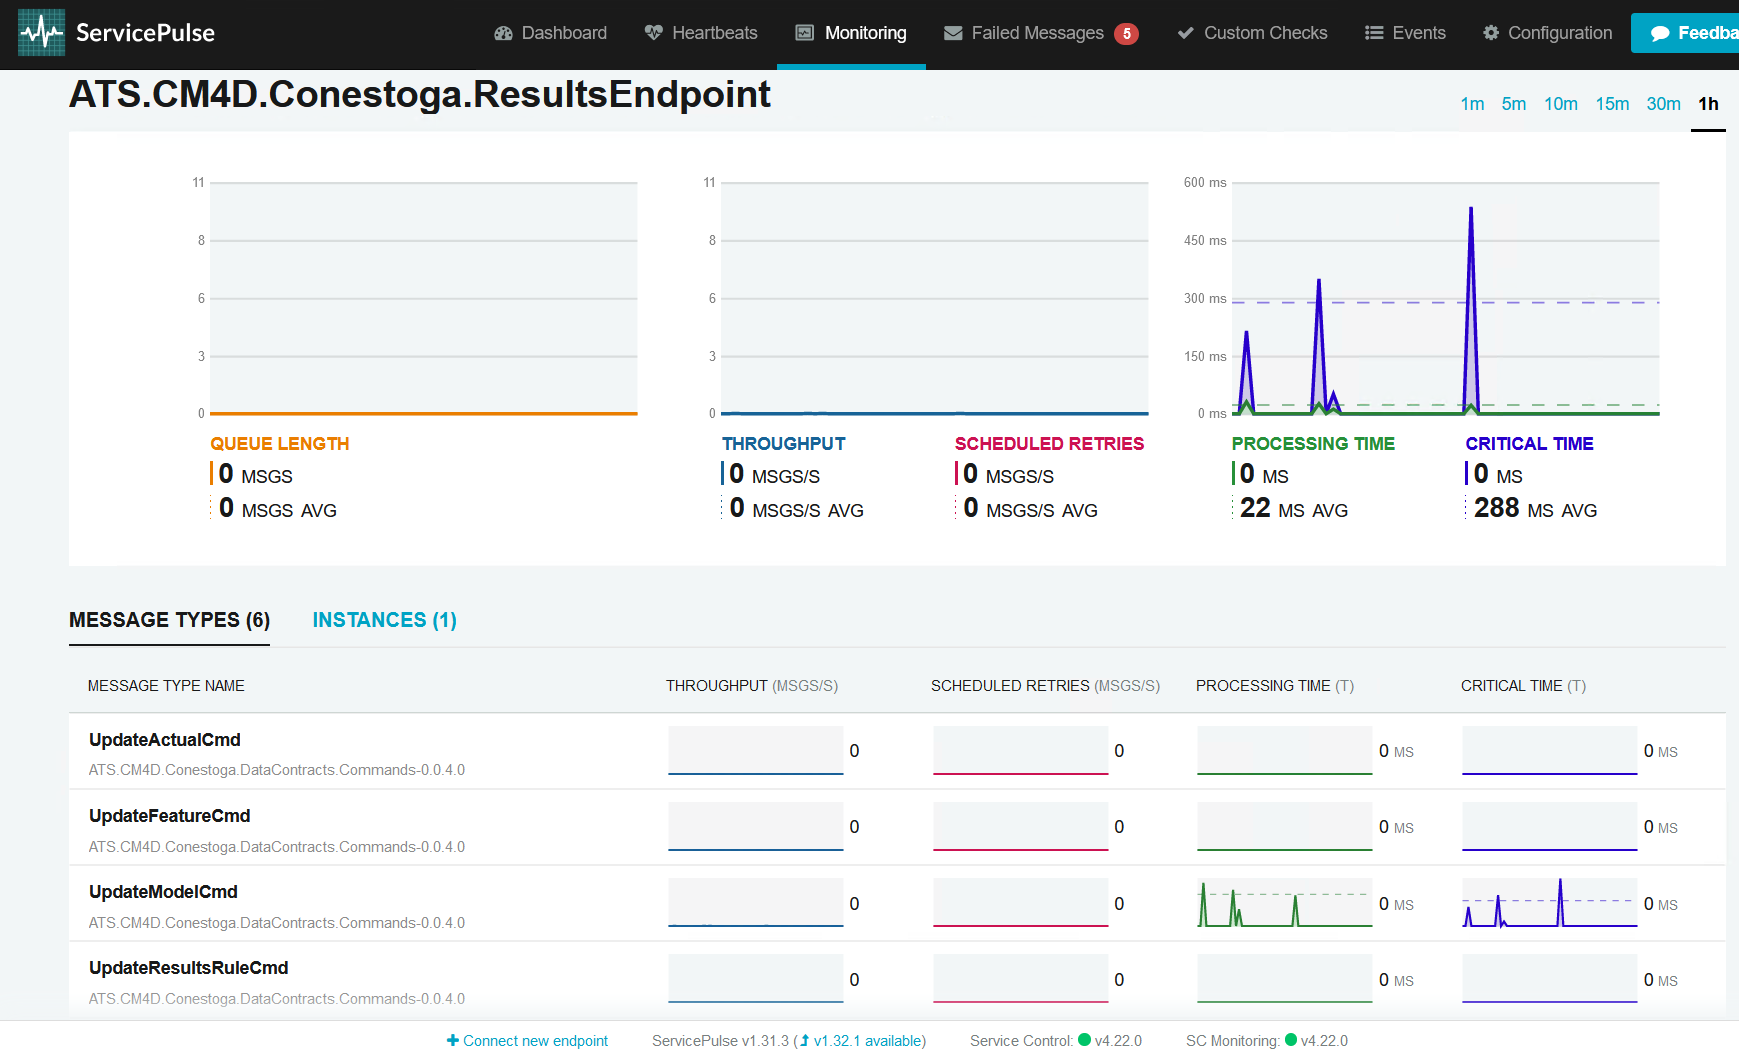
The ServicePulse application is accessed via a shortcut provided in the Windows Start menu ![]()
![]() or manually enter the web server and the port (default: localhost:9090) used during the ServicePulse installation
or manually enter the web server and the port (default: localhost:9090) used during the ServicePulse installation 
 .
.

Run ServiceInsight (Optional)
Open the ServiceInsight application and connect or configure as needed.
