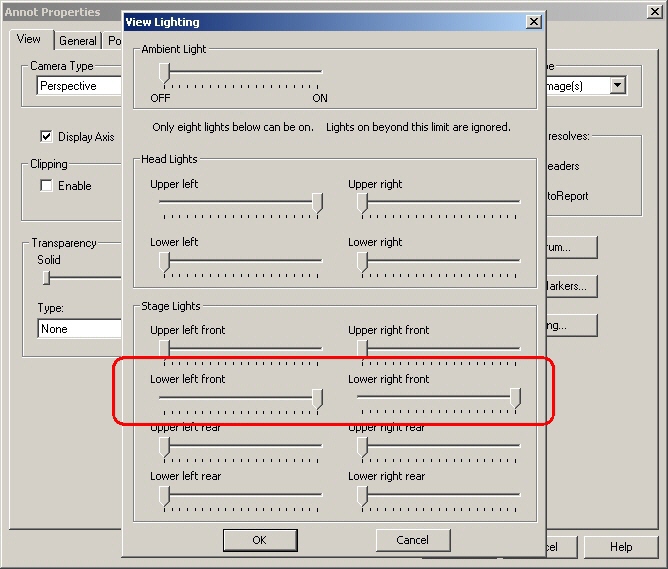
View Lighting
All Views are created with Default Lighting that is always enabled. Any lighting settings are obtained from the CAD model, but if none are available a 'Default Light' is applied to a View. In cases where the default CAD model lighting is not preferred or sufficient, custom lighting may be applied as a property of a View.
Various graphics cards and display drivers may have varying results!
To set the View Lighting:
Right-click on a View annotation.
Select Properties.
On the View tab, click Lighting.
Multiple lights can be created and enabled, or all lighting may be turned off. Lighting is a property of the View annotation and can be 'copied' via 'copy properties' or duplicating the annotation. It cannot be imported/exported from one view to another.
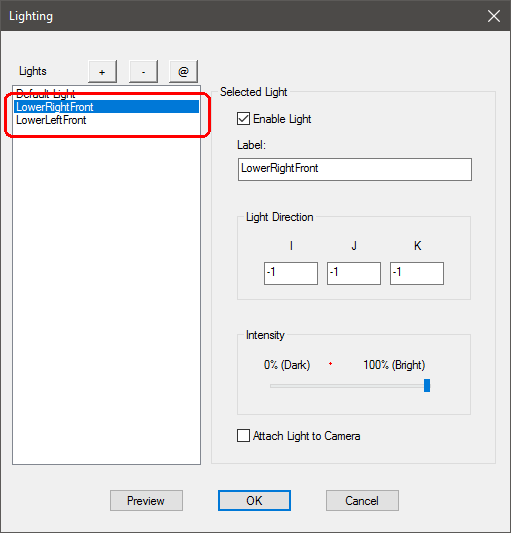
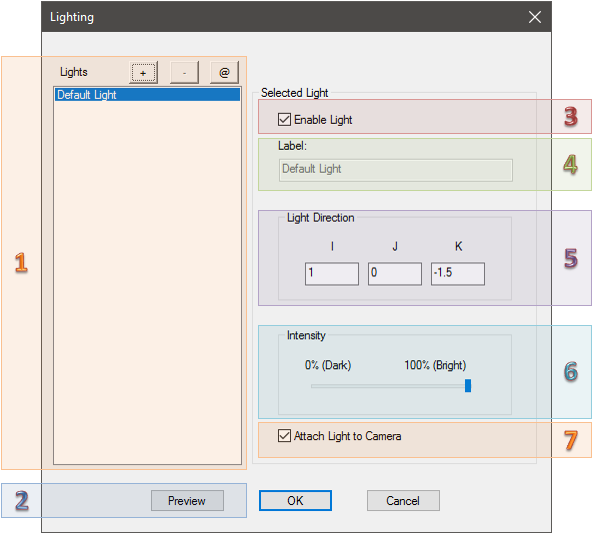 1. Lights
This is the list of lights created for the current View. All views have a 'Default Light' that can be enabled or disabled, but not deleted or renamed.
The three buttons modify the lights in the list. These buttons make changes temporarily within the dialog; if you cancel out of the Lighting dialog, any alteration of the Lights in the list (add, remove, apply changes) are discarded.
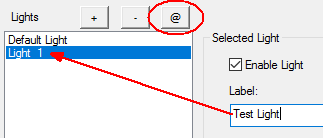
 - Create a new light.
![]() - Delete the selected light.
- Delete the selected light.
 - Apply changes to the selected light (e.g., change the label, then click apply to see new label in the list).
Default Light
The Default Light is an upper left headlight, like a light originating from over the left shoulder of the viewer. The default Light Direction is (1, 0, -1.5). The IJK values and intensity can be modified if you prefer rather than creating a new light.
| Default Light | No Light | |
 |
 |
The Default Light is enabled by default on new Views or Views that do not have any custom lighting already assigned. See the end of this topic for information on pre-v25 migrated lighting.
2. Preview
While making changes to lighting, you may want to preview the settings before committing changes to the view. The Preview button activates the current Lighting settings for all enabled lights in the View. If the View area is covered by the property dialogs, you must move the dialogs away from the View you are modifying for the preview results to be visible.

3. Enable Light
Check the box to enabled the selected light. Clear the box to disable the selected light.
The Default Light is enabled by default on new Views or Views that do not have any custom lighting already assigned. See the end of this topic for information on pre-v25 migrated lighting.
4. Label
Enter a label for the light. Each light must have a unique label per View.
5. Light Direction
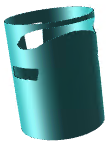
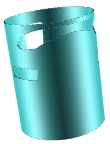
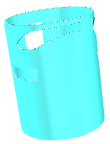
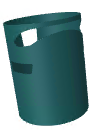
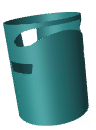
The IJK vector set here determines the direction of the lighting. Enter positive or negative values for each vector to set the direction. For example, if you use the direction (5, 10, -10), it will appear as though the light is coming from the upper left corner. Below are a few more examples of some lighting vectors and how the attachment affects the light:
| Description | I | J | K | Light Attached | Light Not Attached |
| Lower Left | 5 | -10 | -10 |  |
 |
| Lower Right | -5 | -10 | -10 |  |
 |
| Upper Left | 5 | 10 | -10 |  |
 |
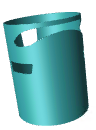
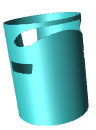
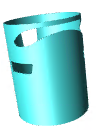
| Upper Right | -5 | 10 | -10 |  |
 |
| Upper Right Lower Right | -5 | 10 | -10 | 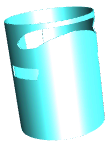 |
 |
| -5 | -10 | -10 | |||
| Upper Left Lower Right | 5 | 10 | -10 | 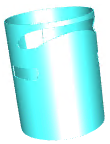 |
 |
| -5 | -10 | -10 | |||
| Back Upper Left Back Upper Right Front Upper Left Front Upper Right | 1 | -1 | 1 | 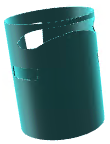 |
 |
| 1 | 1 | 1 | |||
| -1 | 1 | 1 | |||
| -1 | -1 | 1 |
6. Intensity
The brightness of each light can be adjusted with a slider, from 0% (Dark) - 100% (Bright). Drag the slider to the desired setting, or click on the slider to move the switch in 20% increments.
| 0% | 20% | 40% | 60% | 80% | 100% |
 |
 |
 |
 |
 |
 |
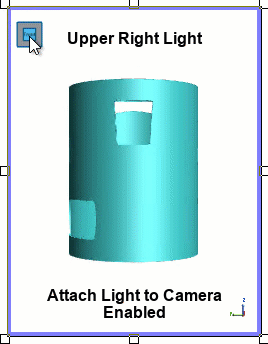
7. Attach Light to Camera
This option determines how the lighting direction is applied to the model in a view from the perspective of the user.
Attach Light to Camera = Enabled ("Headlight")
Lights move as the view is moved and keep their position relative to the viewer. The direction of the light remains static, regardless of how the model is rotated within the view.
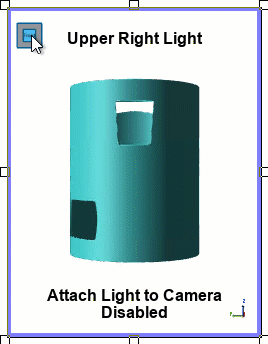
Attach Light to Camera =Disabled ("Stagelight")
Lights have a fixed position, like the lights on a stage, where the image is illuminated according to its position within the stage scene. Rotating the part within the view is like the user is moving around the stationary model and lighting.
 |
 |
v25 Migrated View Lighting
If you have a document that was created prior to v25, any lighting settings on the Views are migrated automatically into the new format. Migrated lighting does not have a 1:1 correlation.; each light is recreated as close to the old version as possible. Ambient Lighting does not migrate, as there is no corresponding option in the new lighting.
| Lighting in v23 | Lighting as Migrated in v25 | |
 |
 |
Can we improve this topic?