SSL Certificates
CM4D web application API's use TLS and therefore require a secure signed certificate.
A self-signed certificate will work for testing but it is HIGHLY RECOMMENDED to use a production grade certificate from a Certificate Authority (CA) that provides SSL Certification (e.g., GoDaddy, Cloudflare, GeoTrust, etc.).
- CM4D Peruse and CM4D Peruse API requires a SSL Certificate. The application server that runs these services allow for certificates to be implemented in different options. Each service in its installation folder contains a configuration file where the user can modify these option based on the type of the certificate they have. The default installation uses a configuration option to load the certificate from saved in the Windows Certificate store. See the section Create and Register Certificates for TLS/SSL (Windows Certificate Store) for more details.
- The HOOPS Communicator Server, which is installed along with CM4D Peruse, also requires certification. However, HOOPS is a third-party SDK which does not utilize the Windows Certificate store and therefore requires a separate Certificate File and Private Key File. See the section SSL Certificate and Key Files (Non-Windows Certificate Store) for more details.
For more information on how to replace the default certificate from configuration, please refer to the Microsoft documentation.
Create and Register Certificates for TLS/SSL (Windows Certificate Store)
This option applies only for workstations that are configured on a domain within a company that has configured a Certificate Authority from your IT department. Before applying the steps described bellow please consult with your IT department to see if they support importing/requesting certificates from their respected Certificate Authority.
Follow the steps below to create a certificate for the ADOS web API’s that require HTTPS and is the recommended approach. Self-signed certificates should not be used for ADOS web API’s except for testing.
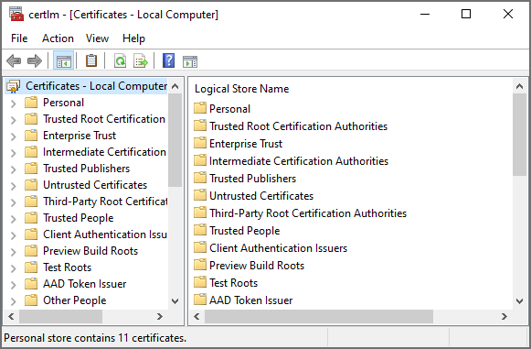
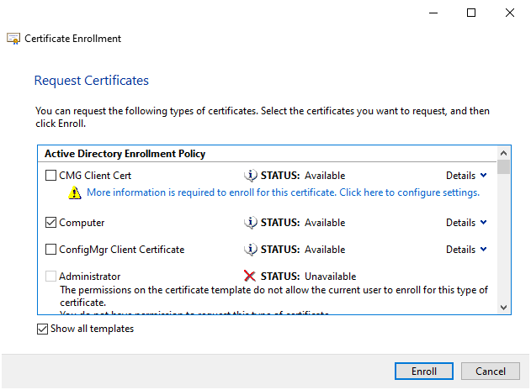
- Open the certificate manager for the local computer using the following command: certlm.msc
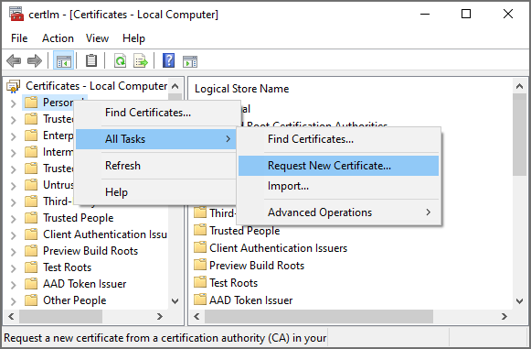
- Right click on the Personal folder and select All Tasks > Request New Certificate.
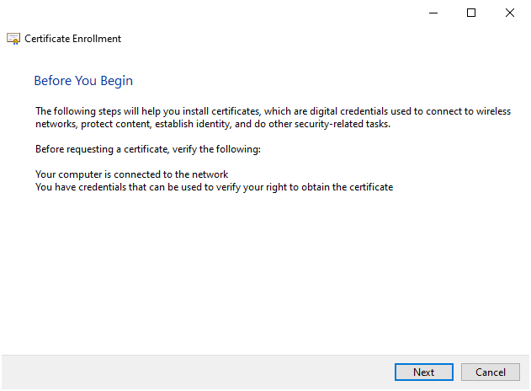
- Click Next.
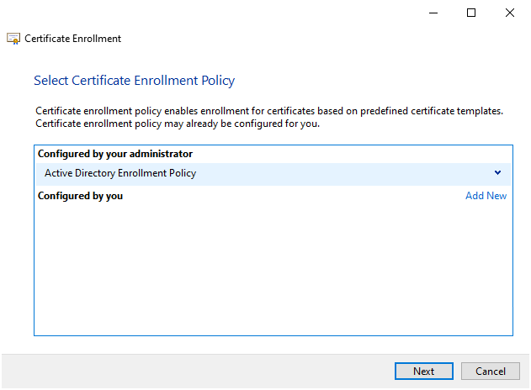
- Select the Active Directory Enrollment Policy and press Next.
- Request a certificate of a specific type that is required for the web API and click Enroll.
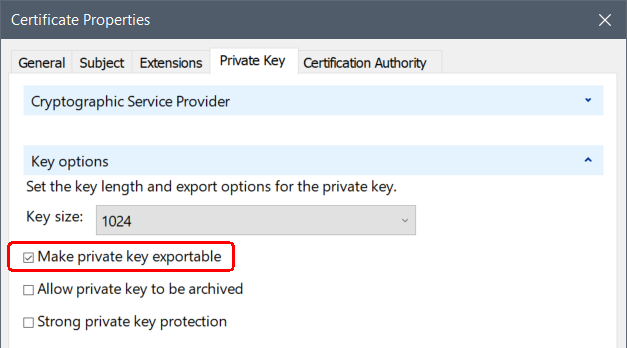
If the certificate is to be used with the HOOPS Communicator Server, the requested certificate must include the Private Key and it must be exportable. Not all organizations allow this type of request, but this will be required in order to export the certificate to a file for use with the HOOPS server. See the next section, SSL Certificate and Key Files (Non-Windows Certificate Store), for more information on exporting certificates.
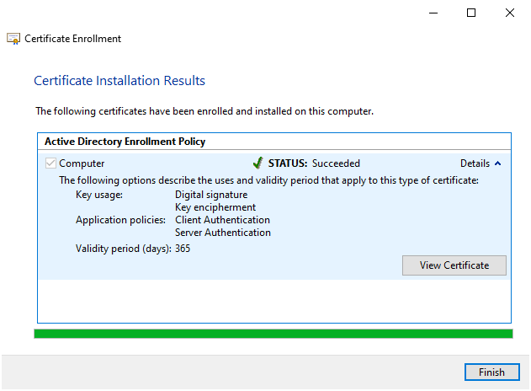
- Review the certificate properties and click Finish.
The certificate uses a FQDN in the Subject Alternative Name and therefore the ADOS web API’s (Security Manager, Configuration Manager, License Manager, Bus services, Inspect services, CM4D services) should configure the FQDN everywhere the hostname is required. Clients should then invoke the services using the FQDN otherwise the browser will display a warning message for invalid host name and will result in a HTTP Bad Request.
There may be multiple certificates in the personal store with the same ‘Issue to’ property. This causes an issue when the certificate that has the ‘Server authentication’ set expires earlier than the certificate that does not have that intended purpose set. The ADOS web API’s select the certificate by its subject CN and the longest validity. It does not check the intended purpose.
![]()
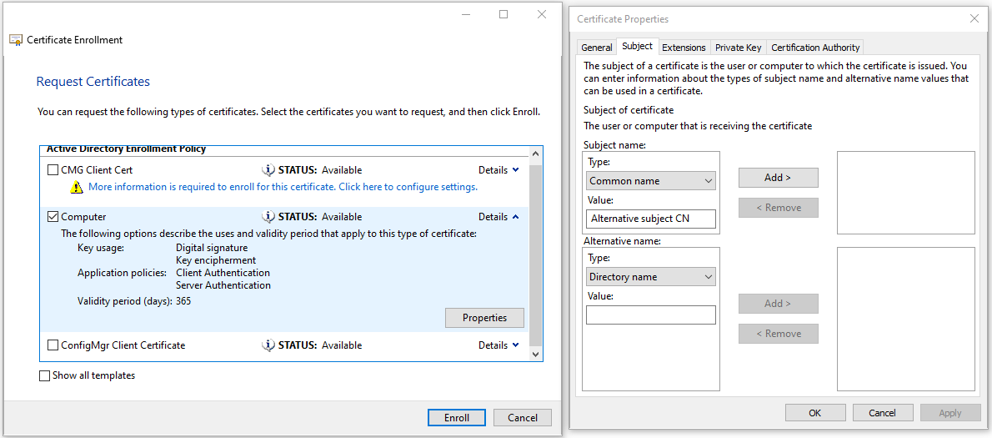
It is recommended to check if the subject common name can be changed in the certificate type selection window as indicated below:
For further information on working with certificates, please refer to the official Microsoft documentation here.
For additional information regarding configuration on Kestrel, please refer to the official Microsoft documentation here.
SSL Certificate and Key Files (Non-Windows Certificate Store)
In some cases, such as with the HOOPS Communicator third-party SDK, an application/service cannot access the Windows certificate store to establish a secure connection for its clients. Instead, the SSL Certificate can be stored as a PEM file with an additional KEY file containing the Private Key. Both of these files contain sensitive information and should be handled carefully.
Export the SSL Certificate with the Private Key (PFX)
Exporting a certificate to a PFX file has some requirements:
- Export from Personal > Certificates
- Format -
- Personal Information Exchange - PKCS #12 (.PFX)
- Include all certificates in the certification path if possible
- Enable certificate privacy
- Security - Set a Password, not a Group/User
- Encryption - AES256-SHA256
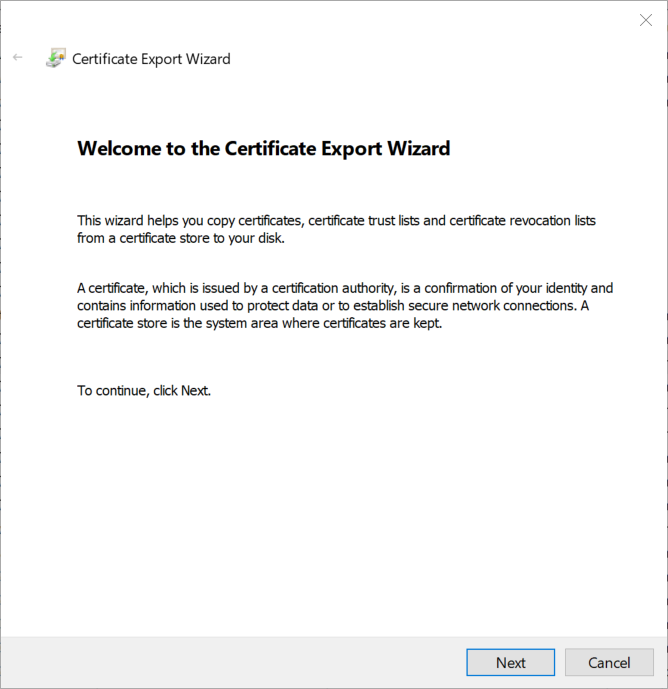
Steps for Exporting a certificate to a PFX file:
- Open the certificate manager for the local computer using the following command: certlm.msc
- In Personal > Certificates, right-click on your certificate and select All Tasks > Export....
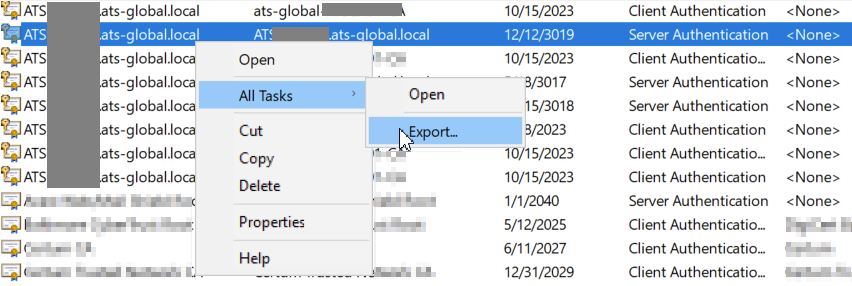
- Click Next.
- When prompted, select Yes, export the private key and click Next.
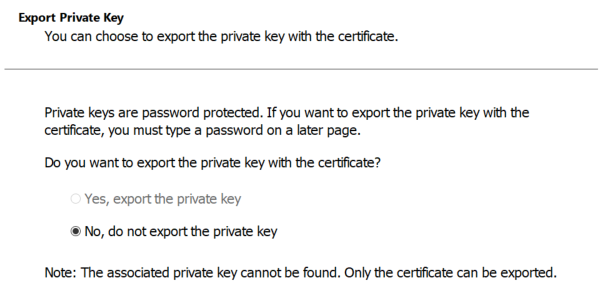
If the Yes option is grayed out, the certificate cannot be used. Request a new certificate with the property Make private key exportableMake private key exportable enabled. - Select the following options:
- Personal Information Exchange - PKCS #12 (.PFX)
- Include all certificates in the certification path if possible
- Enable certificate privacy
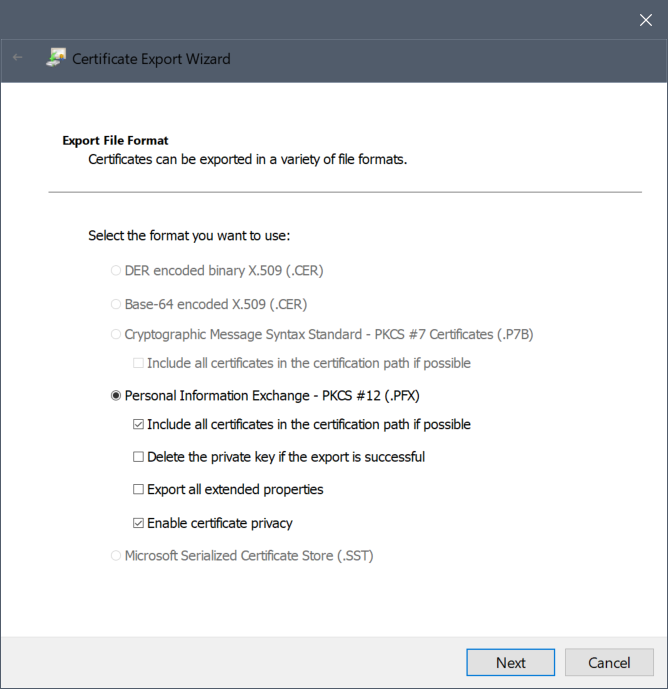
- Click Next.
- In the Security section:
- Check Password.
- Configure the password. Make a note of this password, as it will be needed later when converting the PFX file to PEM/KEY files.
- Set the Encryption to AES256-SHA256.
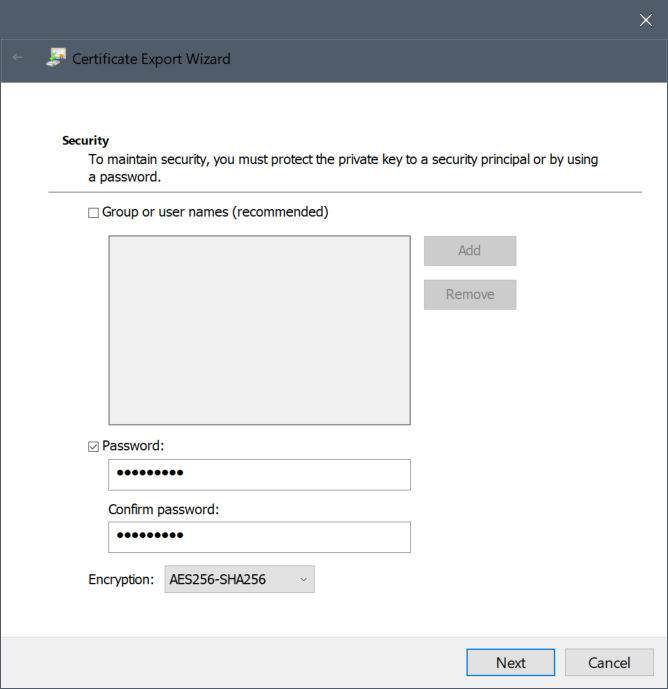
- Click Next.
- Enter or browse to the folder in which the certificate file will be created and enter a file name with the extension *.pfx. Make a note of the location/name of this file as the file will need to be moved to the appropriate location of the extraction tool when converting the PFX file to PEM/KEY files.
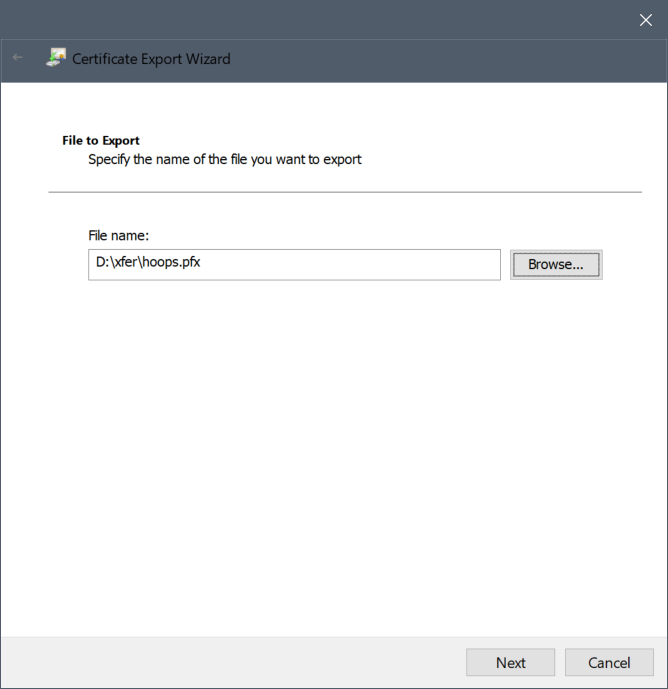
- Click Next.
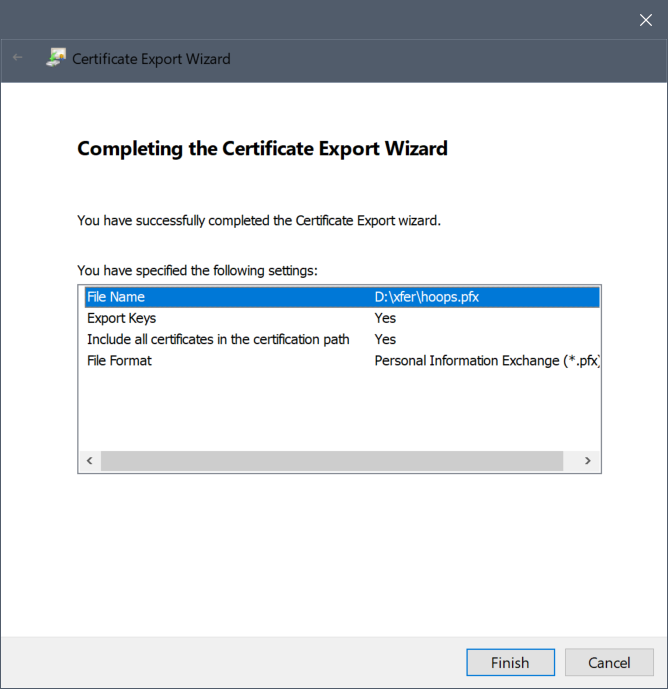
- Click Finish.
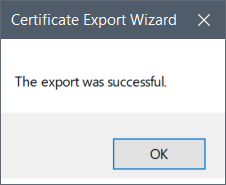
- Click OK.
Convert the PFX to PEM/KEY
Once you have exported your certificate to a PFX file, you will need to convert the PFX file to a PEM file and a KEY file. Both of these files are required for the HOOPS Communicator Server, which is a third-party SDK that does not use the Windows Certificate store and therefore requires a separate Certificate File and Private Key File to be specified during installation (part of the CM4D Peruse Installer).
This process requires a tool such as OpenSSL. While the example provided here is for OpenSSL, there are other tools that accomplish the same result.
Example Using OpenSSL
Copy the exported PFX file to the install location of OpenSSL (.\Program Files\OpenSSL-Win64\bin).
- Run Command Prompt (Admin).
- Go to the OpenSSL directory.
- Enter the command for PFX to PEM: openssl pkcs12 -in certfile.pfx -out certfile.pem -nokeys -clcerts
- Once the command is initiated, it prompts for the password entered during the export of the PFX file.
- Enter the command for PFX to KEY: openssl pkcs12 -in certfile.pfx -out certfile.key -nocerts -nodes
- Once the command is initiated, it prompts for the password entered during the export of the PFX file.
- Copy the PEM/KEY files to the location entered during the CM4D Peruse/HOOPS Communicator Server installation or keep the files on hand for future installations.
PFX to PEM:
openssl pkcs12 -in certfile.pfx -out certfile.pem -nokeys -clcerts
PFX to KEY:
openssl pkcs12 -in certfile.pfx -out certfile.key -nocerts -nodes
Can we improve this topic?