This guide contains the basic steps for upgrading a CM4D Server from v24 up to v25. While this can be used as a general outline of the upgrade process, your individual implementation may require additional or custom steps.
This is a major version upgrade so a complete uninstall and then reinstall is required.
Prepare for the Upgrade
Contact your ATS sales representative or ATS support if you require assistance with your upgrade.
Backup CM4D configuration files. Once the upgrade is complete, the files can be copied back into the install folder to replace the previous files.
CM4D.4ds
Cm4d.ini
Settings Files:
CM4DLauncher.settings
CM4DScheduler.settings
CM4DResultsLauncher.settings
CM4DService.settings
CM4DResultsLoader.settings
DataSmithBatch.Settings
ATSLicensingServer.Client.dll.config
Backup all CM4D Databases.
Site DB
CM4D DB(s)
Results DB
Backup all CM4D Managed Documents. This is always recommended before a major upgrade, even when there is little risk of issues directly related with documents.
Obtain v25 CM4D Licenses.
Obtain the v25 CM4D Server installer.
Next, confirm that your systems are ready for upgrading.
Check Queue Status
All Results queues must be empty before continuing with the upgrade. Do not delete the queues or queue contents!
Before uninstalling any previous version of v24 to upgrade, all Results message queues and database queue tables must be empty. If messages are left in the queues during the upgrade, you risk corrupting the validity of those messages or the data contained in those messages may never reach the database. To avoid any issues, wait for the queues to empty before stopping the Results services.
Use the following guideline to allow the queues to empty without adding any new messages:
On every computer that has CM4D installed:
Stop all the CM4D Services.
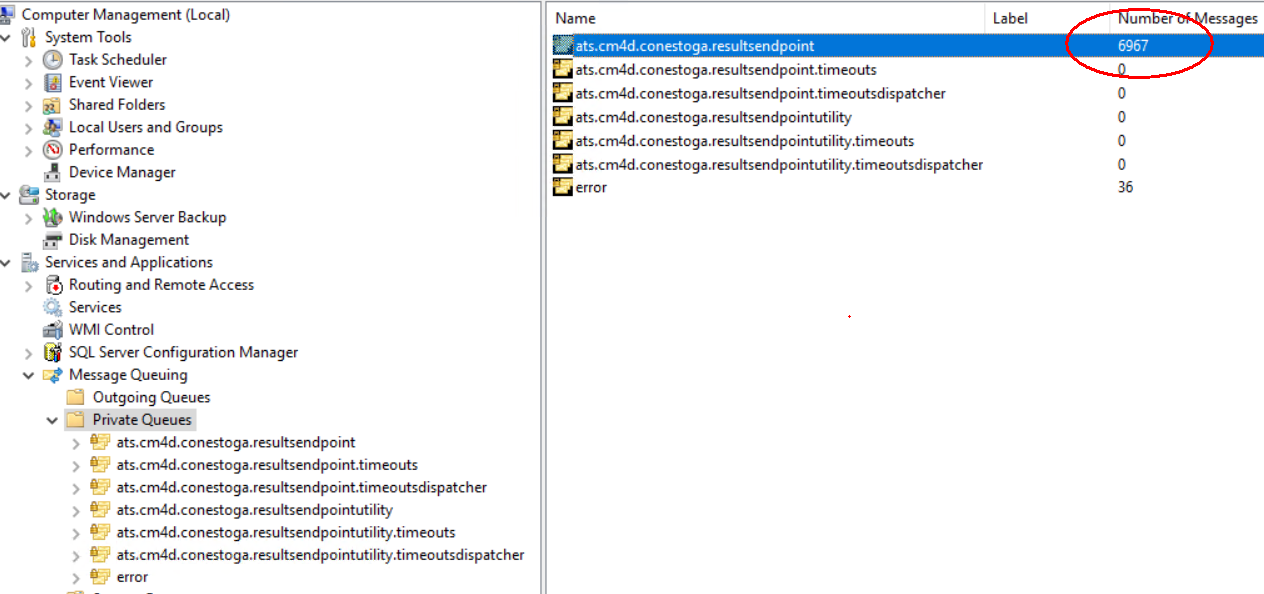
Check the MSMQ Private Queues folders.
If any messages remain in the queues, restart only the Results services. Once the queues reach zero, stop the Results services.
If all queues have zero messages,continue to check other machines. If the are no other CM4D client machines, go to SSMS to check the Site database table.
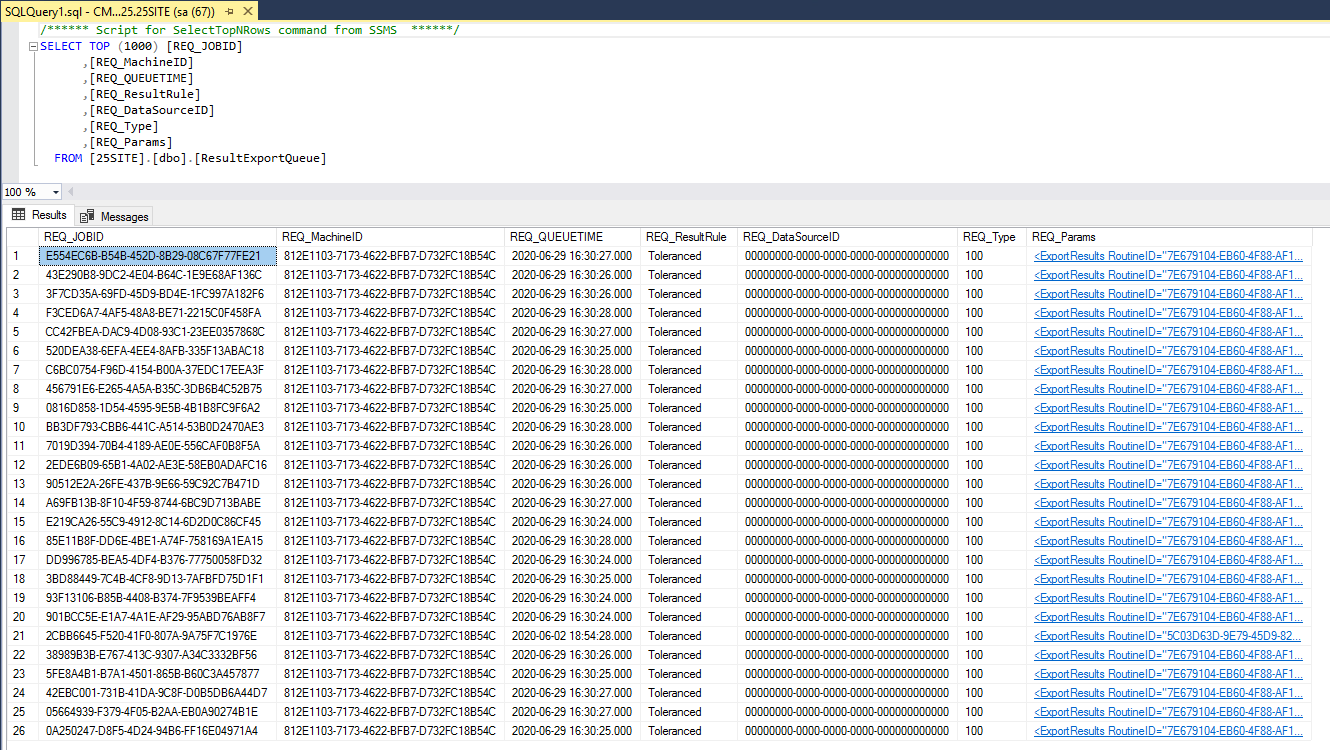
Check the Results Export Queue table (dbo.ResultsExportQueue) in the Site database.
If the table is empty, continue with the upgrade.
If the Results Export table contains data, troubleshoot and resolve any Results processing issues until the queue table has zero rows.
Message Queuing (MSMQ):
SQL Server Table:
Next, uninstall the previous version.
Uninstall CM4D Server v24
If all services are stopped and the Results queues are empty, continue with the upgrade.
Uninstall CM4D v24.
Reboot your computer.
Next, install the new version.
Install CM4D Server v25
Before starting the CM4D installer, the 'Print Spooler' Windows service must be running. If the service is not running, the installation will fail.
Run the CM4D Server installer.
Install the Prerequisites, if needed (allow the machine to restart when prompted; on restart, the installer will resume automatically).
Set the Installation folder, if different from the default.
Select the Installation Type 'Configure and Install'.
Enter the user information for the CM4D Services login.
Enter the name of the ATS Licensing Server.
Finish the installation.
Next, upgrade the Site, CM4D and Results databases.
Upgrade Databases
Upgrade all databases from v24 (24c-24b) to v25 (25b-25b) - the CM4D Site, all CM4D Databases and the Results database.
To check your current db schema versions, go to Programmability>Stored Procedures and check dbo.SiteSchemaVersion for the Site and dbo.SchemaVersion for the CM4D database(s). If you are not currently at the latest Site Schema 24b and CM4D Schema 24c, you must run any interim update scripts before running the v25 update scripts.
Upgrade the CM4D Site database:
From the database dropdown, select your v24 CM4D Site database.
Go to the install folder (.\CM4D\Database Scripts\SQL Server) and open "UpdateSite25a.sql".
Click Execute.
Execute the "UpdateSite25b.sql" script.
Next, execute the "Site Indexes.sql" and "Site Grant.sql" scripts.
Update each CM4D Database:
From the database dropdown, select a v24 CM4D database.
Go to the install folder (.\CM4D\Database Scripts\SQL Server) and open "Update25a.sql".
Click Execute.
Execute the "Update25b.sql" script.
Next, execute the "Indexes.sql" and "Grant.sql" scripts.
If you have more than one CM4D database, execute the same scripts on each of those databases in the same order listed above.
Update the Results database:
Run ATS.CM4D.Conestoga.DbMigrator.exe.
When prompted, hit Y to continue.
Wait for the process to complete.
When it is finished running, the Command Prompt will read ''Successful migration. Press any key to exit application".
Starting in v25, the Results Database can be disabled if you are not actively using Results. This option is set at the enterprise level, in Site Manager.
This completes your Server upgrade. Finish any other configuration as needed, or start using the CM4D system as usual.
Optional next steps may include:
Install StreamCacheSmith
Restore backup CM4D configuration/settings files
Start the CM4D Services