 ).
).
In order for Travel Service to work correctly it must be configured to a domain user account. For further information see here.
Configure the Travel Server so that Inspect operators can print travel tickets from Data Collect stations.
1. Select the General tab.
2. Click the Travel icon ().
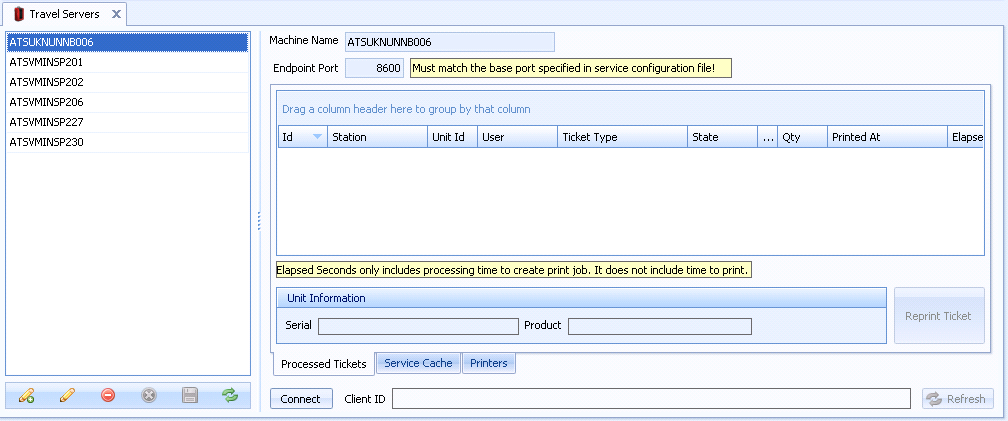
The following screen will appear. It will display all travel tickets that have been created for the currently selected server but have not yet been printed.
3. Click the add icon ( ) in the bottom left corner.
4. In the Machine Name field, type the name of the server.
5. Modify the WCF Traffic Server Endpoint Port if required. The default is 8600.
6. Click the save icon ( ) in the bottom left corner.
7. Run ATS Travel Server Service on the travel server.
8. Click Connect.
If Cockpit is unable to connect to the server then either the connection to the server is not working or ATS Travel Server Service is not running on the server.
Cockpit is able to connect to a service even if it isn't associated to the same database. This will allow you to view the information but you will not be able to select it to print travel tickets in Admin. See here.
Select the Processed Tickets tab.
The tickets that have been printed on the selected travel server are displayed.
It's possible to reprint a ticket in the queue by clicking the Reprint Ticket button.
The server will disconnect automatically when you close it or select a different server.
Select the Service Cache tab.
The disk space taken up by images and components in the cache is displayed.
Select the Printers tab.
This will display the printers available on the Travel Server machine.
A station can be assigned to the Travel Server to print travel tickets in the station properties using the Admin application. See here for further information.