In order for Travel Service to work correctly it must be configured to run as a domain user account. For further information see here.
Printing a travel ticket requires the following:
● Travel Service: Travel Service controls the routing of the station information for the travel ticket. It controls which printer the station will send the Travel Ticket to.
● Traffic Service: Traffic Service assures that the travel ticket is printed completely up to date. For example, if a unit is being viewed by two technicians at the same time and a defect is entered at Station 1, the technician at Station 2 that requests a ticket will include the new defect entered at Station 1.
● Station Configuration: The station that will print the travel ticket will need to be configured with the printer name, travel service and traffic service. In addition, other features can be enabled or disabled.
1. Open Cockpit.
2. Register a Traffic Server (see here).
3. Register a Travel Server (see here). The travel server must have access to the printer you require.
If a system has network printers installed on it, the Travel Service will have to be set to log onto the system using a local system administrator account that is also a domain user. If it isn't the network printers will not be available when the Travel Service is started.
4. Close Cockpit.
5. Start Traffic Service at the server.
6. Start Travel Service at the server.
The user interface in Data Collect will require the Print Travel Ticket button. This can be added in Layout Manager in either the Main screen or the Options screen.
1. Open Admin to setup an Inspect Data Collect station to print travel tickets.
2. Click Stations > Data Collect > Stations.
3. Select a station and click Edit.
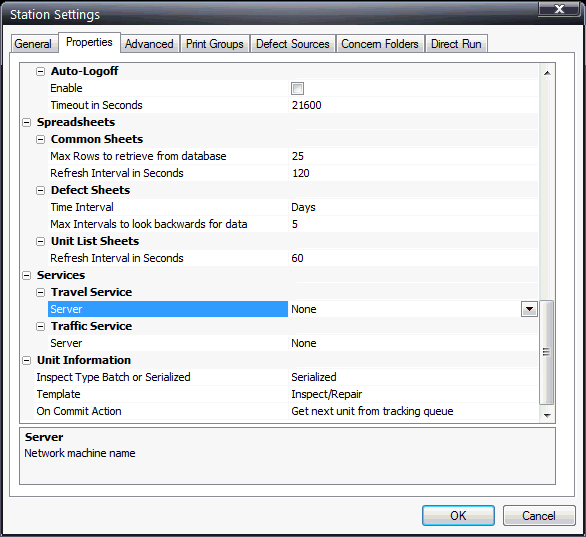
4. Click the Properties tab.

5. Select the Server name from the Travel Service section. This will be the server you previously added in Cockpit.
6. Use the Default Printer field to select the printer where the ticket will be printed. This can be a local or network printer.
7. Use the Other Printers section to specify any other printer you want to use in case the default printer is unavailable. A "True" value indicates you want that printer available.
8. Use the Ticket Type section to specify the specific travel ticket you wish to print. For examples of the available tickets see here.
9. Use the Print Options field to specify the items you want printed on the travel ticket. A "True" value indicates you want that item printed.
10. In the Checklist Options field, select All Categories to print all checklist questions for the unit, or select Print only categories associated with this station to only print checklist questions assigned to this station.
After these changes are made, the station must be restarted in order to begin printing travel tickets.